Vehicle Lists
Vehicle Lists
This screen is where vehicles are listed and kept for data control.
Here you can keep a history of your vehicles and any other relevant information they have.
Below is the information you can store and utilise in vehicle lists.

The Vehicle List page is found under Home > Vehicles > Vehicle List.
Creating a Vehicle
Creating a vehicle is simple, all you need to do is select the Add Vehicle button located top-right hand corner:
You will get a pop-up which will ask for a title and registration; name accordingly:
Give the vehicle a name, rego and if needed, toggle the Agents Vehicle slider to YES - doing this then marks the vehicle as being one used by an agent.
Click the Create button to create the new vehicle, which will then appear in the list.
Vehicle List Import
If required, TransVirtual allows you the ability to create vehicles by importing a csv file with vehicle details.
To do this, first go to the Vehicle List page and then click the create new vehicle at the top-right, then click Import Vehicle List.
For more information on vehicle lists, please click here.
For more information on vehicle lists, please click here.
An alternate way to create vehicles or create vehicles in bulk!
Once you arrive here, you will see a screen similar to the below:
Click the Import Vehicle List option. You will then see the below:
You will notice here, that at a minimum, your csv file MUST include the Vehicle name.
An example of what your file could look like to import a Vehicle list would be the below

Note: This type of import does not allow you to ignore the first row when importing. This means you should NOT include a row with headings, otherwise that row will be imported as a vehicle itself.
Ensure that you map the columns in your file to the relevant fields in TransVirtual. In the above example, the columns are as per the below in TransVirtual:
When imported, the screen will look like the below:
You can see that the system has correctly imported and created 3 new vehicles as per what was in the import file.
Note: When mapping an import field you may notice that there are some fields/columns that appear in the table (seen in the above image) that are not selectable when trying to map an import file.
For example, Service Due appears in the vehicle list grid, but you are unable to map that field:
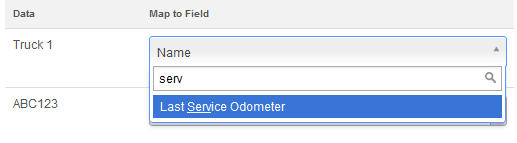
The reason for this is that this is a calculated field based on other information listed against that vehicle.
Many of the columns you can see in the vehicle itself or the vehicle list filter screen are either automatically calculated or they require additional setup; and thus are not mappable when importing a vehicle list.
For example, Service Due appears in the vehicle list grid, but you are unable to map that field:
The reason for this is that this is a calculated field based on other information listed against that vehicle.
Many of the columns you can see in the vehicle itself or the vehicle list filter screen are either automatically calculated or they require additional setup; and thus are not mappable when importing a vehicle list.
Vehicle Details
From within the Vehicle List you can double-click and open or right-click and open to view the data stored against a vehicle in further depth.
There are a number of different tabs across the top of the page and each one stores different information which is outlined in the below.
There are a number of different tabs across the top of the page and each one stores different information which is outlined in the below.
Details tab
The details tab of the vehicle provides information such as vehicle name, registration number, vehicle type etc.
Here is where you can place any important details of the vehicle that may need to be reviewed by other staff.
It is here you can also assign a vehicle to a headport at the bottom of the page.
This function is useful if you require drivers select a vehicle on mobile app login - drivers are typically assigned to the headport they work out of so assigning the relevant vehicles to their respective headports means that drivers can see what vehicles exist at their work location (headport).
This function is useful if you require drivers select a vehicle on mobile app login - drivers are typically assigned to the headport they work out of so assigning the relevant vehicles to their respective headports means that drivers can see what vehicles exist at their work location (headport).
The details tab will look similar to the below:
Please note that for vehicle types to be available, you will need your dictionary lists setup for vehicle types (Settings > Lists and Zones > Dictionary Lists > Vehicle Types)
It is also helpful to review the blue question marks next to certain fields, these can help you understand more of what the fields can do.
Rego/Insurance/Alerts tab
Here is where you can place registration and insurance information.
You can use this page to provide alerts of when upcoming events are occurring with the vehicle - alerts will be emailed to your nominated email address.
The purpose of the alerts is to allow you the ability to setup reminders that can email you or relevant staff to inform of any important renewal notices or the like linked to your vehicles.
Example Setup: In this example, our registration is due in a couple of months, so we need to setup an alert in the Rego/Insurance/Alerts tab.
First we will select the Add Rego/Alert button.
You can then add the name of your alert and select to create.
Below is a list of the different alert types you can create -
For this example we have Registration selected.
Ensure you give the alert a Name - typically this would be the rego of the vehicle so you know what the alert links to but it can be whatever you deem is required (something reflective of what the alert will do).
Set an Expire Date - this is when the alert needs to be completed before. In this example our rego is expiring 29th December so the vehicle must be renewed before this date!
Set an Alert Days Prior. This is how many days before the Expire Date that the reminder email will be sent. In our example we have set to 7 meaning that the first reminder email to action the rego will be sent 7 days prior to 29/12/2021.
Ensure to click Update top-right after making any changes!
The alert will be sent to our accounts payable email address (Settings > General > Global Setup > Contact Details) unless specified otherwise.
If you wish for the alert to be sent to an alternate email address you simply need to enter and update in the Override Email ( Defaults to your 'Payables') section.
Now, according to the alert we have set up, the accounts payable address will receive a notification of registration being due 7 days prior to the due date of 29/12/2021.
Ideally you will have resolved and renewed the rego before the reminder alert email is sent but this function allows you to set a reminder in case the rego renewal is missed etc.
Once an alert has been 'resolved' (the rego has been renewed), you can leave the alert there and update the Expire Date to cover the next time the rego is due for renewal - if you wish to do so.
Once an alert has been 'resolved' (the rego has been renewed), you can leave the alert there and update the Expire Date to cover the next time the rego is due for renewal - if you wish to do so.
Maintenance tab
A tab used to monitor any scheduled maintenance on the vehicles.
Here you can track servicing, parts and costs whilst adding any images or files required to track the vehicles.
An example might be the below:
Create the maintenance record first and nominate what type of maintenance it is.
Once you do this you can then click on the maintenance and then on the right you can add in the hourly cost and or parts cost to show you what the total price/cost for this maintenance came to; this example was a service that cost around the $731 mark.
When you add in maintenance costs against a vehicle in this tab, a summary of this information will be displayed in the Details tab for an easy and quick way to see costs associated against a vehicle:
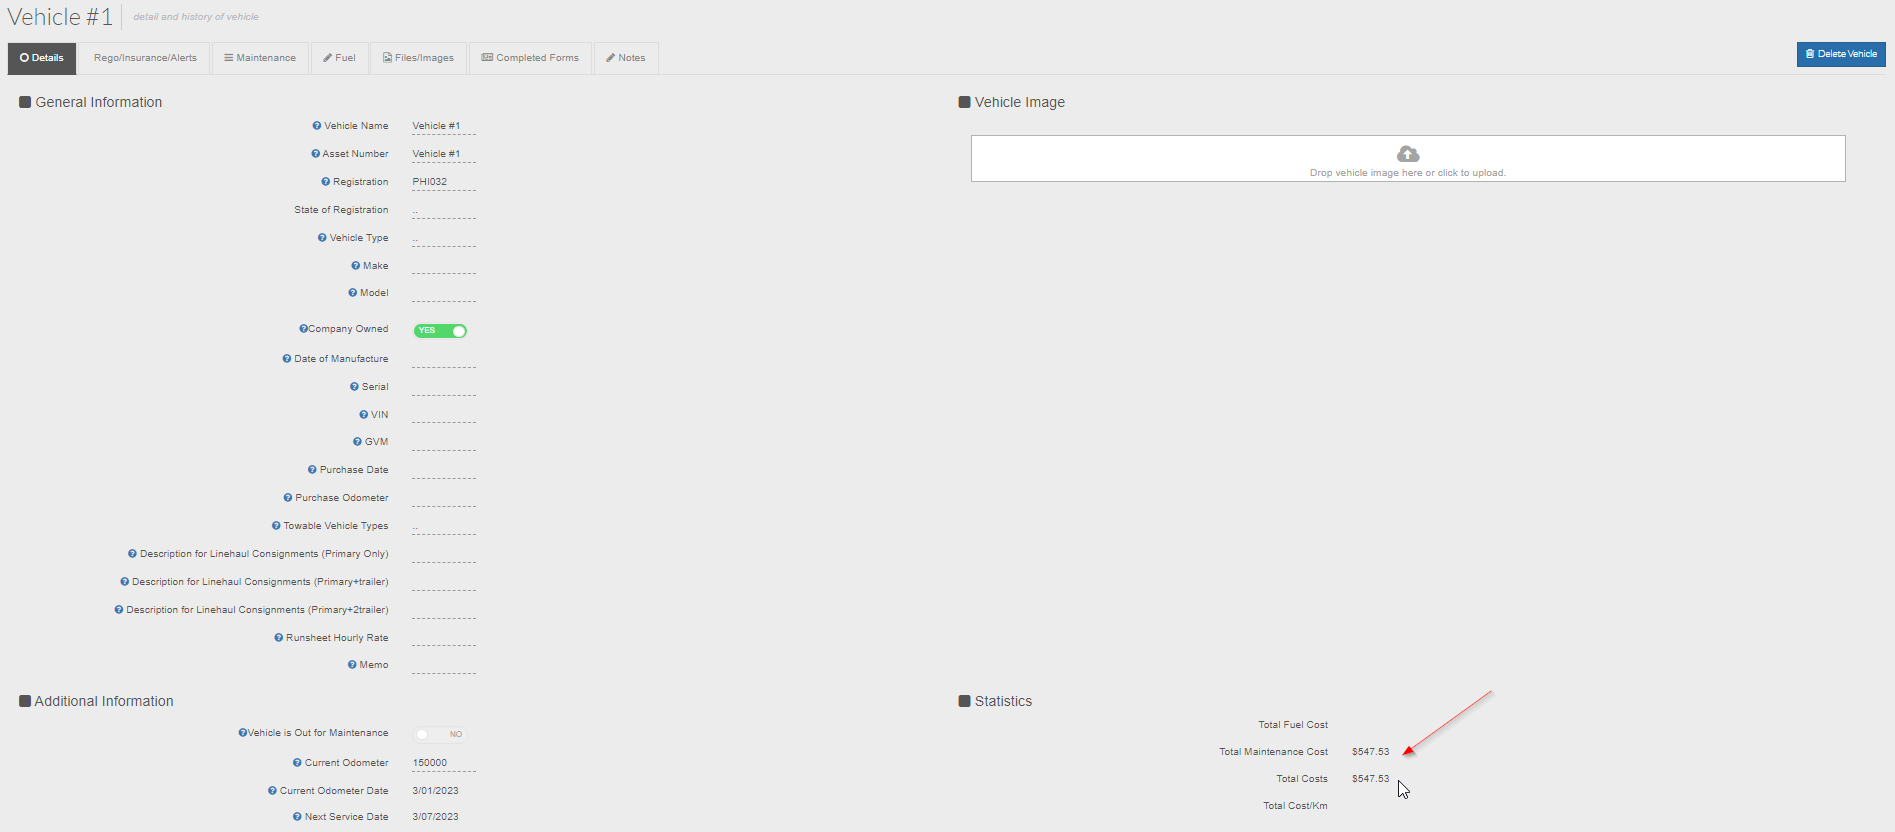
This will take a few minutes to update after adding in costs within the maintenance tab.
Fuel tab
The fuel tab is for fuel maintenance and history.
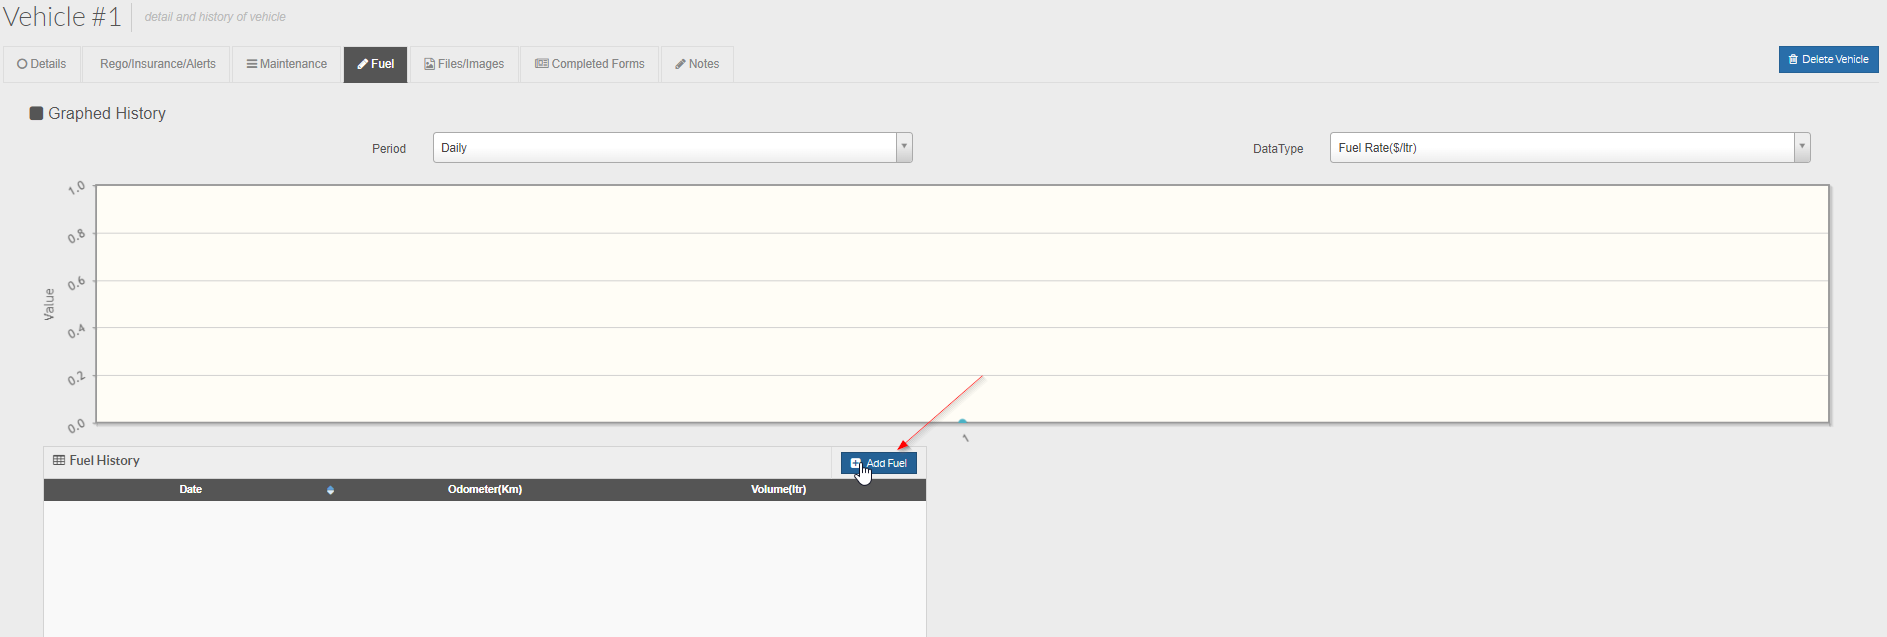
You can add in fuel costs associated with a vehicle by using the Add Fuel button:
You will then see a screen like the below:
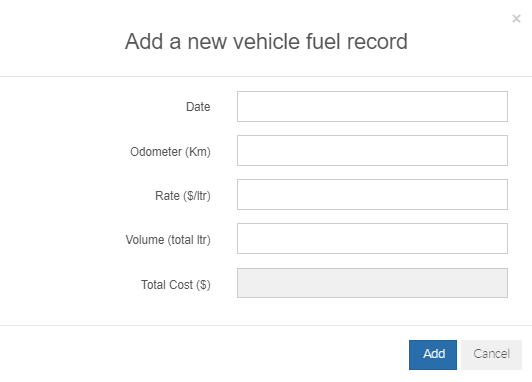
The Total Cost section at the bottom of this pop-up is a calculated field that will automatically populate based on the details you enter (Rate and Volume).
Once you add in fuel data the graph at the top of the page will display information according to what you have entered.
Entering data every day or week (or as often as required) would allow you to see a breakdown of the fuel usage against a vehicle over a period of time (using the graph at the top of the page).
You can use the Period and Data Type fields to change the graph output to see the data displayed how you wish, like the below is an example:
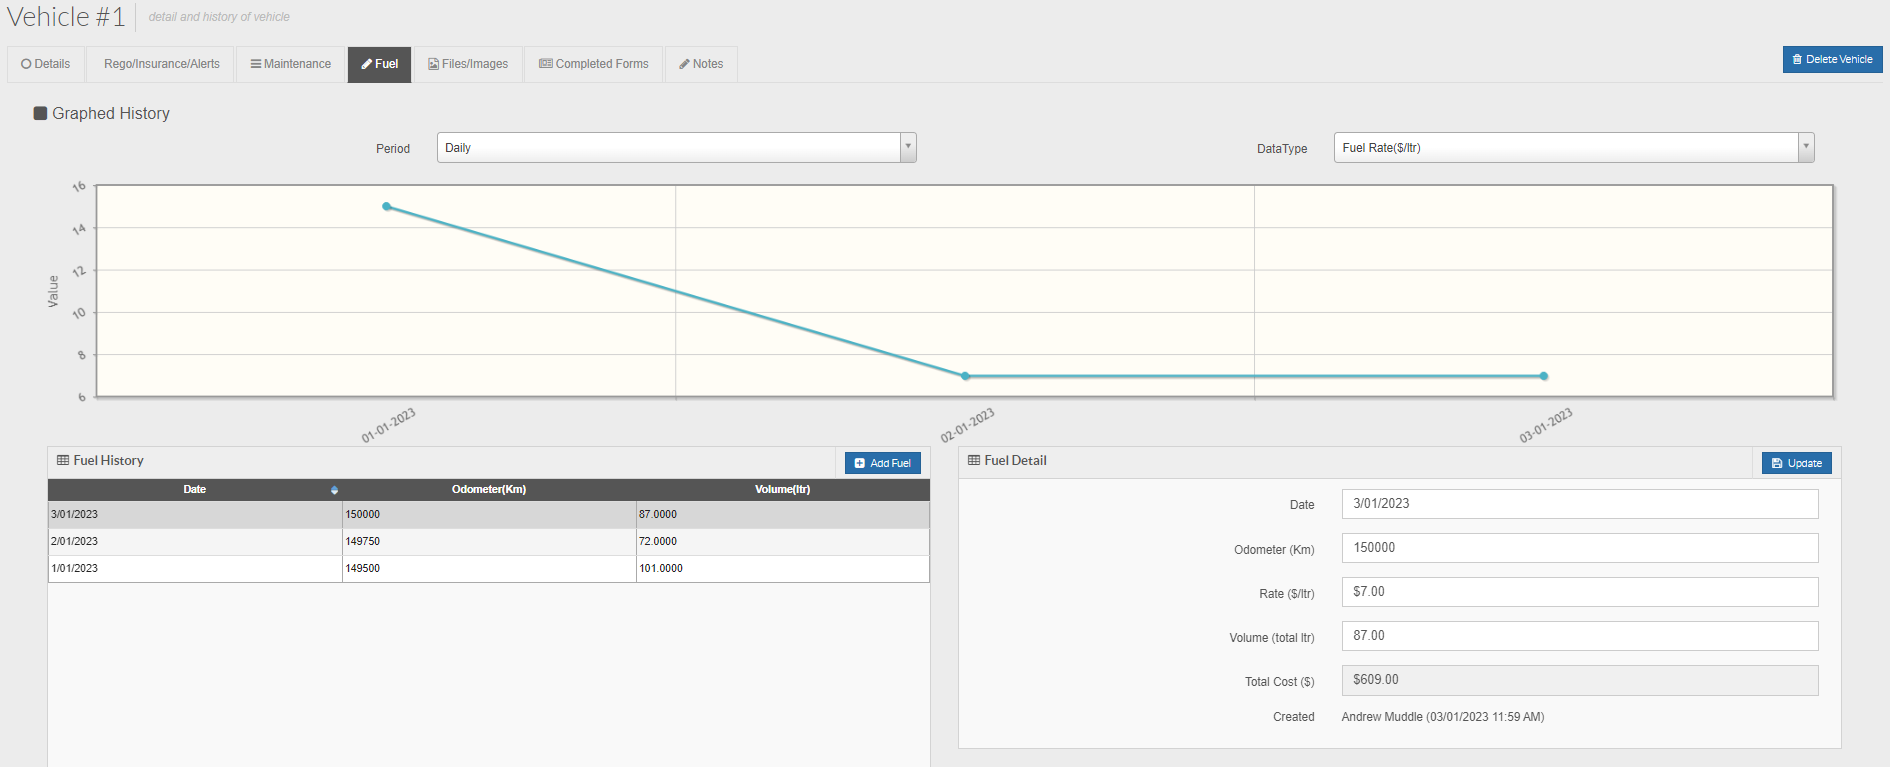
The above shows the Fuel Rate in $ per litre over a daily time period - each dot represents a fuel entry for this example.
This is handy for reporting costs and identifying if any vehicles are costing you more money than they should etc.
Files/Images tab
Here you can upload any Files/Images required to monitor the maintenance of your vehicle or any images that may relate to the vehicle in some way.
This could include any additional information such as scanned receipts of services or service logs, fuel receipts or vehicle damage.
Completed Forms tab
This would include the completed forms done by drivers using the specified vehicle (when they complete a form and are linked to this vehicle).
For this to be applicable you will require the form reports module to be activated.
For more information please visit: https://support.transvirtual.com/portal/en/kb/articles/form-reports
Notes tab
Here you can add any notes or comments required about this vehicle.
A good spot for important information or things of note that can't be added in using the other tabs etc.
A good spot for important information or things of note that can't be added in using the other tabs etc.
Extra Information
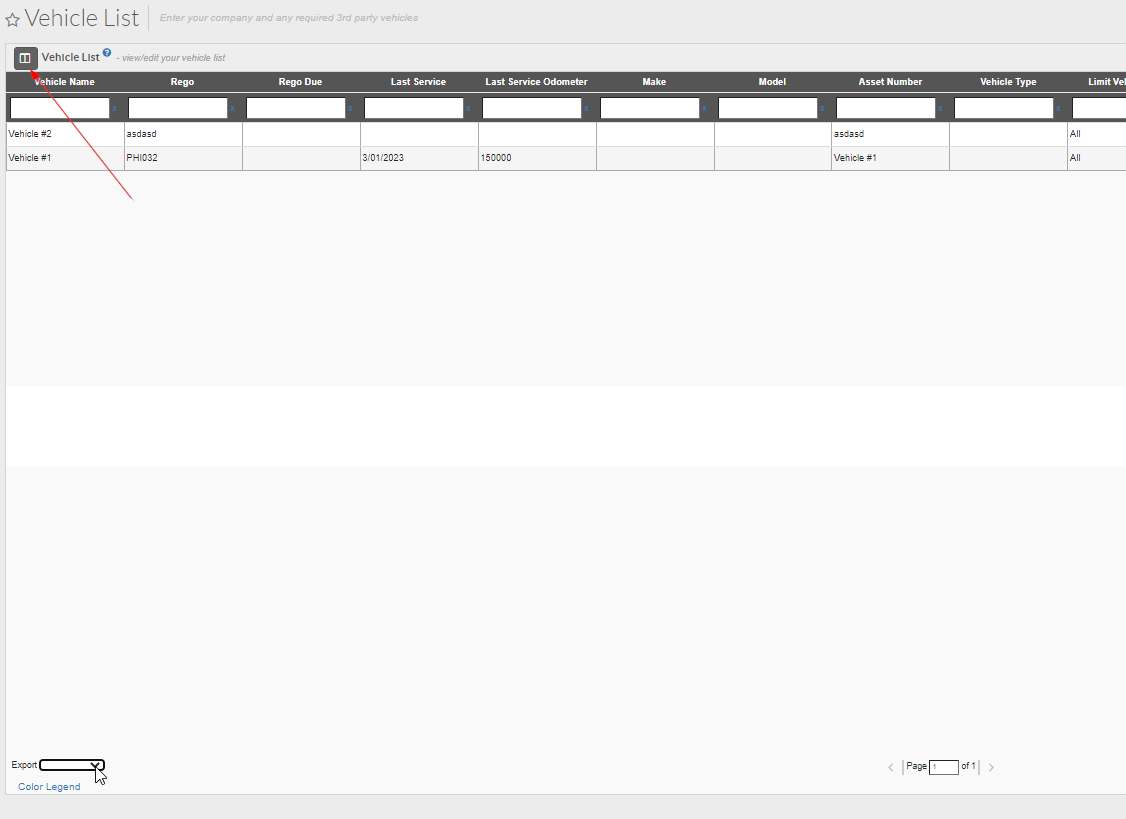
Like with many other pages in TransVirtual, the Vehicle List page allows you the ability to export the results grid into an excel or csv file using the Export button located bottom-left of the page:
You have the ability to add or remove columns using the column selector:
Adding/removing columns will add/remove different information that may be available.
Handy if you need to amend the columns prior to exporting any data etc.
Colour Legend
You may notice that some of your vehicle are highlighted in colours other than white.
Each colour represents something different.
To see what each colour means, click the Color Legend button bottom-left:
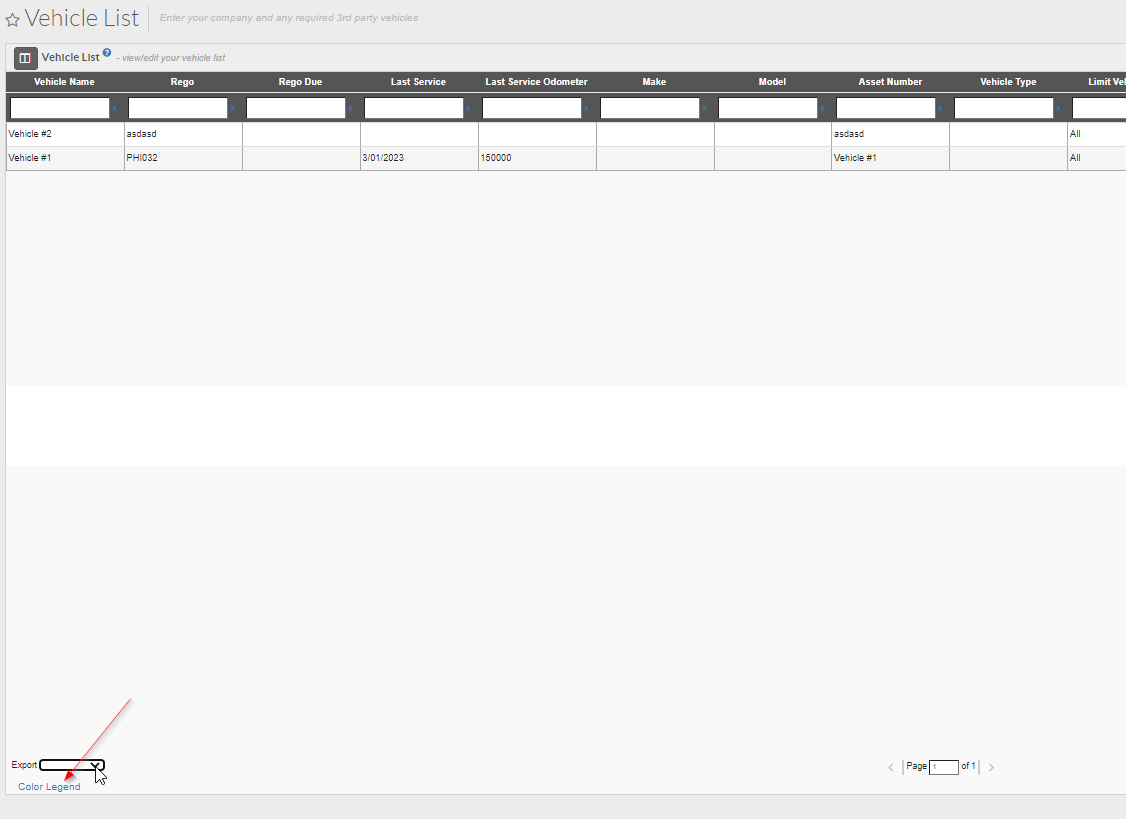
Upon doing this you will be presented with the below pop-up screen: