Transit Times
Transit Times
In Transvirtual you are able to set up a listing of zones and expected delivery/pickup time-frames.

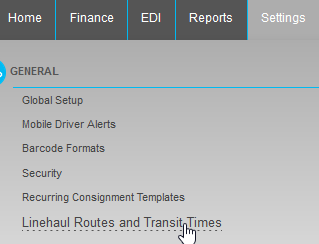
Please refer to the extra information section which explains how to seperate the Linehaul Routes and Transit Times which allows the "Add Transit List" button to show.
Step by Step guide
1. Setup a zone listing separating your service area and potentially other areas into a series of zones to set time frames for transit of freight between these
2. In Global Setup (Settings>General>Global Setup) and in the Zone Directory Mapping section set the Transit Times Zone List to the zone list created
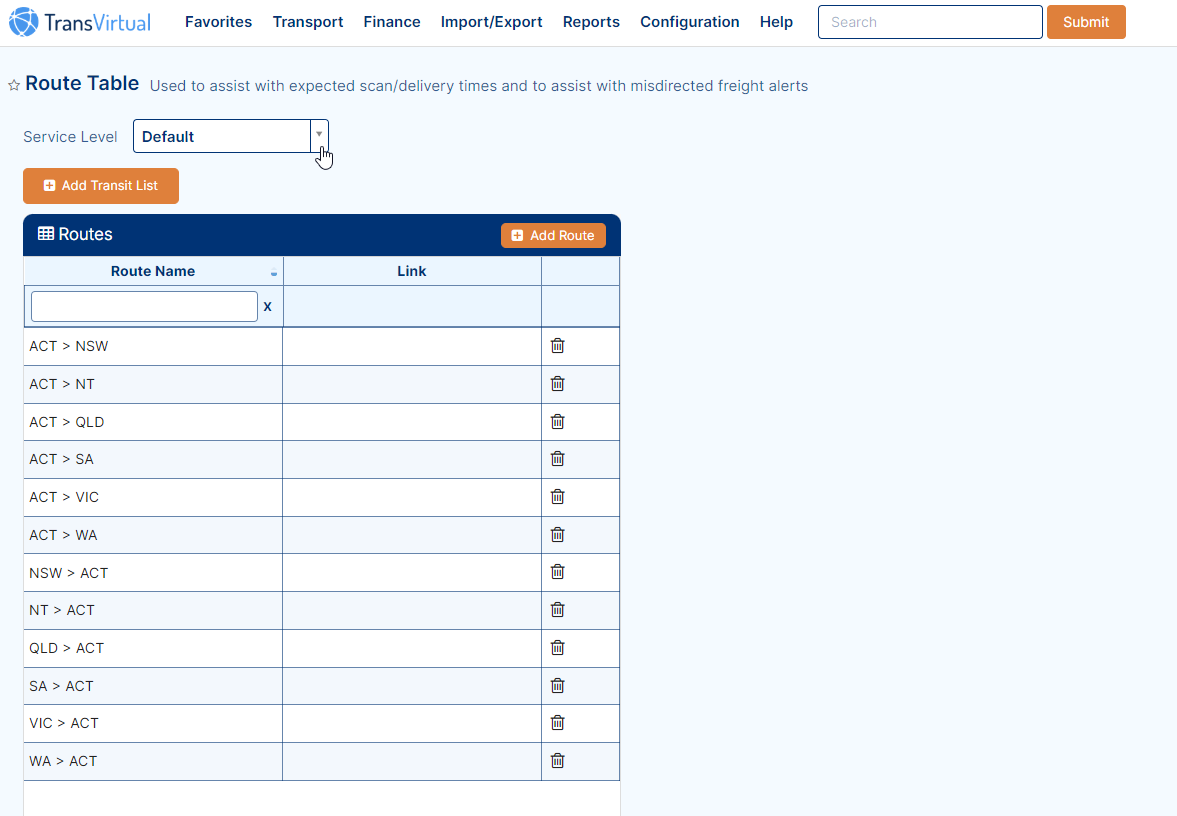
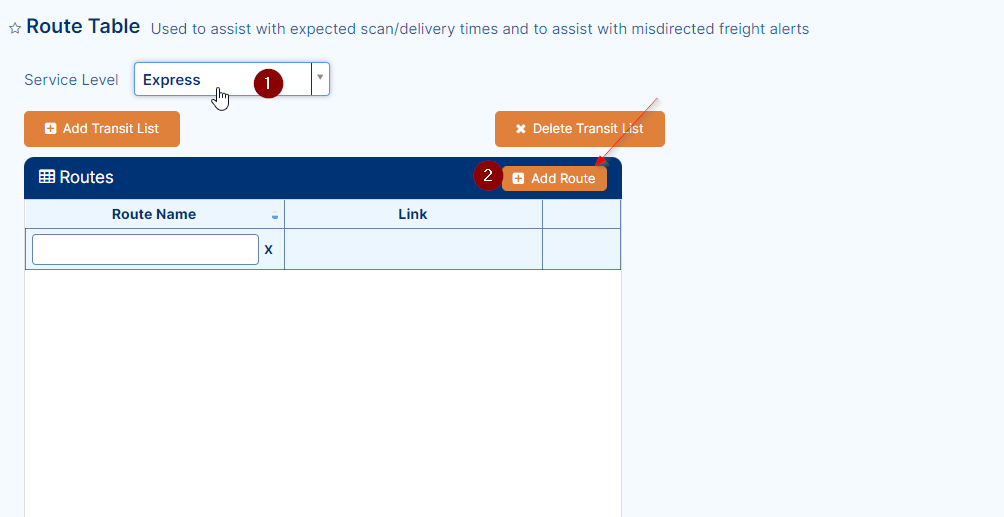
3. In Transit Times (Settings>General>Transit Times) as below you have 2 options to Add Route or Add Transit List. If you plan on having more than one set of transit times based on different service levels you can select Add Transit List alternatively for one set of transit times select Add Route.
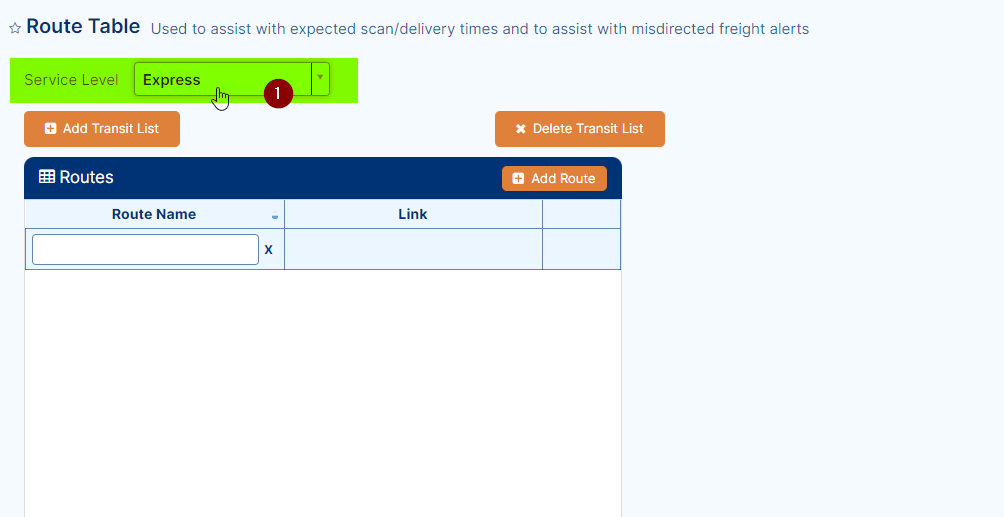
4. If adding multiple sets of Transit Times for different service levels after selecting Add Transit List you can select your relevant Service Level and select Create
5. You will now have an option to switch between your lists as below
6. You can now Add Routes to each based off your transit times. Select Add Route and as below you will have a Zone From and Zone To to create your route and select Save
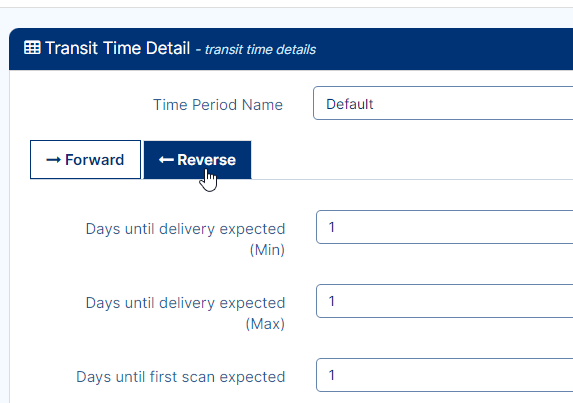
7. You are now able to define the number of days expected for this delivery as below in Forward or Reverse.
Transit Times per Service Level
As mentioned above, it is possible to have different transit times per Service Level.
To do this you will need to have a separate zone list for each Service Level.
Import or create the zone list and give it an appropriate name - if, for example, you had a Service Level of Express, your zone list might be called 'Express Service Transit Times'. The name of the zone list should be reflective of what the zone list will be used for.

The zone list file (if doing an import) will simply need to have zone name, suburb, state and postcode - you do not need to have the Transit days listed as that will be added from within the page in TransVirtual as per the above (manually via the web portal or via a route table import).
Click here for further information on zone lists.
Click here for further information on zone lists.
Once the zone lists have been created, you can assign each zone list to its respective Service Level.
Before this can be done however, you need to ensure that the below zone lists are different:
This section can be found under Settings > General > Global Setup > General Tab OR Configuration > General > Global Setup.
The reason that this is required is because the Route/Scan/Agent Zone List is what is used for Linehaul Routes and there is no ability to add different times per Service Level for Linehaul Routes - this does not make sense in the same way it does for Transit Times etc. These two zones lists MUST be separate/different, otherwise you will not get the option to add a Transit Zone Master Override per Service Level (meaning you are unable to have different transit times per Service Level).

Note: The zone list added to the Transit Times Zone List section should be your global default list.
Once this has been done, you can then go to the Service Level list page under Settings > Lists and Zones > Service Levels OR Configuration > Lists and Zones > Service Levels and select the relevant Service Level and apply the respective Transit Zone List:

It make take around 10-15 minutes for this field to appear after separating the global default zone lists, it will not happen straight-away!
Ensure once selected you click Update at the top to implement.
You now have a different set of Transit times for that specific service level vs the global default list (located under Global Setup in Zone Mapping). Now, when an Express Service Level consignment is created the transit time will be different to the transit time of a General Service Level type consignment - it will use the times listed in the zone attached to the Service Level.
From here, the next step is to add the actual transit times as per the first section of this article; simply click add Transit List, select the relevant Service Level, then click Add Route and add in the transit days for each applicable route that belongs to that Service Level. Repeat this process until all Service Levels have the correct transit times listed against them.
You could instead do a Route Table import if preferred (see below section of this article) - this allows you to import a csv file specifying transit days for a Service Level.
You could instead do a Route Table import if preferred (see below section of this article) - this allows you to import a csv file specifying transit days for a Service Level.
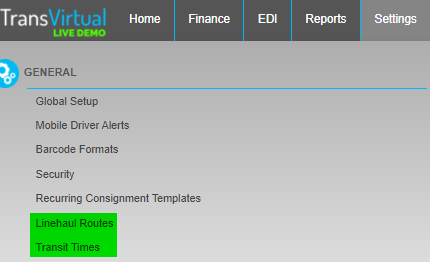
When you have separate zone lists for Route/Scan/Agent Zone List and Transit Times Zone List in the Global Setup settings page, your TransVirtual will split the below page into separate pages in TransVirtual:
Vs:
This process may take around 15 minutes - it will not happen straight-away.
Once the pages have been separated you then have the option to customize each Service Level as per the above and make unique.
Vs:
This process may take around 15 minutes - it will not happen straight-away.
Once the pages have been separated you then have the option to customize each Service Level as per the above and make unique.
Important to note:
Transit Time setup typically populates the Expected Delivery on a consignment, like so:
You may see circumstances however where this field is not populated.
One of the reasons for this could be that the consignment was created via a linked TransVirtual customer (another TransVirtual account that send you consignments to deliver on their behalf).
When this happens, the consignment in your account WILL NOT display an Expected Delivery date - the simple reason for this is that what you have setup may contradict what is setup in their account.
Allowing this to display in your account could create issues if the original customer (linked customer's customer) has a login to both yours and your linked customer's TransVirtual accounts; they may wonder why the Expected Delivery dates are different, hence why this field WILL NOT display if the consignment in your account was created via a linked TransVirtual customer.
Importing a Route Table
Per the above, there is the ability to have unique Transit Times per service level if you require.
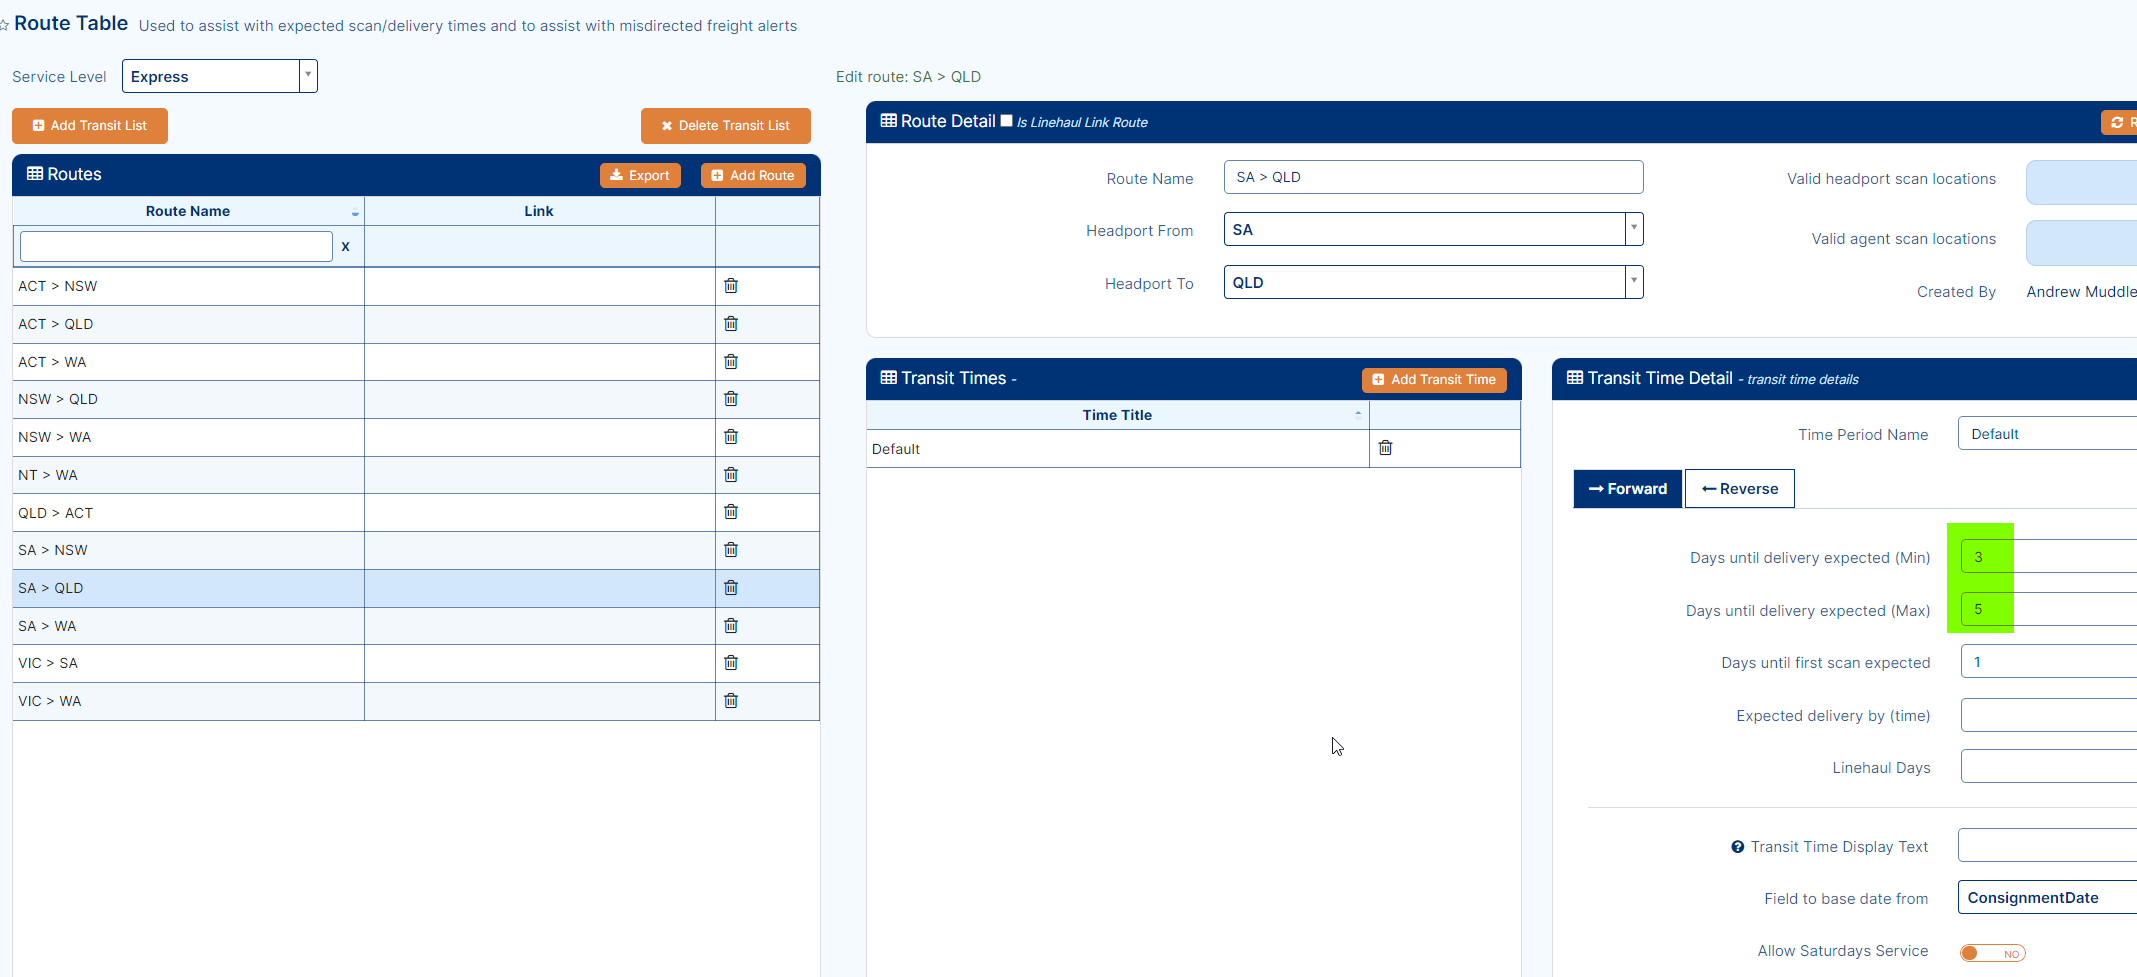
Navigating to the Transit Times page ( Configuration > General > Transit Times OR Settings > General > Transit Times) you will see a page similar to the below:
Navigating to the Transit Times page ( Configuration > General > Transit Times OR Settings > General > Transit Times) you will see a page similar to the below:
The drop-down list at the top indicates the current selected Service Level and the routes shown will be for that Service type.
To import a Route Table, first select the desired Service Level:
To import a Route Table, first select the desired Service Level:
Next, click Add Route:
A popup window will then appear. Choose Import Route Table List:
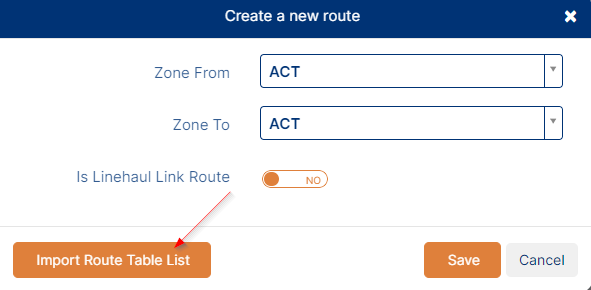
The following screen will then appear:
Drag and upload the relevant file then click Next.

An example of what your import file could look like can be seen below:
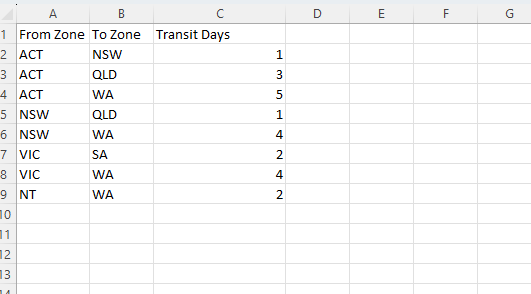
At a minimum you must have 3 columns nominating From Zone, To Zone and the number of transit days between those locations.
You can have more if you wish but at least 3 columns are required.
At a minimum you must have 3 columns nominating From Zone, To Zone and the number of transit days between those locations.
You can have more if you wish but at least 3 columns are required.
If you wish to setup a transit time range, your import file could look something like the below:
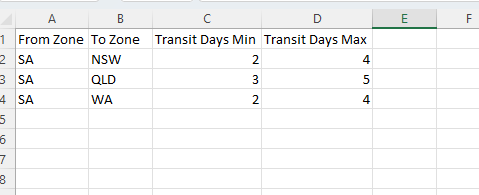
You are able to nominate a minimum number for delivery days and a maximum number.
The mapping would then be something like the below:

The mapping would then be something like the below:
The successful import would then display a range as per your file:
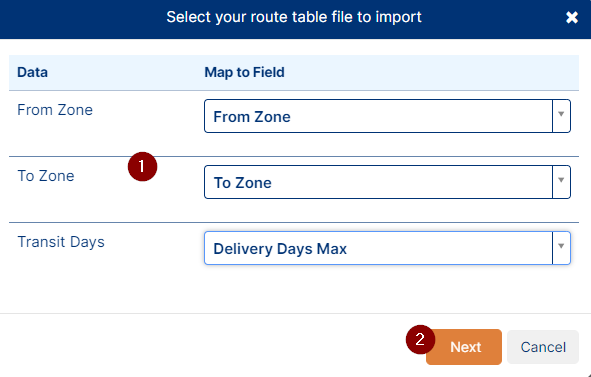
After clicking Next, a screen like the below will appear where you will need to map your file:
Once mapped, click Next to import the file.

The Date column on the left shows you the column names in your upload file and the Map to Field column allows you to match your columns with the relevant fields in TransVirtual.
Note: There are many fields to choose from in terms of Transit Days. It is advisable to use the Delivery Days Max field as typically, when Transit Times are referred to, they are setup as being a number of maximum allowable days between locations.
Note: There are many fields to choose from in terms of Transit Days. It is advisable to use the Delivery Days Max field as typically, when Transit Times are referred to, they are setup as being a number of maximum allowable days between locations.
The import has now been completed:
Import Transit Zone List vs Import Route Table
There is a difference between importing a Transit Times zone list and importing the Route Table.
The first step when setting up Transit Times is to create a Transit times zone list. This is a zone list like any other that simply lists the areas you move freight between.
This file simply contains Zone Name, Suburb, State and Postcode.
A Route Table Import is subsequent to this and is simply a file that outlines the number of travel days between two locations.
As per the above, this file simply contains (at a minimum) 3 columns: Zone From, Zone To and Transit Days.
Extra Information
Whether manually creating Transit Times or importing them, it is important to note that where the same route exists more than once, the number of Transit Days must be the same.
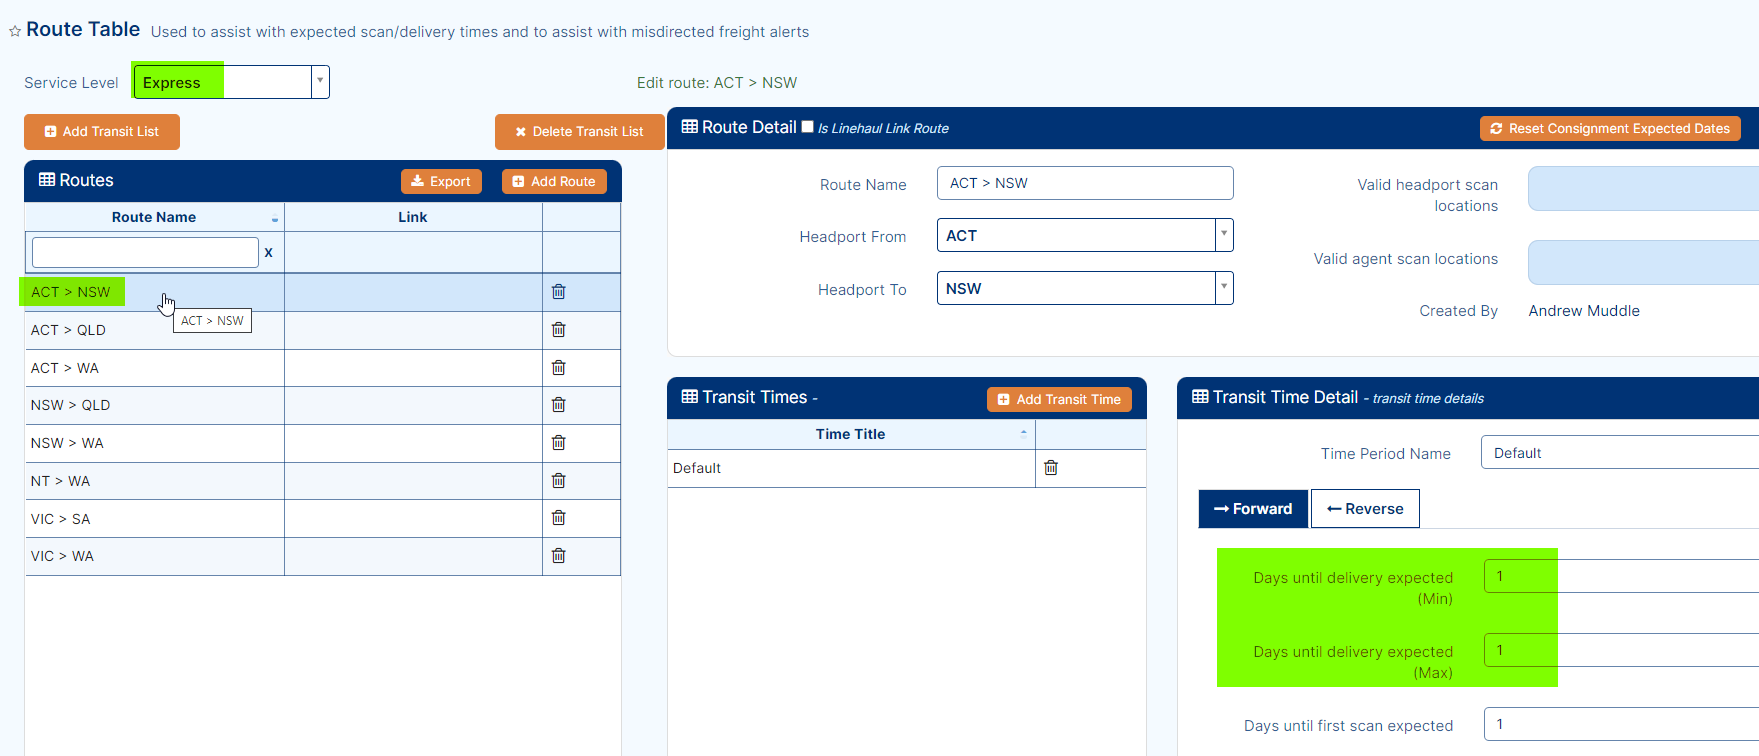
Each Route setup in your account has a forward and reverse Transit value assigned, see here:
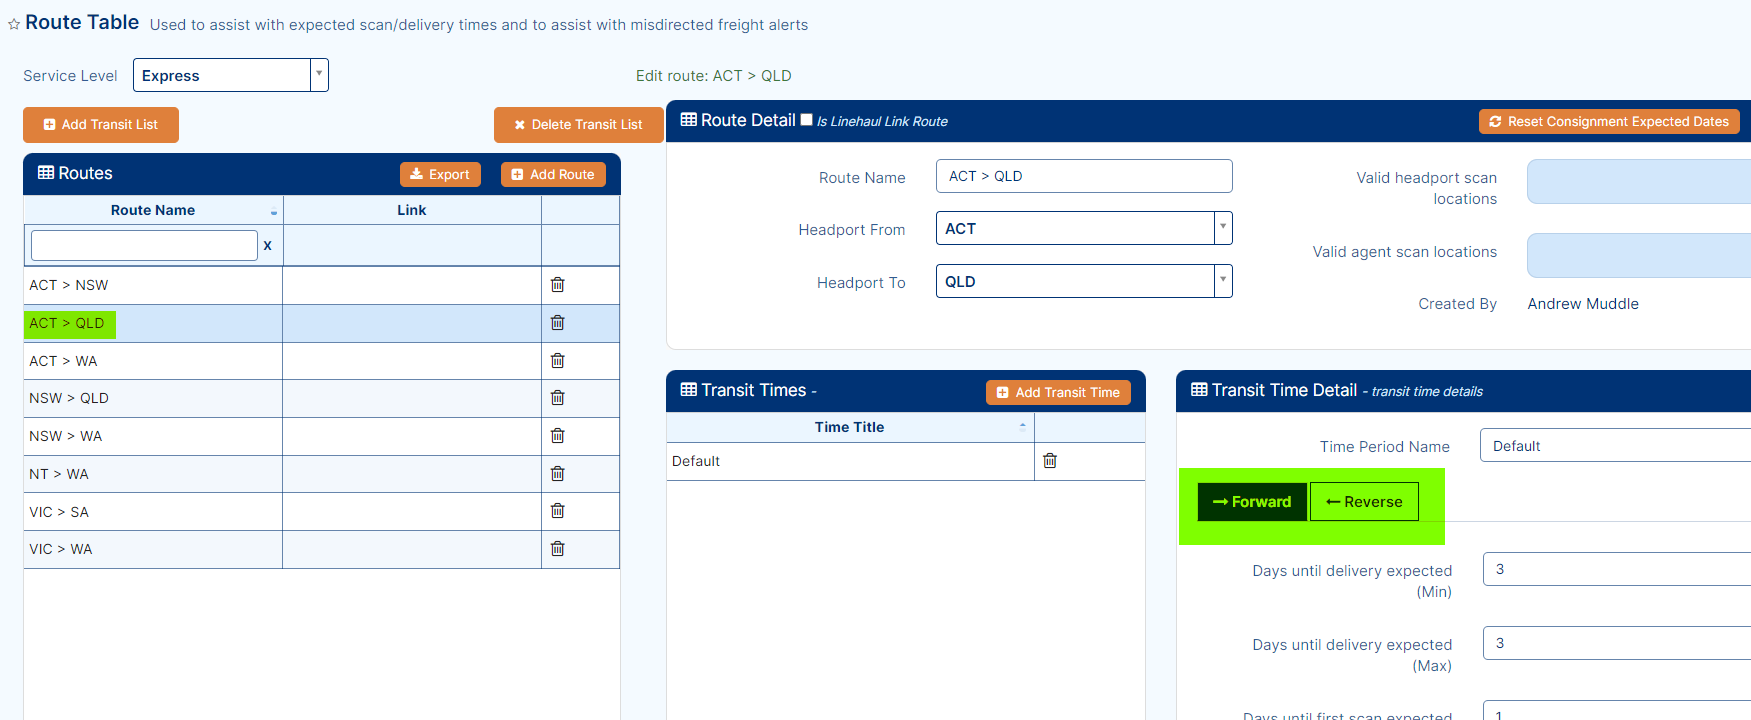
In the above example, there is a route for ACT > QLD and the forward direction has a Transit Time of 3 days set. There is also a reverse tab here which means a time for QLD > ACT has been assigned:
If you have a dedicated QLD > ACT route configured, the number of days listed would need to match the reverse route value seen in the above:
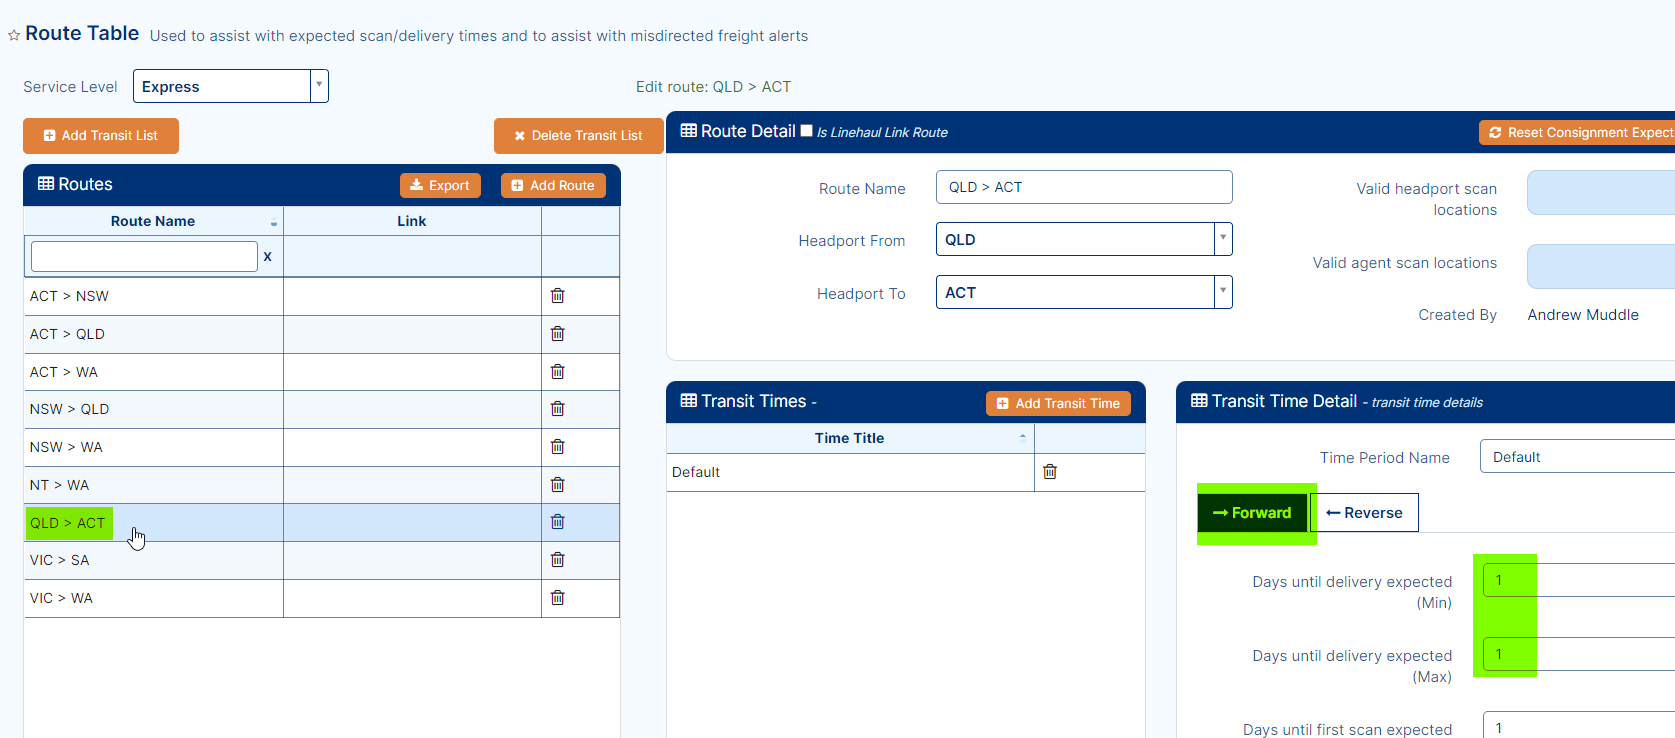
If you have a dedicated QLD > ACT route configured, the number of days listed would need to match the reverse route value seen in the above:
If there the same route exists more than once and the Transit Day values assigned differ, this will cause unexpected and likely incorrect results for consignments generated using those routes - you may see instances where the ETA/Transit time listed is using the smaller/lesser of the two applicable times meaning customers may expect freight to arrive earlier than it will.
Resetting Expected Delivery on First Scan or All Scanned
If suitable, there are the below settings in your account under Configuration > General > Global Setup > Consignment Related Rules:
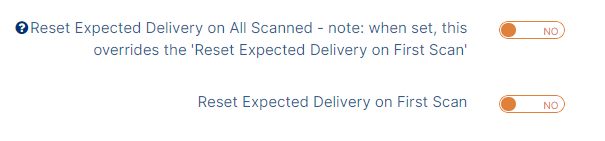
These settings will reset the expected delivery date of a consignment (system will re-calculate based on applicable transit route) when either the first scan has been performed against the consignment or all items on the consignment have been scanned.
Handy if you wish to have the ETA reset based off when you start/finish scanning the freight, rather than the consignment date that is typically used as the default.
Handy if you wish to have the ETA reset based off when you start/finish scanning the freight, rather than the consignment date that is typically used as the default.
Related Articles
Route Optimisation - App Functionality
Route Optimisation Basic Driver Workflow: If using consignment auto allocation rules start from Step 2. From the Load Screen manually scan consignments to the device. Tap the sort button to view the order of the scanned or auto allocated ...Route Optimisation Module
Route Optimisation Module What is it? A paid add on module to the TransVirtual mobile app and web portal. All features are thoroughly integrated into both the TransVirtual mobile app and web portal. Enables a number of functions resulting in more ...Process/Workflow Table of Contents
Individual components of TransVirtual can be brought together to create practical processes and workflows. This list introduces you to our default or recommended options. Consignment Lifecycle/Overview Consignment Creation Manually created via Web ...Linehaul Routes
Linehaul Routes In TransVirtual there is the ability to setup Linehaul Routes which are a set of pre-defined routes that any Linehaul freight may take. Linehaul Routes are typically depot to depot runs and are created using zone list data from the ...Global Setup
General Field Descriptions This section allows you to define default general settings for mobile devices. Auto Updates Enabled: As updates to the mobile application are rolled out, notifications will be automatically sent to the devices. Users are ...