Runsheet EDI Export
In TransVirtual there is the ability to create Runsheet EDI (Electronic Data Interchange) Export Rules that can send Runsheet data to a location, via FTP, Email, etc.
The page used to create these types of rules can be found under EDI > Data Export > Runsheets.
This article will detail how to setup a common example; automatically printing a Runsheet for a driver.
The page used to create these types of rules can be found under EDI > Data Export > Runsheets.
This article will detail how to setup a common example; automatically printing a Runsheet for a driver.

This process requires that you have downloaded and installed the TransVirtual Printer app and shared your depot (or other relevant) printer with TransVirtual.
Example Setup
Arriving at this page, you will see a screen similar to the below:
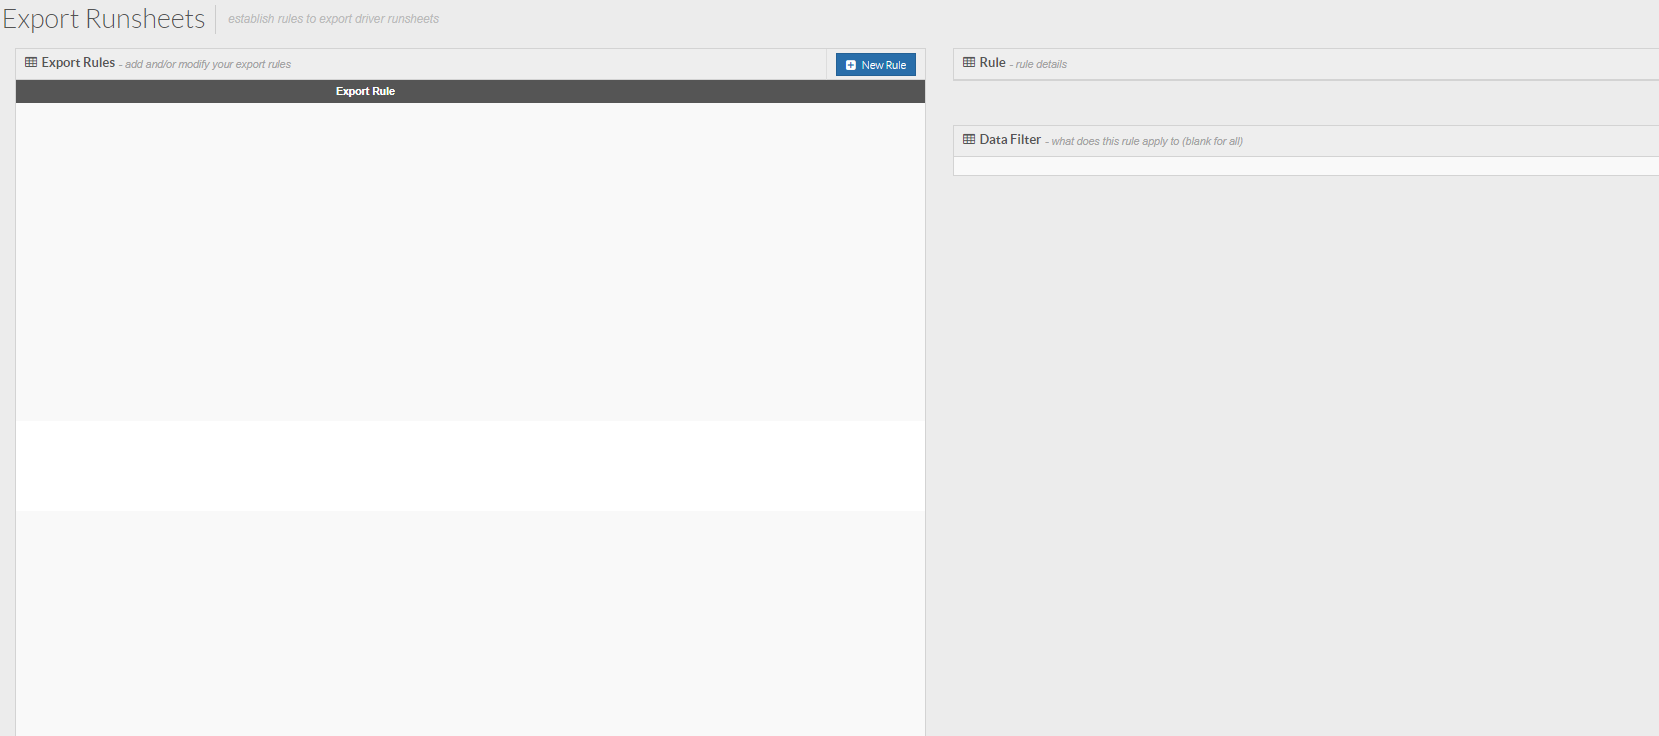
Click the New Rule button at the top of the page to create a new Runsheet EDI export rule.
You will then see the below window appear:
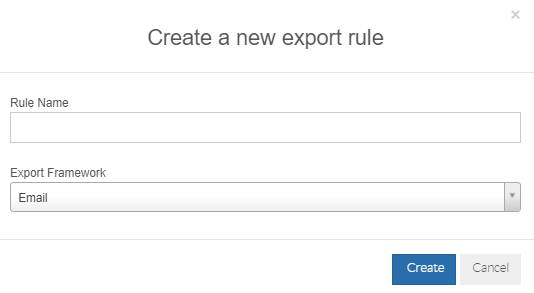
You will then see the below window appear:
Rule Name = This is where you can specify a name for the rule. The name should be reflective of what the EDI rule will do. For this example we are going to name the rule "Runsheet PDF Print".
Export Framework = This is the method by which TransVirtual will export the information. This example will use Printer.
Click the Create button at the bottom of this window to create the EDI rule.
You will then see the rule appear in the list in orange which indicates that it is not yet active.
Click on the rule on the left and the settings for it will appear on the right:
You will then see the rule appear in the list in orange which indicates that it is not yet active.
Click on the rule on the left and the settings for it will appear on the right:
From here we need to configure the settings.
At the bottom of the page you will see a Data Filter:
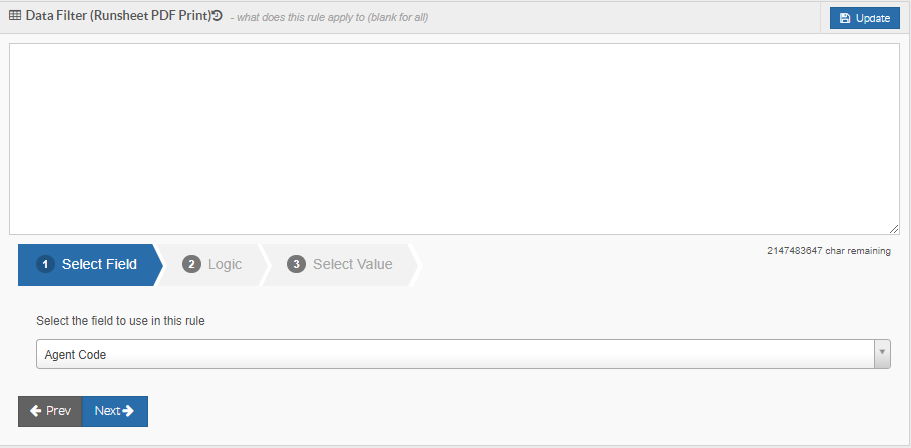
The Data Filter is the driving force behind determining when an EDI rule will and won't apply.
To configure the Data Filter, we need to add logic to it.
To do this, use the Data Filter Builder at the bottom of the page:
In Step 1 of the builder, select Drivers Headport Base and then click Next to proceed:

In Step 2 of the builder, select Equal and then click Next:

In Step 3 of the builder, select a Headport value - for this example, we are going to choose Newcastle and then click Add Rule:

You will then see text in the Data Filter, like so:
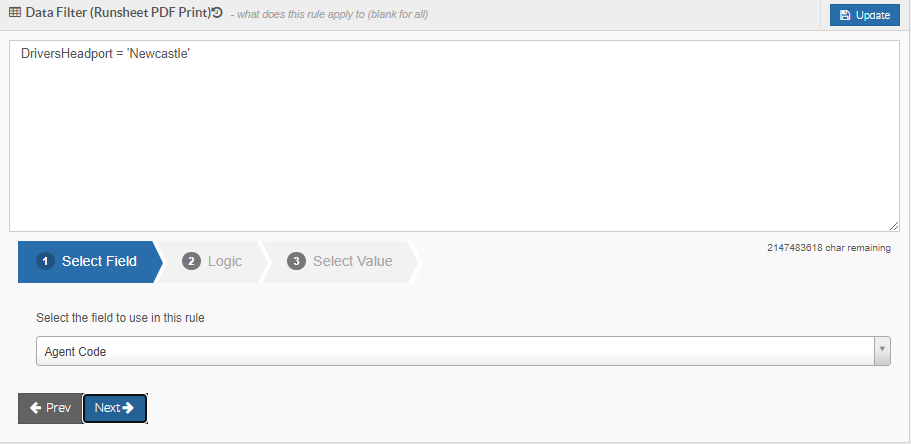
The Data Filter will now apply this EDI rule to any Runsheets where the assigned driver's Headport is Newcastle.
This is handy because it means that any drivers assigned to the Newcastle Headport will have their Runsheets automatically printed off once they have been created (and the rest of this EDI rule has been configured and enabled).

For more information on Headport setup, please click here.
Once your Headports have been setup in your account, for this EDI rule to work correctly, you will need to assign each staff user to the appropriate Headport. This can be easily done by going to Home > Card Files > Staff List > Double-click and open appropriate staff member > Double-click on Headport Assigned field and add to relevant Headport then save to implement:
Once the Data Filter has been configured, we need to setup the remainder of the settings at the top of the page.
Rule Name = This should already be populated from when the rule was created, but can be changed again if required.
Export Framework = This should also be configured from when the rule was created. This example will use Printer.
Printer Name = This field only appears when the export framework has been set to Printer.
Select the appropriate printer from your list. The printer specified will typically be the printer linked to the Headport specified in the Data Filter; you might have a depot printer for your Newcastle Headport, if so, select that as the option:
Select the appropriate printer from your list. The printer specified will typically be the printer linked to the Headport specified in the Data Filter; you might have a depot printer for your Newcastle Headport, if so, select that as the option:
Print Count = The number of copies that will be printed. This should default to 1 and is recommended to leave as 1 to minimize on paper usage where possible.
Limit to customer name (separate by ,) = This field can be used to limit this EDI rule to specific customers. To use this, the customer names MUST be spelt exactly as they are entered in your account and each customer in the list must be separated by a comma ( , ). For this example we are going to leave this blank as we simply want to print any Runsheets that have been generated by Drivers in the Newcastle Headport.
The last thing to do from here is to Enable Export. Toggle to YES and click Update:
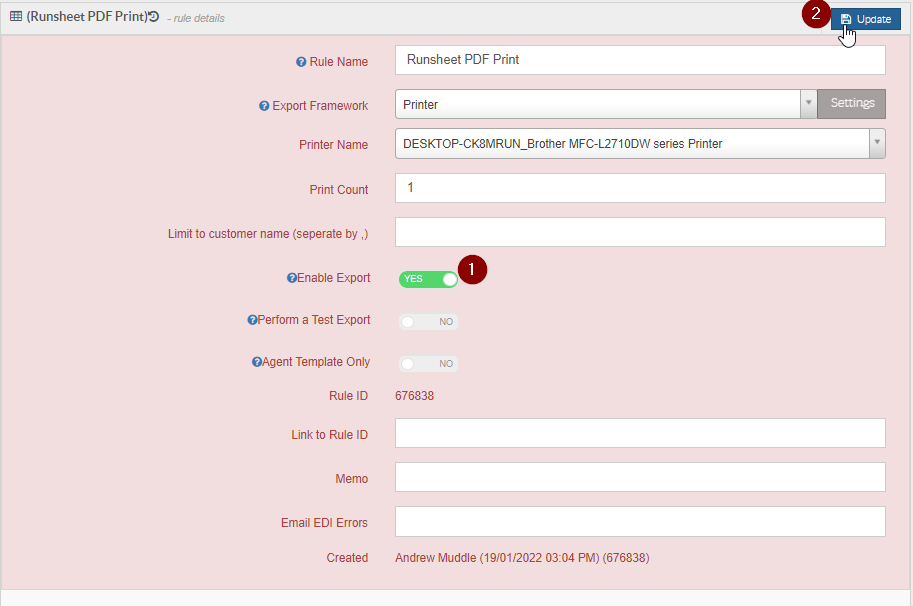
You will now see that the rule is white in colour as it is now active.
From now, when a Runsheet is created it will be automatically printed off to your specified printer; handy for drivers requiring a physical copy.
Related Articles
Consignment EDI Export
Consignment EDI Export In TransVirtual there is the ability to setup Consignment EDI (Electronic Data Interchange) Exports which are essentially a method of exporting data out from TransVirtual to another location; via email, FTP etc. This article ...Invoice EDI Export
Invoice Export Setup In TransVirtual you can setup an EDI (Electronic Data Interchange) that automatically sends PDF, Excel, CSV (etc.) Invoice files to a Customer or Agent, based on specific situations. So, when an Invoice is Approved and Locked you ...Manifest EDI Export
In TransVirtual there is the ability to setup Manifest EDI (Electronic Data Interchange) Export Rules that can send out Manifest information via FTP, Email, etc The page used to create these rules can be found under EDI > Data Export > Manifests. ...Photo EDI Export
In TransVirtual there is the ability to setup Photo (Image) EDI (Electronic Data Interchange) Export Rules that can send out images/photos to a location via Email, FTP, etc. The page used to create these rules can be found under EDI > Data Export > ...Additional Service EDI Export
Additional Service EDI Export In TransVirtual there is the ability to create Additional Service EDI (Electronic Data Interchange) Export Rules that can send out information from TransVirtual to a location; this can be done using FTP, Email, etc. ...