Address Lists
The address list contains a list of each of the addresses you have picked up from and delivered to.
Addresses can be entered into the list in a few different ways:
- They can be Manually Added - whilst within the Address List page
- They can be Imported in Bulk
- They will be added from creating Consignments or EDI Imports
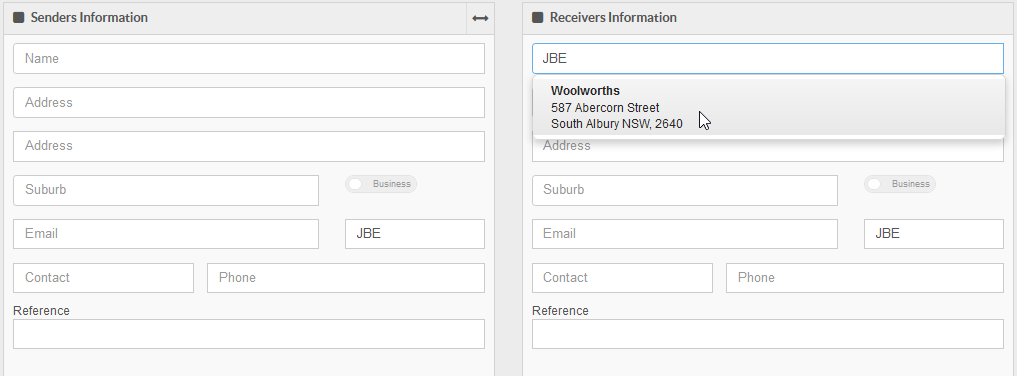
The Address List is searched whilst manually creating a consignment to minimize duplication and data entry time.
Duplicate addresses can be linked together in a Parent and Child arrangement
Creating an Address Manually
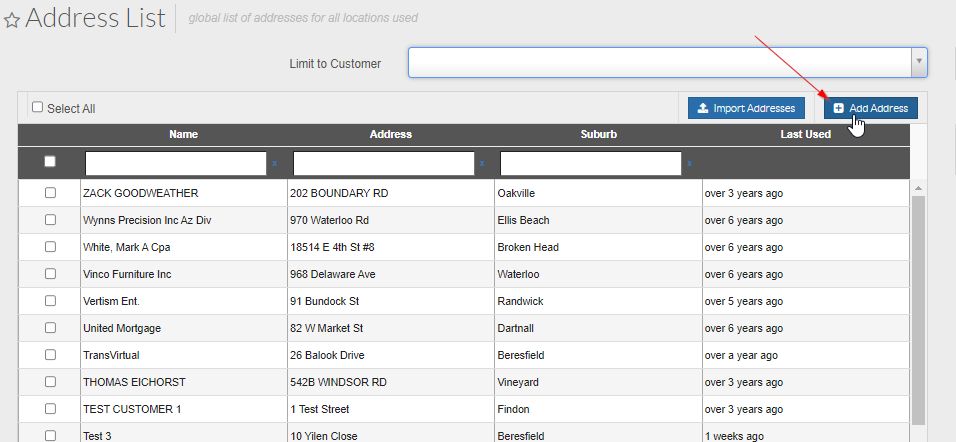
In your TransVirtual web portal menu, Go to Home>Card Files>Address List
Click on the Add Address button in the top-right corner of the address list:
You will then see a pop-up like the below appear:
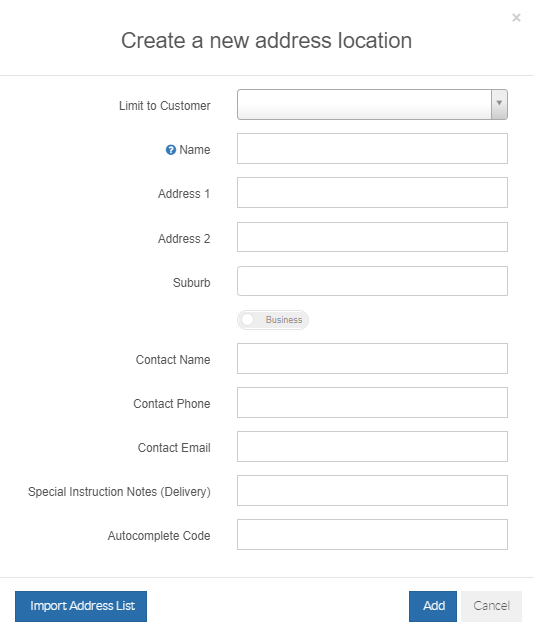
Fill out the address details on this page
- Limit to Customer - Select a customer if this address is specific to one of your customers
- Name - Business or person's name for this location
- Address 1 - First line of the address
- Address 2 - Second line of the address
- Suburb - Suburb of the address location; start typing and select from Dropdown options
- Toggle if this location is a Business or Residential location
- Contact Name - Name or person to contact at this address location
- Contact Phone - Phone number of the relevant contact
- Contact Email - Email address for the contact person
- Special Instruction Notes (Delivery) - Enter any delivery related instructions for this location e.g. Go to rear of Building
- Autocomplete Code - A code your staff can enter when creating consignments to allow for ease of address lookup
Once all details have been entered, select the Add button when complete - this then creates the address and saves into your Address List.
Importing an Address List
In your TransVirtual web portal menu, click on Home>Card Files>Address List
Click on the Add Address button in the top-right corner of the address list:
From here, click the Import Address List button to start the import process:
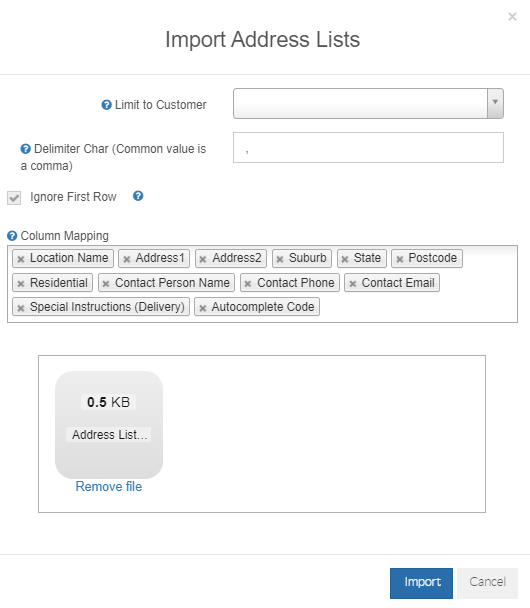
You will then see a screen like the below appear:
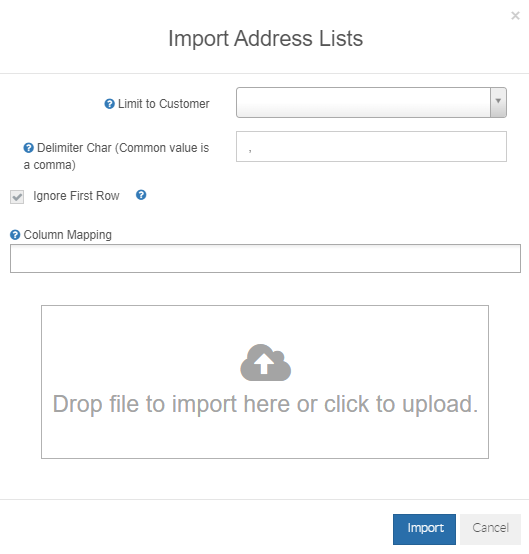
- Limit to Customer - Select the customer for this to be limited to or leave blank for all customers to see these addresses
- Delimiter Char - If using the default CSV file this will be a comma or change as required (comma is most common)
- Ignore First Row - If your file has a heading row check the box to ignore the first row
- Column Mapping - Map the columns of your file to the appropriate fields, via the dropdown list, in TransVirtual. If you have columns you don't wish to import, use the Ignore option.
- Drag and Drop or Click to upload your CSV File with your address list
Now Select the Import button to create the addresses contained in your file.

Note: If you are importing an address list file and limiting the addresses to a new customer, and the addresses contain autocomplete codes; if the address count imported is different to what you are expecting (less are imported than you thought should have been), the likely cause is that some of the imported addresses are using autocomplete codes already existing within your account.
Autocomplete codes must be unique - only one autocomplete code can be assigned to the one address location.
If you attempt to import an address that has an autocomplete code belonging to an existing address assigned to another customer, the import will still work but the new address for the new customer will not display when 'Limit to Customer' is clicked to return addresses for that customer.
'Limit to Customer' only shows unique addresses for the selected customer but the customer can be attached to more than these specific addresses.
In the event of the above, these addresses become shared addresses across multiple customers and do not display specifically assigned to any one customer - but they can still be used by all customers attached to them.
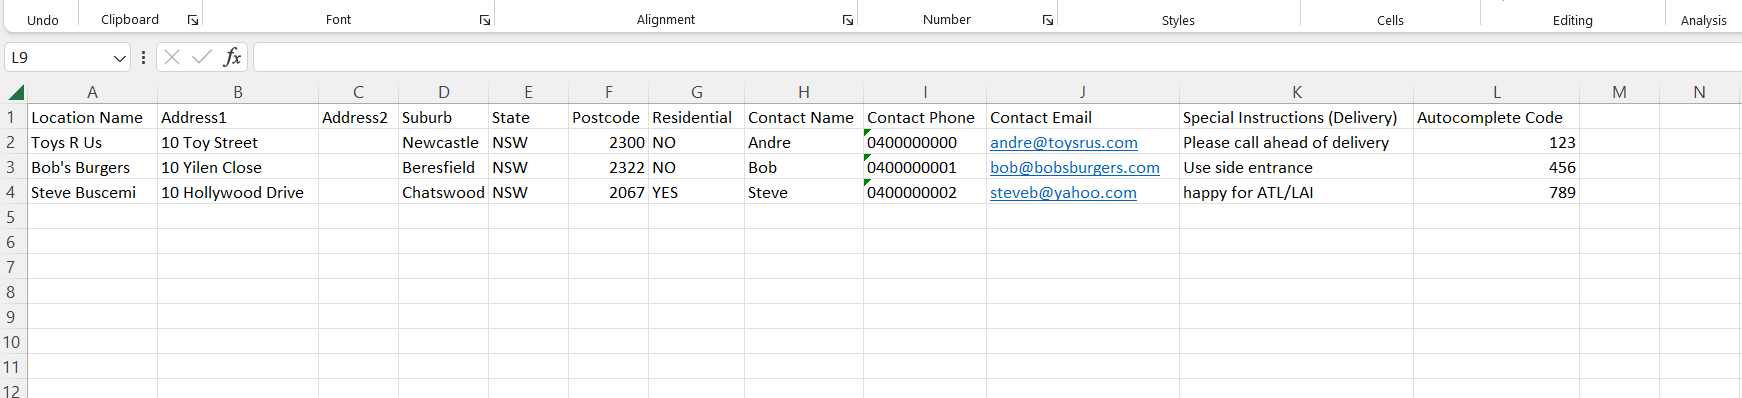
Example Import File
Below is an example of what your import file could look like:
An example of how you would map this example file:
 Note: When importing addresses, you are able to identify if an address is residential or business by using a column such as the below in your file:
In the above there is a column that is called Residential, and the values contained are either YES or NO. Use YES for when an address is residential and NO for when an address is a business.
This column is then mapped using the Residential option from the dropdown:
Another thing to consider when doing an import is that you will need columns for State and Postcode. This differs to creating addresses manually within TransVirtual as per the top part of this article as when using that method you start typing an address and then select it from the options that appear; you don't need to manually enter state and postcode like you do here.
Searching/Finding an Address
To search for an address, use the Name, Address or Suburb text boxes - in much the same way that you would search for a consignment in the pickup allocation or consignment search pages:
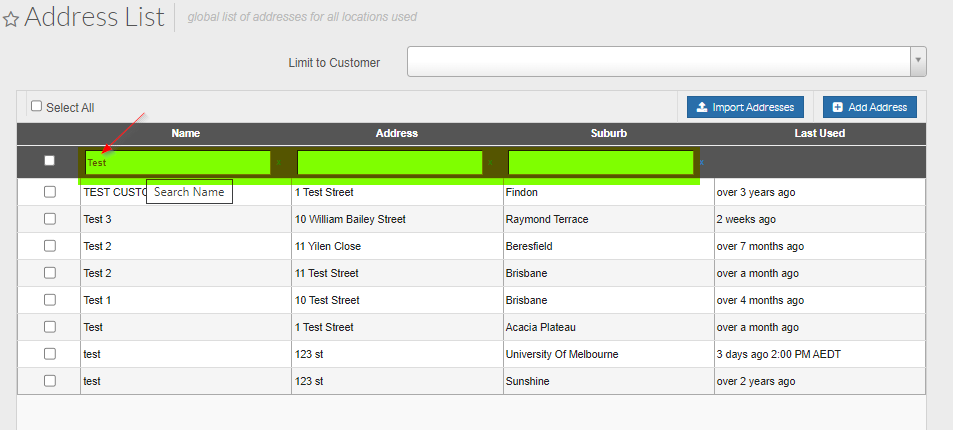
Simply type a value or enter text and then press enter.
Any matching results are displayed.
To remove the filter and return all results simply delete the search text from the white text box and press enter.
Any matching results are displayed.
To remove the filter and return all results simply delete the search text from the white text box and press enter.
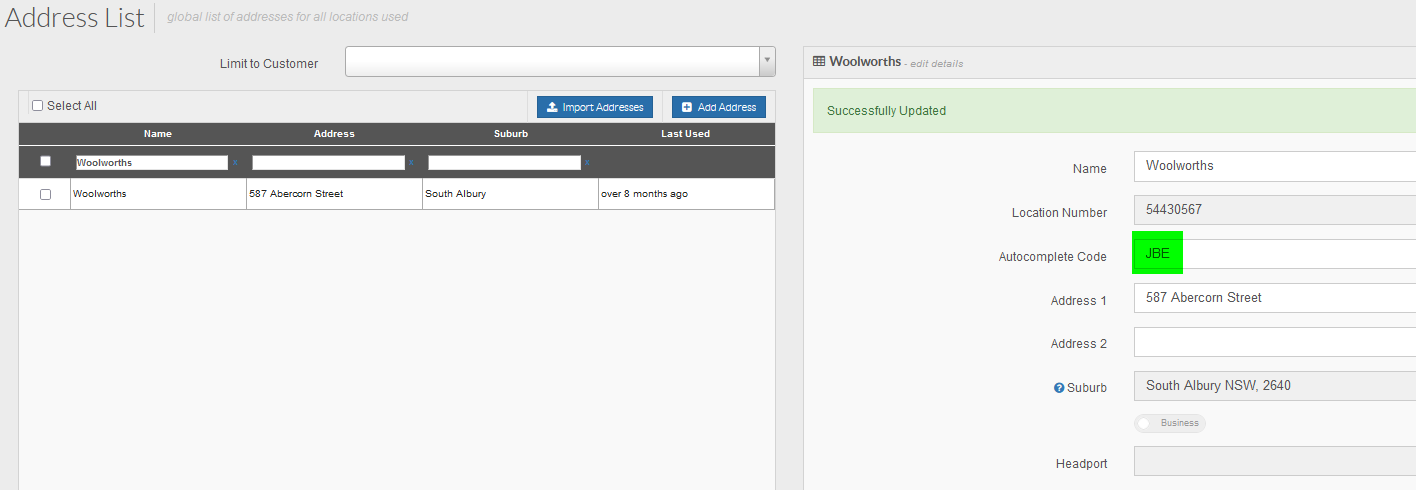
Editing/Modifying an Address
Find/Locate an Address as above.
Once you have found your address you will be presented the details of the address on the right
Edit any of the fields that require changing and click the Update button in the top right when complete:
Field Information
- Name: Customer Name
- Location Number: Cannot Change, this is the location ID within Transvirtual
- Autocomplete Code: A string of letters and/or number your staff can use to lookup sender/receiver addresses when entering consignments
- Address 1: First Address Line
- Address 2: Second Address Line
- Suburb: Suburb State and Postcode
- Rsidential/Business: Toggle this to the relevant option, assists with additional charges and reporting.
- Headport: Headport for this address determined by your headport zone listing
- Contact Name: Onsite Contact for the address
- Contact Phone: Onsite Contact Phone Number
- Contact Email: Onsite Contacts Email Address
- Special Instruction Notes (Delivery): Any Site specific instructions to be aware of
- Special Instruction Notes (Pickup): Any Site specific instructions to be aware of
- Close Time: The time this locations closes
- Linked Address Locations: Please Click Here for instructions on Assigning Parent and Child Associations between addresses.
- Pickups require Booking: Yes/No
- Deliveries require Booking: Yes/No
- Receiver Names: These are the historical names that have signed for goods at this address. You can add new names for drivers to select from. One name per line
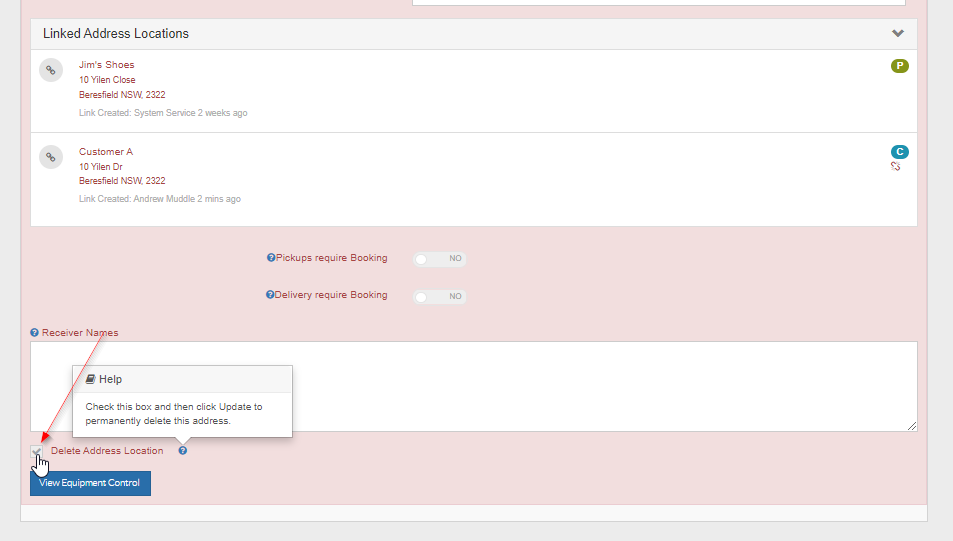
- Delete Address Location: Check this box if you would like to delete this address location from the list.
Note: To use an autocomplete code you need to enter the relevant code against the address:
When you then go to create a consignment next time, you simply need to enter the autocomplete code into the name fields as per below:
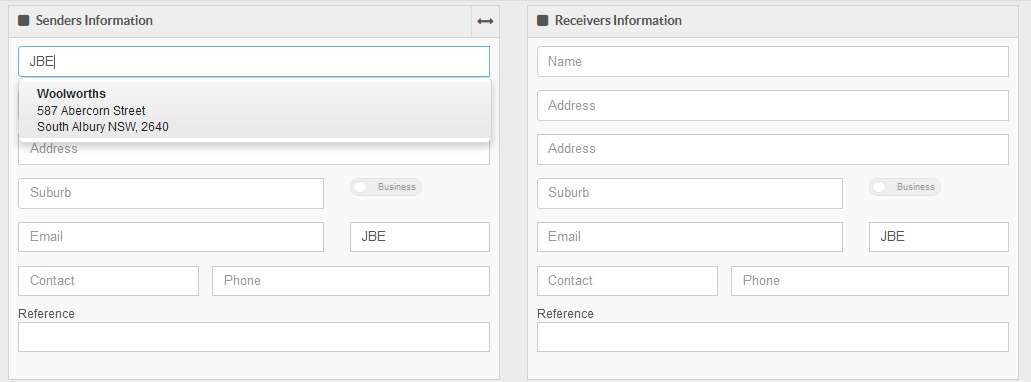
When you then go to create a consignment next time, you simply need to enter the autocomplete code into the name fields as per below:
Address Linking
When customers enter consignments, they add a destination address. Different people will abbreviate the name or addresses differently which will create multiple addresses to the one destination. Linking addresses assists in keeping a clean workflow for your staff and customers who enter/create consignments, as well as your drivers who deliver consignments.
It's important to note that addresses can be linked manually or automatically by a driver when grouping deliveries (Click Here for further information on this). This article will explain how to link these from the Web Portal (within TransVirtual).
Addresses can be one of 3 types; a Parent, Child or have no links (usually most locations would fall into this category).
- You can view and modify any Linked Addresses by looking at the "Linked Address Locations" section:
In the above you can see that this address '10 Yilen Cl" is linked to address "10 Yilen Close" and in that relationship the selected consignment is the parent address (the linked address appears with a C meaning that address is the child of this address). - When viewing (selected location) a child address, the "Linked Address Locations" will contain an address that will have a "P" allocation on the right-hand side of the row - this is because the linked address is the parent address for the selected consignment.
- When viewing a parent address the "Linked Address Locations" will display addresses that will have a "C" allocated on the right-hand side.
- Note: You will notice that when you have selected the parent address and can see the linked child addresses that a broken link icon appears:
Clicking this will allow you to break the link and make the addresses separate once more. Handy if a link occurs accidentally but please ensure that breaking links only occurs where required.
- When viewing a parent address, you can drag another address from the address list over to the "Linked Address Locations" section to create another link:
Doing this then adds the 'dragged' address as a linked child address:
You can see that in the above there are now two child addresses where before there was only one. - When viewing a parent address, you can click on the "C" association to change the address from a child to parent address:
Doing this then makes that address the parent in the relationship from that point on:
As per the above, after clicking on the C, that address then became the Parent which now means the address selected is now a child of that address.
Handy if an address has been incorrectly assigned parent status when it should be the child instead.
Important considerations:
- Child addresses will not be visible when entering consignments.
- An address can only have one Parent
- An address can have multiple Children
Deleting an Address

Deleting addresses is not recommended unless absolutely required. Addresses that are generated via an EDI Import will recreate that address on the next consignment to that delivery address. If this address is a duplicate of another valid address in your address list, follow the instructions on how to Assign Parent and Child Addresses.
Once you have found your address requiring deletion and selected from the list on the left you will be presented with the address details on the right. Scroll down and check the box to the left of Delete Address Location:
Click on the Update button in the top right-hand corner to action.
Please ensure care is taken when deleting addresses.
Please ensure care is taken when deleting addresses.
If you delete an address, it will still show on any consignments it has been used previously and rating/pricing will still work as it did prior to the address deletion, but please exercise caution when deleting addresses!
Address Maps
In TransVirtual all addresses are mapped to their respective location on the map. This can be overridden within the map if an address is not specific; particularly useful if dealing with Minesites (as an example) which may only have a road name for their address.
Additionally when a delivery is performed to an address location TransVirtual will utilise the Signature GPS location to improve the mapping accuracy.
If you need to alter this manually select the Pin on the map and drag this to the correct location as below
Extra Information
There is the ability to see Equipment Transaction information associated with a location by searching for and selecting an address, then clicking the below button:
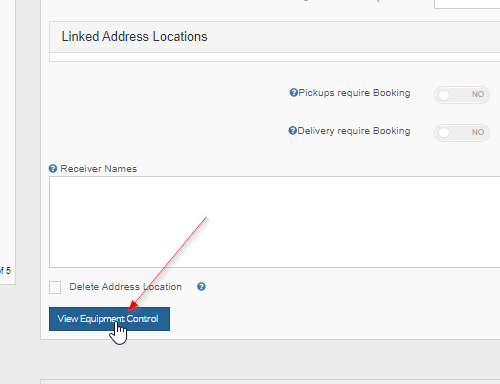
For further information on Equipment in TransVirtual, please Click Here.
Export Address List
There is the ability to export the Address List using the export function top-right:

Exporting here will provide you with a file containing all data from your Address List.
Exporting here will provide you with a file containing all data from your Address List.
There is also the ability to export the data from the grid using the export button bottom-left:
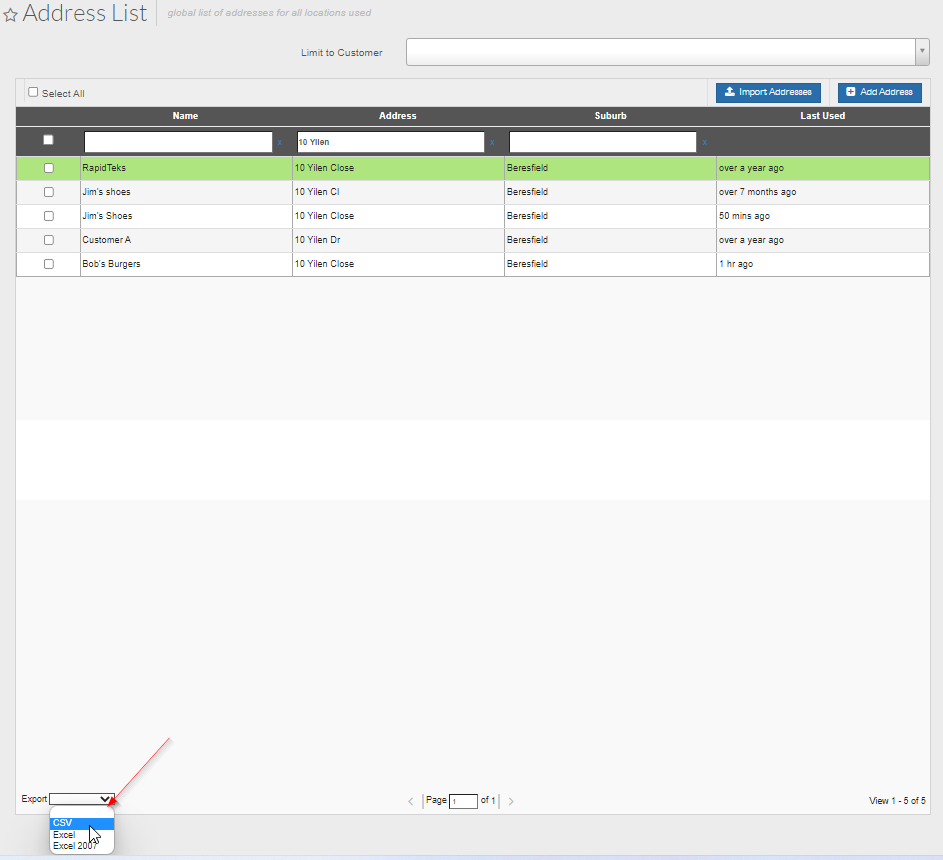
Doing this way will provide you with a file containing the information from the above grid - handy if you perform a search of some sort and wish to only extract that data not the entire list.
Doing this way will provide you with a file containing the information from the above grid - handy if you perform a search of some sort and wish to only extract that data not the entire list.
Seeing Addresses limited to a Customer
If you have addresses assigned to a customer and wish to view them only, use the dropdown at the top of the page to return the address results for the desired customer:
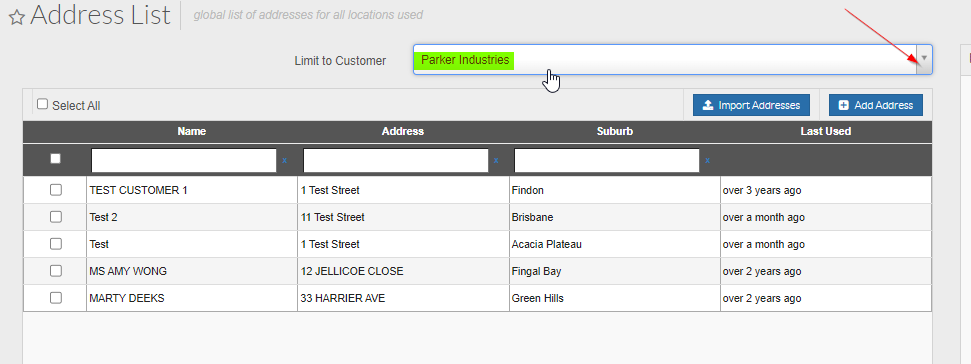
In the above when the customer is selected the results grid has been populated with the addresses assigned to this customer.
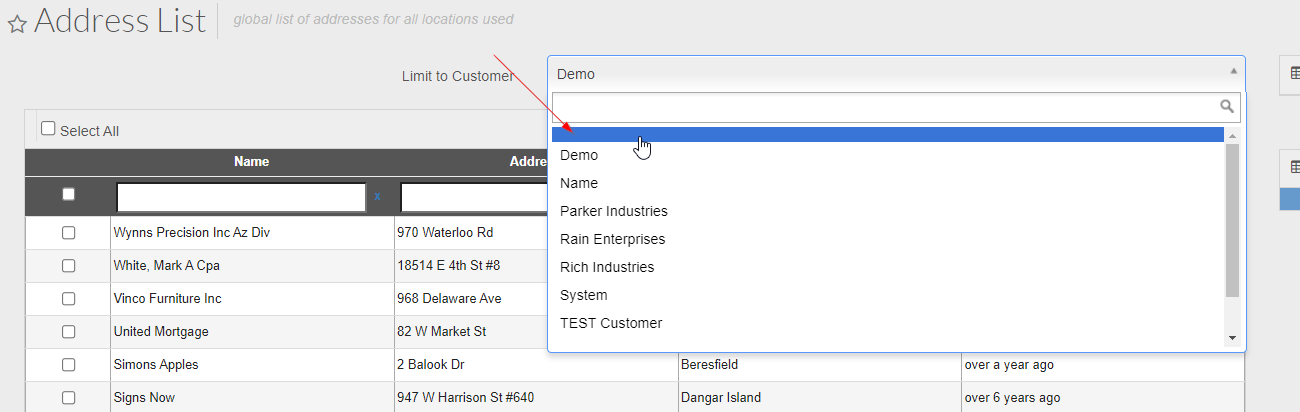
If needed, you can remove the customer filter and return all results by clicking the blank bar above the first customer in the list:
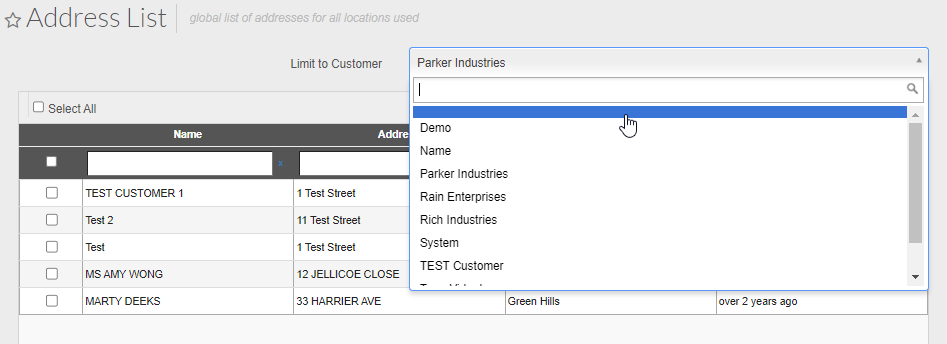
This then removes the customer filter condition allowing you to see all addresses.
As an addition to this, you may wish for customers to be able to only see their own addresses (those assigned to them) when creating consignments. If so, toggle this setting on:
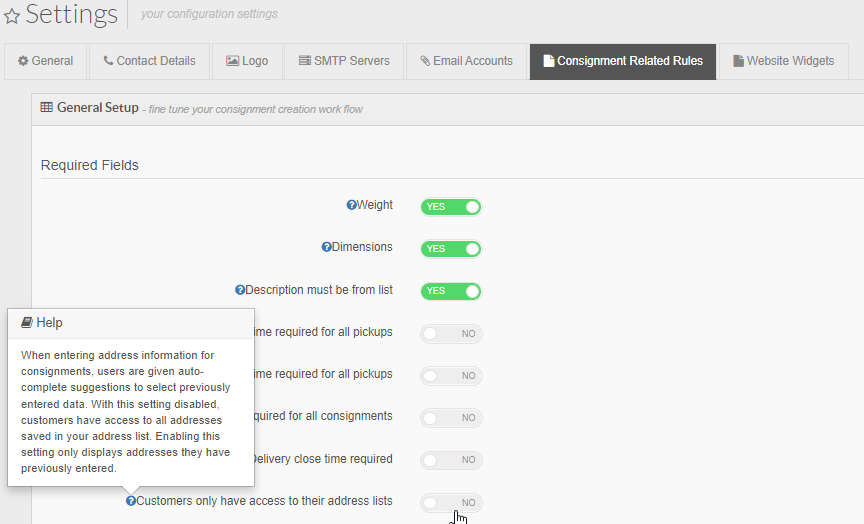
Located under Settings > General > Global Setup > Consignment Related Rules.
If needed, you can remove the customer filter and return all results by clicking the blank bar above the first customer in the list:
This then removes the customer filter condition allowing you to see all addresses.
As an addition to this, you may wish for customers to be able to only see their own addresses (those assigned to them) when creating consignments. If so, toggle this setting on:
Located under Settings > General > Global Setup > Consignment Related Rules.
Note:The above setting 'Customers only have access to their address lists' only applies to customer logins.
If you are a SuperAdmin user you will still see all addresses in your account even with this setting enabled - this setting applies to customer logins used to manually create consignments within your account where the login can only see addresses linked to their customer card.
Things to Note
- When selecting a customer from the Limit to Customer section within the UI, you will need to have more than one customer in your account to be able to de-select a customer:
Having more than one customer will then create a 'blank bar' at the top of the page which is selectable and allows you to de-select a customer from this list, allowing you to see the entire list (not specific to any one customer).
Having more than one customer will then create a 'blank bar' at the top of the page which is selectable and allows you to de-select a customer from this list, allowing you to see the entire list (not specific to any one customer).