Inbound Process
Inbound Process
In this article we will be going over the inbound process which will cover the different ways you can receive stock, assign stock and manage storage once the stock is received.
Our inbound process is designed to make receiving stock a simple process with multiple different avenues you can take.
Through this article you will be able to determine which receival process works best for your business.
Create a Purchase Order
To create a new Purchase Order, simply go to Warehouse > Inbound > Purchase Orders > Create New,
or you can go to Home -->Dashboard -->Orders.
In this page you can:
> Enter an "Order #" if available
> Select a "Customer" from the drop-down list
> Select a "Supplier " from the drop-down list
> Select a "Date"
>Specify Suppliers Location
>Enter Reference
>Enter Other References
>Enter Special Instructions
>Add a Booking Time
>Enter Special Instructions
>Add a Booking Time
>Add a Booking Reference
>Enter Order Items
Note:
>Once the order items are entered in the first row, automatically the second row gets generated for the user to enter multiple order items
>Delete icon"  " helps the user to delete a particular row with the order item
>Column Selector "  " icon gives the user to add or delete the columns to be displayed in the "Order Items" and also enable/disable access controls. User clicks on "Update" button to save the changes
After entering all the details, you can click on the "Save" Button which will give you a visual confirmation of completion as shown below:

Note: User can skip Purchase Order and proceed to stock receives (Inbound Batch -Skip PO) or can proceed to "Put Away Assignment"
Stock Receives (Inbound Batch-Skip PO)
Every stock item which is entered as an inbound batch is considered to be received stock.
Essentially this feature allows users to receive stock items without a purchase order.
Create Inbound Batch
To create an inbound batch, you will need to:
Go to Warehouse-->Inbound-->Stock Receives (Inbound Batch-Skip PO)
Click on "Create inbound batch" button as shown below:
The user can enter the following:
>Stock Item
>Unit of Qty
>Quantity
>Current Bin Location
>Purchase Order number
>Serial / Batch Number
>Lot Number
>Arrival Date
>Date of Manufacture
>Expire Date
Once all the required details are entered, the user just needs to click on the "Create" button, which will create an inbound batch.
Inventory by Inbound Batch
This section displays all the inbound batches created for the selected warehouse.
If the user clicks on one row item (inbound batch), corresponding stock item detail displays in this section as listed below:
>Batch details
>In progress
>History
>Stock Item info
>Files
The user can then alter details in these information screens such as the qty received in the batch, purchase orders, memos etc.
Note:
>User can print labels for the inbound batch by clicking on " Print Label " and
>Deleted the selected inbound batch created by clicking on "Delete Inbound Batch"
Put Away Assignments
Once the Stock is received, all the stock items are reviewed and registered into the software.
The system automatically compares the available stock levels with the existing stock location before the actual stock movement.
Create Put Away Movement
Go To --> Warehouse -->Inbound-->Put Away Movement
When a specific stock item is selected in the inbound list on the left, the details of the inbound batch are displayed on the right hand side.
Note: The user can create an adhoc batch via the 'Create Inbound Batch' button
Before we create the put away movement, the user can view the following tabs as shown in the figure below:
>Batch Details
>InProgress
>History
>Stock Item Info
To create a new put away movement, simply select "Create Put Away Movement".
Now you will be presented with a popup page which gives you the option to put the stock away into an available bin location.
To do this, you can:
Click on the "+" sign of the bin you want the stock to be allocated to.
Then just confirm the unit of quantity and then the quantity of the units.
Once done, select 'Create'.
With this, the stock movement is initiated from existing bin location to the the defined destination bin location.
Delete Inbound Batch
If the user needs to delete the created inbound batch or already existing inbound batch, they can select the batch from the Put Away List on the left and select "Delete Inbound Batch" as shown below.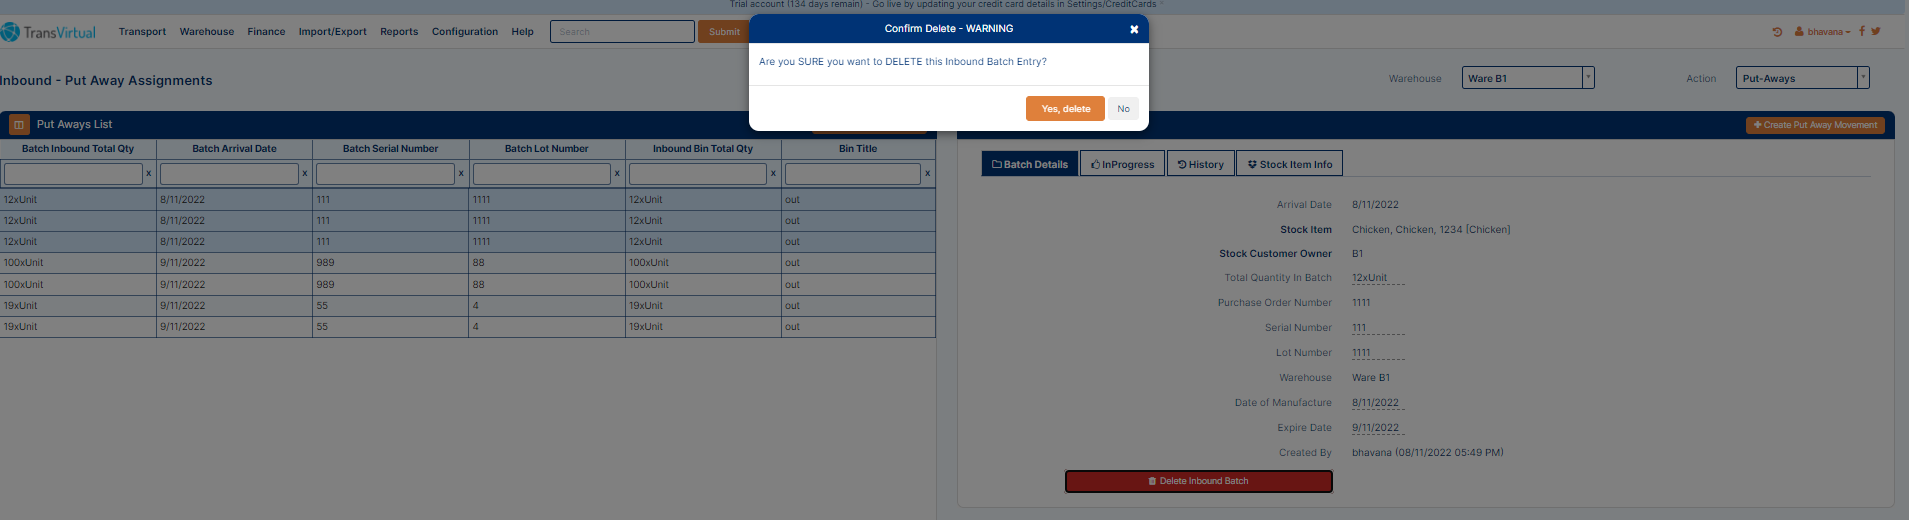
Note:
User needs to have an inbound batch existing for every Put Away Movement initiated, without the batch, the stock movement cannot be initiated.
Bin In/ Bin Out: This selection of location can be set in Bin location at--> Configuration and Setup -->Warehouse- Zone/Bin Location.
Always remember to have Zone types for outbound/inbound and storage created separately to accommodate any type of stock movement.
WMS-Inbound-Suppliers (Agents)
Here we will review how you can manually create an agent, Import Agents or Export Agents.
Within every card file, the user can create logins, edit contact details and setup agent specific settings.
Note: For every inbound movement or Purchase order (PO) created, user needs to assign a pre-existing Supplier/Agent or create/add a new Supplier/ Agent.
The suppliers page can be found by going to Warehouse -->Inbound-->Suppliers.
Here, there are 2 ways to add agent.
Add Individual Agents
The user will need to click on the "Add Agent" button to then enter the Agent name, the TransVirtual number is not available for use in the WMS for the current moment.
Once the New agent is created, the user can view:
- Agent Name
- AKA - Alternate name for the agent.
- Agent Code - Short name to help when importing data.
- Tax Number - Country Tax identifier for this card file.
- Head port Assigned - Defined the head port the agent is assigned to/operates out of.
- Data Filter Tag - A unique tag assigned to the agent and helpful to filter bulk data entries for EDI's etc.
Contact Details:
The user can either double click on the entry field or click on the "Edit Button" to enter details in all of the below headings:
>General
>Accounts Payable
>Accounts Receivable
>Other
Logo:
The user can upload "Consignment Report Logo" by dropping their image logo or uploading the image logo by double clicking within the upload box.
Logins:
Superadmins can add new users by clicking on the "+New User" button.
By doing so they will be presented with the below popup:
Username: A complete username in abc@xxx.com format is mandatory, this is not an email address required field
Password: Should be minimum 6 characters
First name: Optional
Last name: Optional
Enable Mobile Device Access: Yes /No: User can choose to provide mobile device access to the user, this is in relation to the TransVirtual app.
General Setup
Consignment Related Rules
This section is relative to the Transport Management System, this will be where you can adjust any settings in relation to consignments actions and manifests.
If you need more information relating to this, click here.
Method 2: Import Agents
In Transvirtual you do have the ability to do a bulk import via a CSV spreadsheet.
To do so, simply select to import agents rather than selecting the create agent button.

Info:
>File format must must be .csv, .xlxs , .xls or .txt (using tab delimiter)
>Every row must include "Name" as a mandatory field
You will be presented with a list of columns which can be aligned to your file, if your file does not have a column to match, simply leave the box on the right as "Empty".

Info:
To know how to create a new agent rate card please refer to:
Conclusion:
This article shows how the inbound process works within TransVirtual.
Now the stock is in the warehouse, it is ready to fulfil any internal movements, internal jobs or sales orders.