Tax Rates
In TransVirtual there is the ability to create custom tax rates, if required.
Typically, the tax rate in Australia is defined as GST (Goods and Services Tax) and is usually a 10% tax applied to most goods or services.
This article will detail how to create a custom tax rate and apply it, should you require a rate other than the default 10%.
Typically, the tax rate in Australia is defined as GST (Goods and Services Tax) and is usually a 10% tax applied to most goods or services.
This article will detail how to create a custom tax rate and apply it, should you require a rate other than the default 10%.
The page used to create a new tax rate can be found under Finance > Other Setup > Tax rates.

This requires the Finance Module!
How to
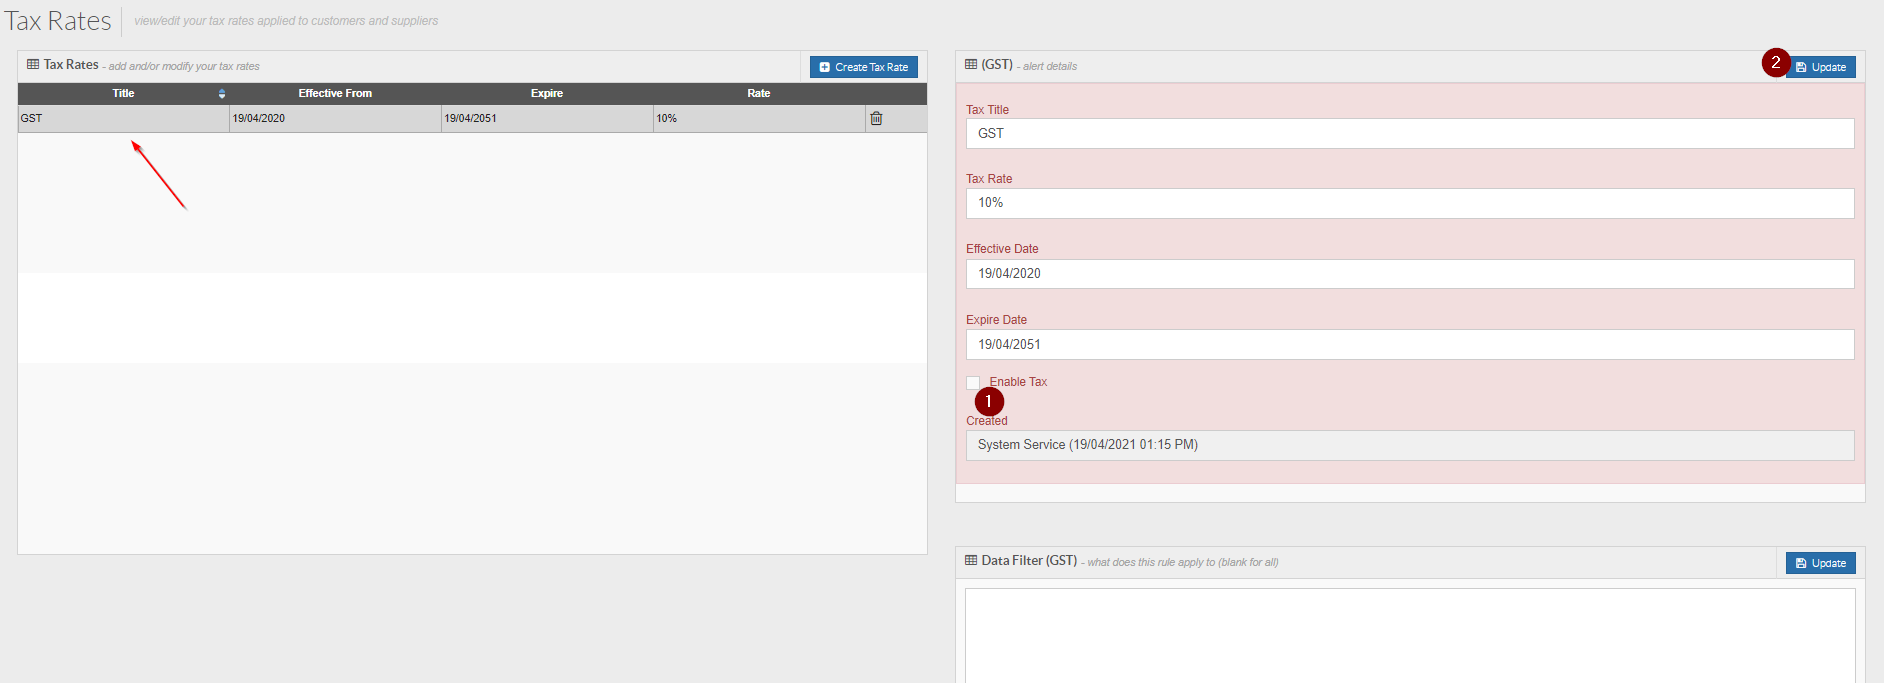
Arriving at this page, you will see a screen similar to the below:

You will notice that, by default, you may already have a rule in the list.
If you are located in Australia there should be a 10% GST rule already in place.
For this example, we are going to create a new custom tax rate rule and disable the original 10% one seen in the above.
To do this, first we need to disable the current rule. Click on the rule on the left and on the right you will see the settings for it. Toggle the below to be 'un-ticked' then click the Update button:
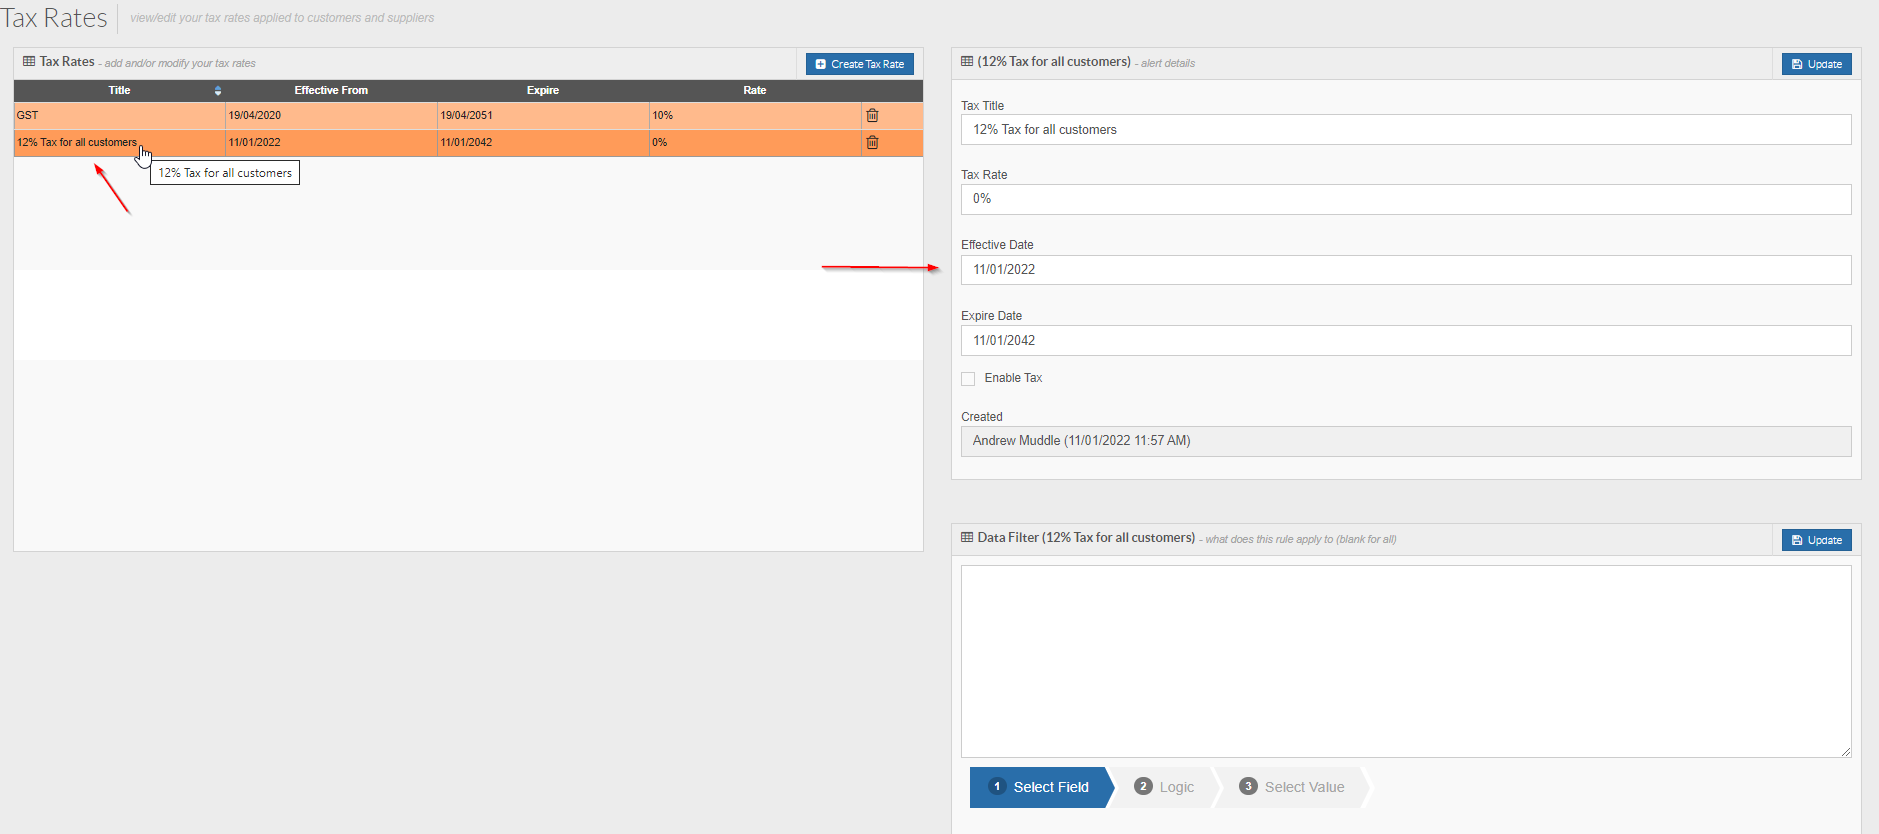
You will then notice that the rule now appears in orange as it is no longer active:

You will then notice that the rule now appears in orange as it is no longer active:
From here, click the Create Tax Rate button at the top of the page. You will then see the below pop-up window appear:
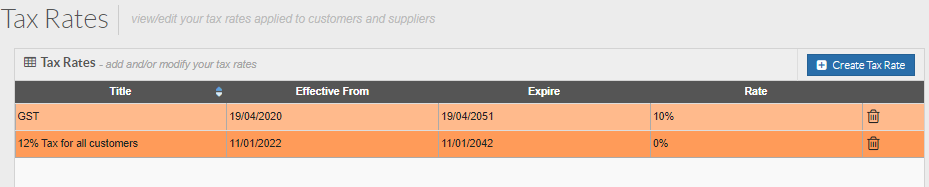
Tax Title = Give the Tax rule a name. The name should be reflective of who it applies to or what it does. For this example, we are going to use "12% Tax for all customers" as the name. Click the Create button to create the new Tax Rate.
You will then see the new Tax Rate in the list, in orange, as it is not yet active.
Click on it and the settings for it will appear on the right of the page:
Click on it and the settings for it will appear on the right of the page:
The next step from here is to configure the settings seen on the right.
Starting at the bottom of the page you will notice a Data Filter.
The Data Filter is the driving force that determines when this tax rate will and won't apply to a consignment.
For this example, we are actually going to leave it blank; the reason being is that a blank Data Filter will apply the tax rate to all consignments in your account - this is what we are after:
However, if you wanted to create a tax rate for a specific customer or set of customers, you would need to add logic to the Data Filter so that the tax rate would apply in the correct circumstances.
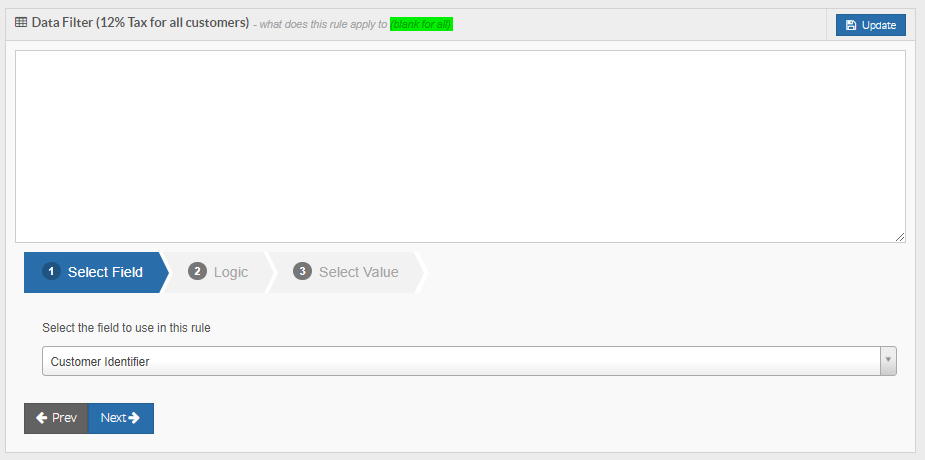
To add logic to the Data Filter, use the Data Filter Builder at the bottom of the page:

To add logic to the Data Filter, use the Data Filter Builder at the bottom of the page:
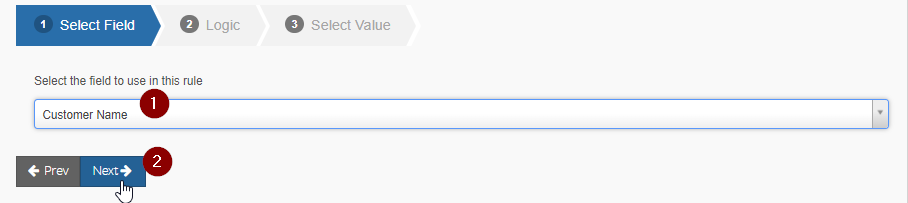
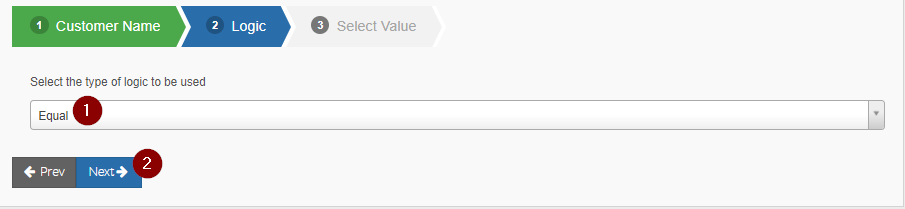
To add logic, click and select a field from the drop-down list. You could select customer name and then click the next button:
You could then select Equal from step 2 and then click Next:
In step 3 you could then select the appropriate customer name and then click the Add Rule button:

Once added, you will then see some text appear in the Data Filter, like the below:
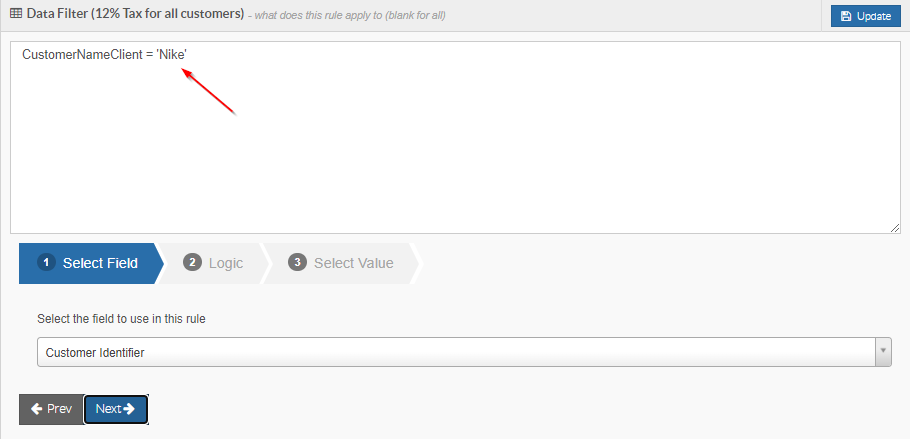
This tax rate will now only apply to consignments where the customer is Nike.
It is important to note that if you have more than one active tax rate; if any of these are limited to a specific customer or customers, any other tax rates would need to have the reverse logic added to their Data Filters.
For example:
If both of the above tax rates were active and one applied to one customer using the above logic in the Data Filter, the other Data Filter would need to say Customer Name Not Equal Nike, like so:

If the Data Filter was left blank and the rule was active, BOTH of the tax rates would apply to consignments where the customer was Nike.
Something to keep in mind if you have more than one tax rate - ensure they are limited to the appropriate customer, etc otherwise there may be issues with more than one tax rate applying to a consignment.
As mentioned above, for this example, we are leaving the Data Filter blank because we want it to apply to ALL customers, agents, etc.
Once the Data Filter has been configured as needed, you then need to specify the Tax Rate and the Effective Dates:
You could then select Equal from step 2 and then click Next:
In step 3 you could then select the appropriate customer name and then click the Add Rule button:
Once added, you will then see some text appear in the Data Filter, like the below:
This tax rate will now only apply to consignments where the customer is Nike.
It is important to note that if you have more than one active tax rate; if any of these are limited to a specific customer or customers, any other tax rates would need to have the reverse logic added to their Data Filters.
For example:
If both of the above tax rates were active and one applied to one customer using the above logic in the Data Filter, the other Data Filter would need to say Customer Name Not Equal Nike, like so:
If the Data Filter was left blank and the rule was active, BOTH of the tax rates would apply to consignments where the customer was Nike.
Something to keep in mind if you have more than one tax rate - ensure they are limited to the appropriate customer, etc otherwise there may be issues with more than one tax rate applying to a consignment.
As mentioned above, for this example, we are leaving the Data Filter blank because we want it to apply to ALL customers, agents, etc.
Once the Data Filter has been configured as needed, you then need to specify the Tax Rate and the Effective Dates:
For this example, we want to specify a 12% tax rate, and we want it to apply as per what is already populated in these fields.
The end result will look like the below:
To enter a value for the tax rate, simply click in the field and type the number followed by the % symbol, then click the Update button top-right to implement this change.
The last thing to do from here is enable the tax rate.
Click the below button and then click Update at the top to activate the rule:
The tax rate will now appear in white in the list as it is now active.