Photo EDI Export
In TransVirtual there is the ability to setup Photo (Image) EDI (Electronic Data Interchange) Export Rules that can send out images/photos to a location via Email, FTP, etc.
The page used to create these rules can be found under EDI > Data Export > Photo.
This article will detail how to setup a common example; emailing left as instructed type photos to a consignment customer.
This article will detail how to setup a common example; emailing left as instructed type photos to a consignment customer.

This EDI setup works well with a Mobile Driver Alert setup where you may force drivers to take photos on Left As Instructed type deliveries.
Example Setup
Arriving at this page, you will see a screen similar to the below:
Click the New Rule button at the top of the page to create a new Image Export EDI rule.
You will then see the below pop-up window appear:
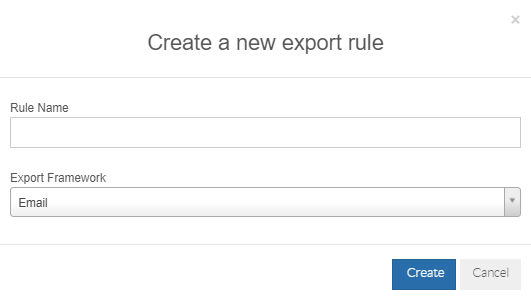
You will then see the below pop-up window appear:
Rule Name = This is the name assigned to the EDI rule. You can call it whatever you wish, but the name should be reflective of what the EDI rule does or will be used for. For this example, we are going to name the rule "Email Left As Instructed type photos to Customer".
Export Framework = This is the method by which TransVirtual will export the photos. For this example, we are going to select Email.
Click the Create Button at the bottom of this window to create the rule.
You will then see the rule appear in orange in the grid.
Click on it and the settings for it will appear on the right side of the page:
You will then see the rule appear in orange in the grid.
Click on it and the settings for it will appear on the right side of the page:
From here we need to configure the settings.
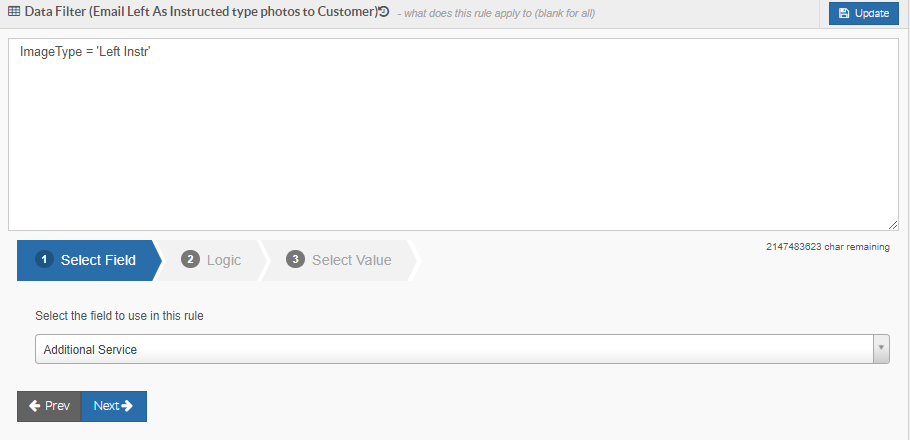
Starting at the bottom of the page, you will notice a Data Filter.
Data Filters are the driving force behind how the system determines when an EDI rule will and won't apply to a consignment; they specify criteria that consignments must meet to have EDI rules trigger against them.
To setup the Data Filter we need to add logic to it.
To do this, you will need to use the Data Filter Builder at the bottom of the page:
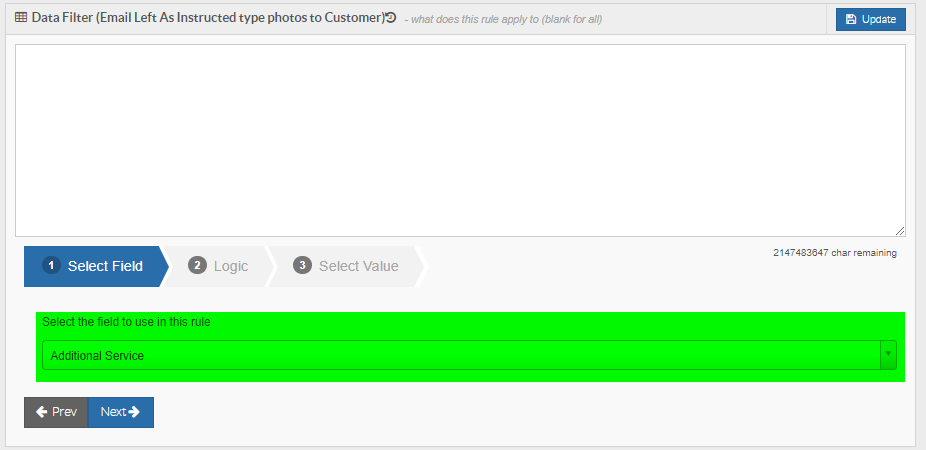
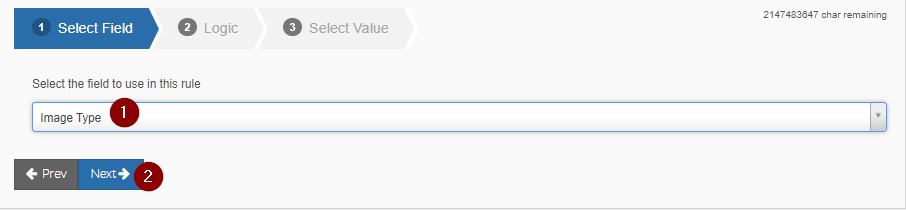
From the drop-down, search for and click on the field called Image Type. Click the Next button to proceed:
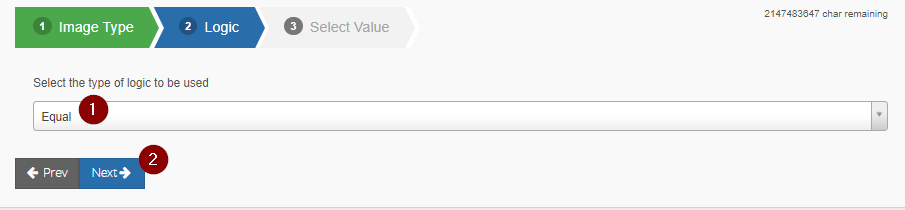
In Step 2 of the builder, select Equal then click Next:
In Step 3 of the builder, select Left Instr and then click Add Rule:
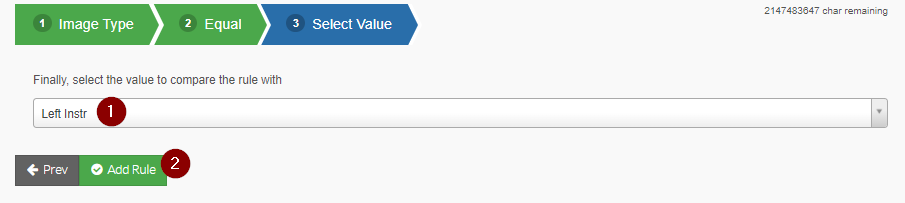
You will then notice that there is text/logic in the Data Filter, as per the below:
This EDI rule will now apply to any consignments where the image type is Left As Instructed.
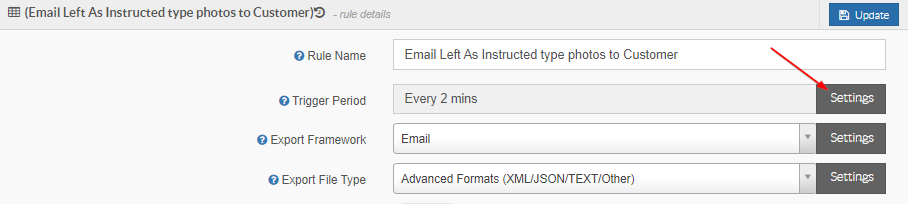
From here, we need to configure the rest of the settings at the top.
Rule Name = This is the name of the rule and should already be populated from when the rule was created. It can be changed if required, but should be reflective of what the rule does.
From here, we need to configure the rest of the settings at the top.
Rule Name = This is the name of the rule and should already be populated from when the rule was created. It can be changed if required, but should be reflective of what the rule does.
Trigger Period = This setting determines how often this EDI rule will run/operate.
Click the Settings button next to this field:
You will then see a window like the below appear:

Click the Settings button next to this field:
You will then see a window like the below appear:
Here you can set a trigger period in minutes or at certain times of the day/or for certain days of the week, etc.
For this example, we are going to set and leave as Every 2 mins - this means as soon as a consignment becomes eligible for this export rule, we are going to trigger the export and export the data.
For this example, we are going to set and leave as Every 2 mins - this means as soon as a consignment becomes eligible for this export rule, we are going to trigger the export and export the data.
Click the Update button to save any changes you have made here.
Export Framework = This is the method that the EDI rule will export data - this should already be populated from when the rule was created.
Click the Settings button next to this field to configure the email that will be exported:
You will then see a screen like the below:
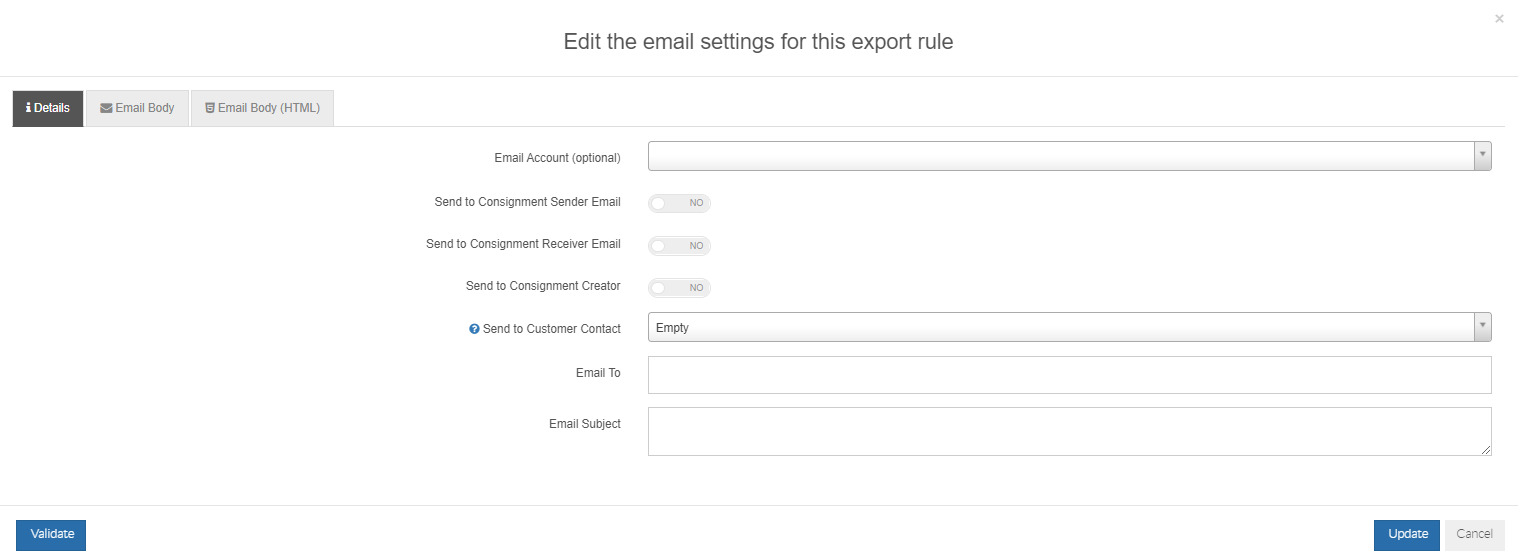
This window gives you the ability to customize the email that will be exported with this EDI rule.
For this example, we are going to send emails to the relevant consignment customer contact:
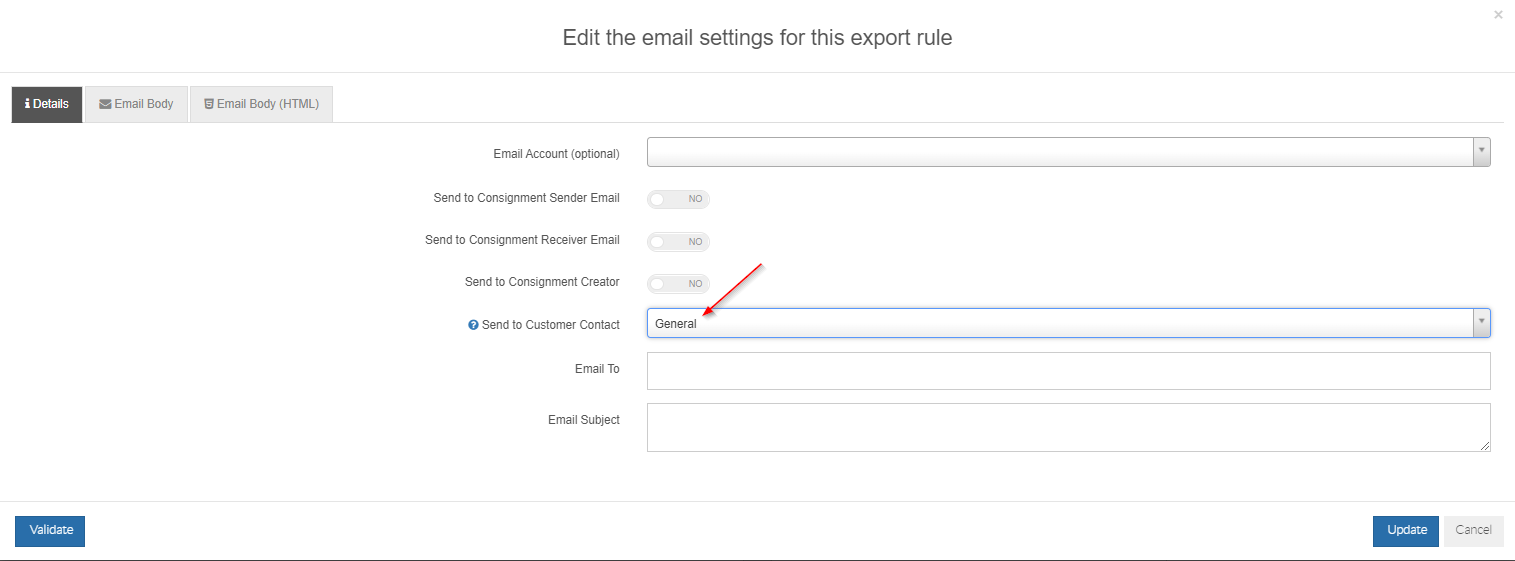
The Send To Customer Contact field is linked to the contact details section of the relevant customer card of the consignment customer.
Setting as general means that an email will be sent to the General email address of that customer's card.
This can be found under Home > Card Files > Customer List > Double-click and open appropriate customer card > Contact Details:
In the above, if the Image EDI export rules triggers against a consignment with Unified Logistics as the customer then the email would be sent to that highlighted above.
For this example, we are going to set the Email Subject as the below:

Note: The @Model.ConsignmentNumber text is a special coding function that will automatically populate the correct consignment number for each consignment that this EDI rules triggers against. It MUST be spelt as per the above to work.
The Email To field can be used if required, but any emails here should only be internal staff emails, where possible. This is because the emails listed here will get ALL emails generated by this EDI rule; so you do not want to put customer specific emails here as then those customers might get photos for other consignments not belonging to them. We are going to leave this blank for this example.
The remainder of the settings can be used to send the email to other sources such as a consignment sender or receiver email. We will leave blank or set to NO for this example.
Once these details have been configured, we are going to modify the Email Body:

Once these details have been configured, we are going to modify the Email Body:
This is where you enter what text you want to be sent as the email body when any emails are exported via this EDI rule.
Our example will use the below:
Note: The Validate button at the bottom of the page can be used to preview what the email will look like and also check to ensure there are no issues with any coding text you have included.
Click the Update button at the bottom of this window to implement these changes.
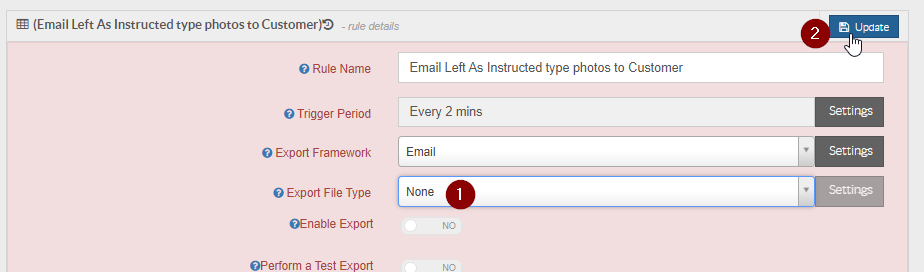
Export File Type = This is the type of file that will be exported when the EDI rule runs.
Change to Basic/CSV and then click the Settings button:

You will then see the below window appear:
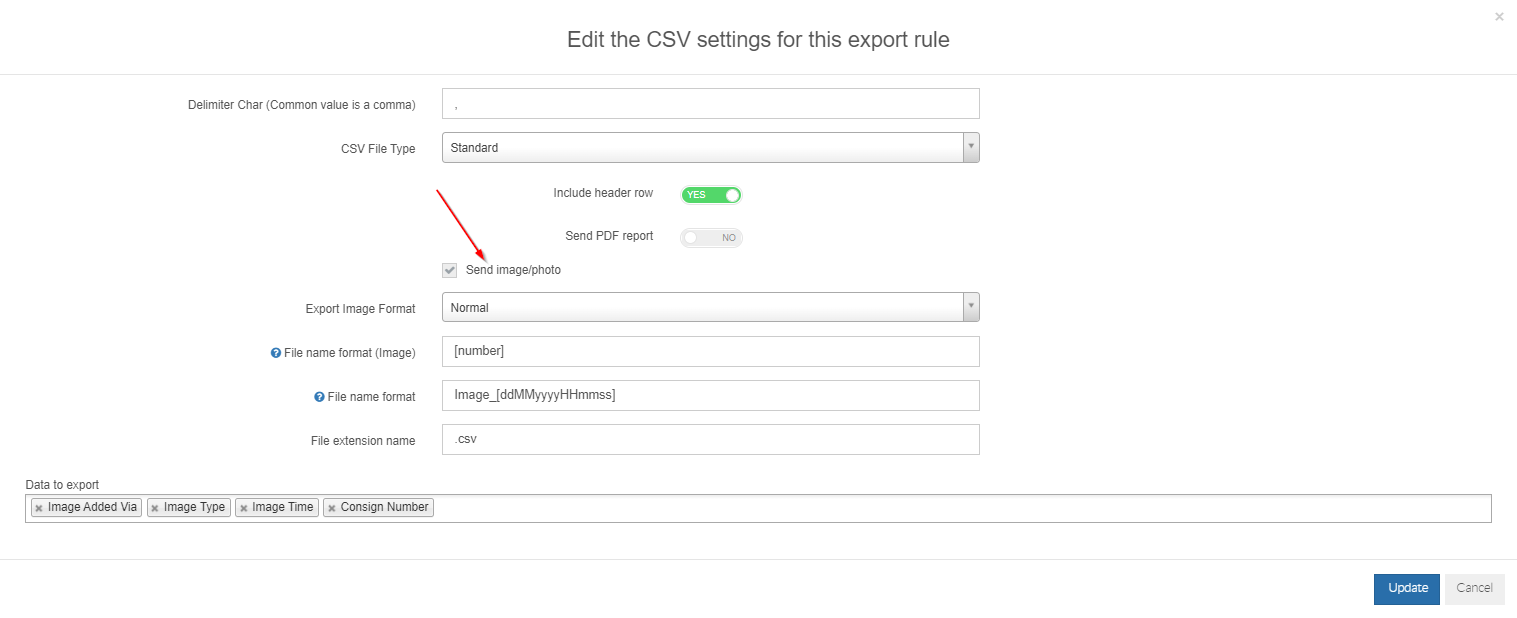
You can see in the above that the Send image/photo setting has been toggled to yes. This is what will send the images in the email. We want this enabled for this example.
Click Update at the bottom of the page to save.
We are now going to change the export type back to None and then Update this change:
You will then see the below window appear:
You can see in the above that the Send image/photo setting has been toggled to yes. This is what will send the images in the email. We want this enabled for this example.
Click Update at the bottom of the page to save.
We are now going to change the export type back to None and then Update this change:
Even though the export type says None, the settings to send photos/images will be remembered in the background to send along with any any emails that are generated. Setting as None means we only want to send the images; we do not want to send a csv or excel file as well.
The next thing to do from here is to Enable Export by toggling the below to YES and then clicking update:
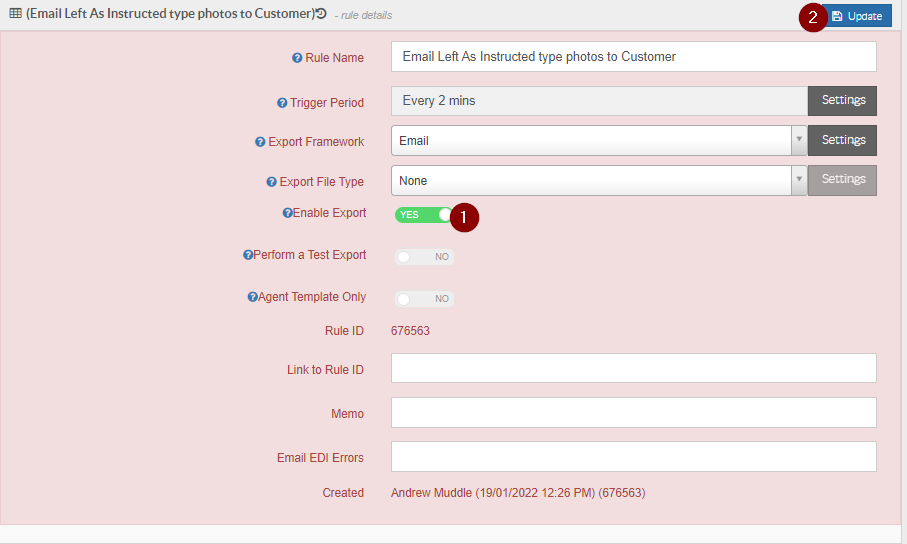
The next thing to do from here is to Enable Export by toggling the below to YES and then clicking update:
You will then notice that the rule is now white in the list - indicating that it is now active.
Extra Information
Whenever photos are taken on a device, the mobile user can specify the type of delivery the photo relates to.
Clicking on a delivery in the delivery page, you will see a screen similar to the below:
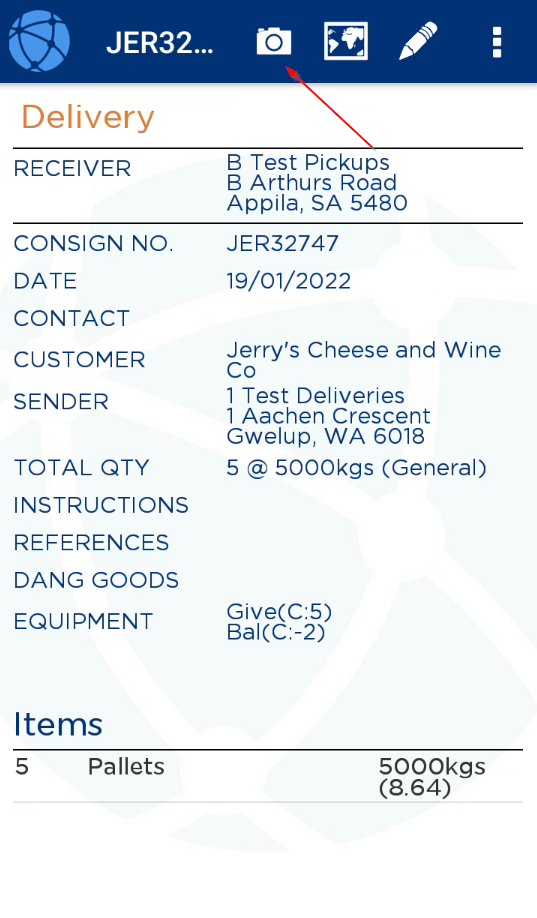
Clicking on a delivery in the delivery page, you will see a screen similar to the below:
The mobile user/driver can click the photo icon at the top of the page to then be able to take and classify a photo:
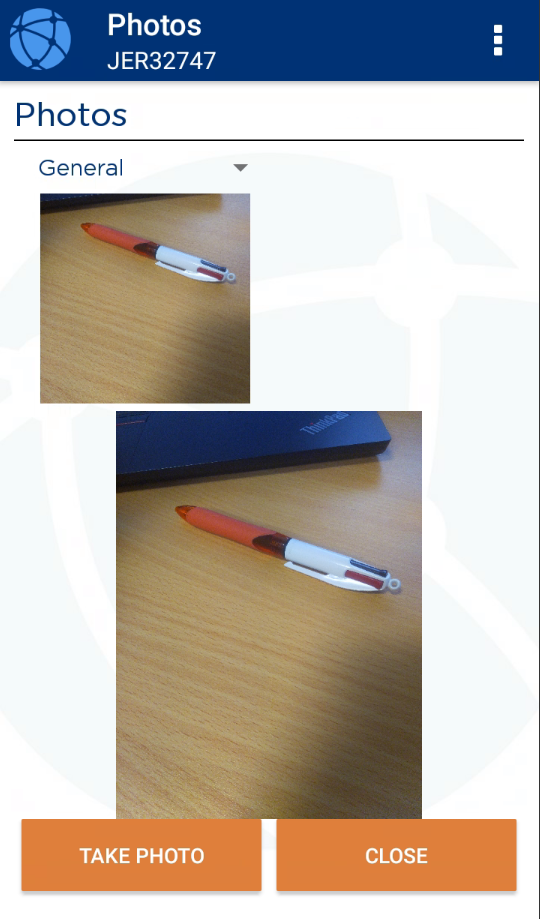
Once all photos have been taken the driver should click the close button to go back to the delivery.
Alternatively, you may have a mobile driver alert setup to force photos on delivery.
This operates in a similar method and more information can found via the link at the top of this page.
Provided, for this example, that the photo attached to a consignment is a Left As Instructed type, the Image EDI export will trigger against the consignment to send the photos to the relevant customer:
These images are seen under the POD & Files tab of a consignment.