Manifest EDI Export
In TransVirtual there is the ability to setup Manifest EDI (Electronic Data Interchange) Export Rules that can send out Manifest information via FTP, Email, etc
The page used to create these rules can be found under EDI > Data Export > Manifests.
This article will detail how to setup a common example; emailing an agent manifest to the agent once it has been created.
This article will detail how to setup a common example; emailing an agent manifest to the agent once it has been created.
Example Setup
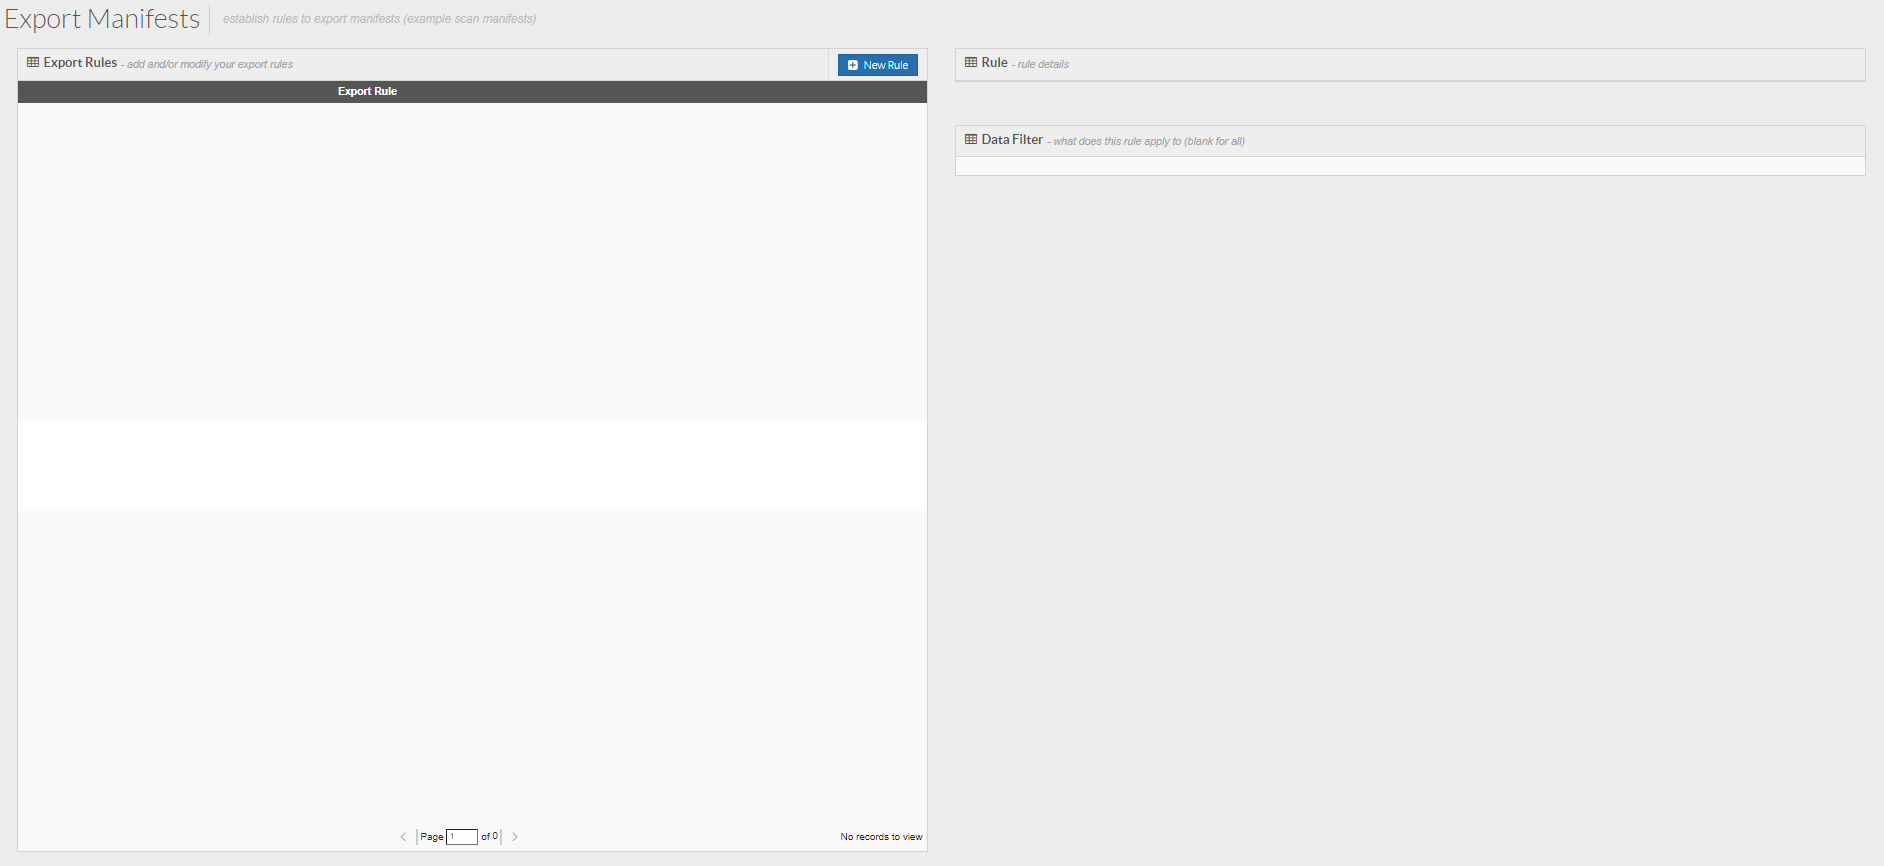
Arriving at this page, you will see a screen similar to the below:
Click the New Rule button at the top of the page to create a new rule. You will then see the below pop-up window appear:
Rule Name = This is where you can specify a name for the rule. The name should be reflective of what the EDI rule will do. For this example we are going to name the rule "Email Agent Manifest to Agent".
Export Framework = This is the method by which TransVirtual will export the information. This example will use Email.
Click Create to create the rule.
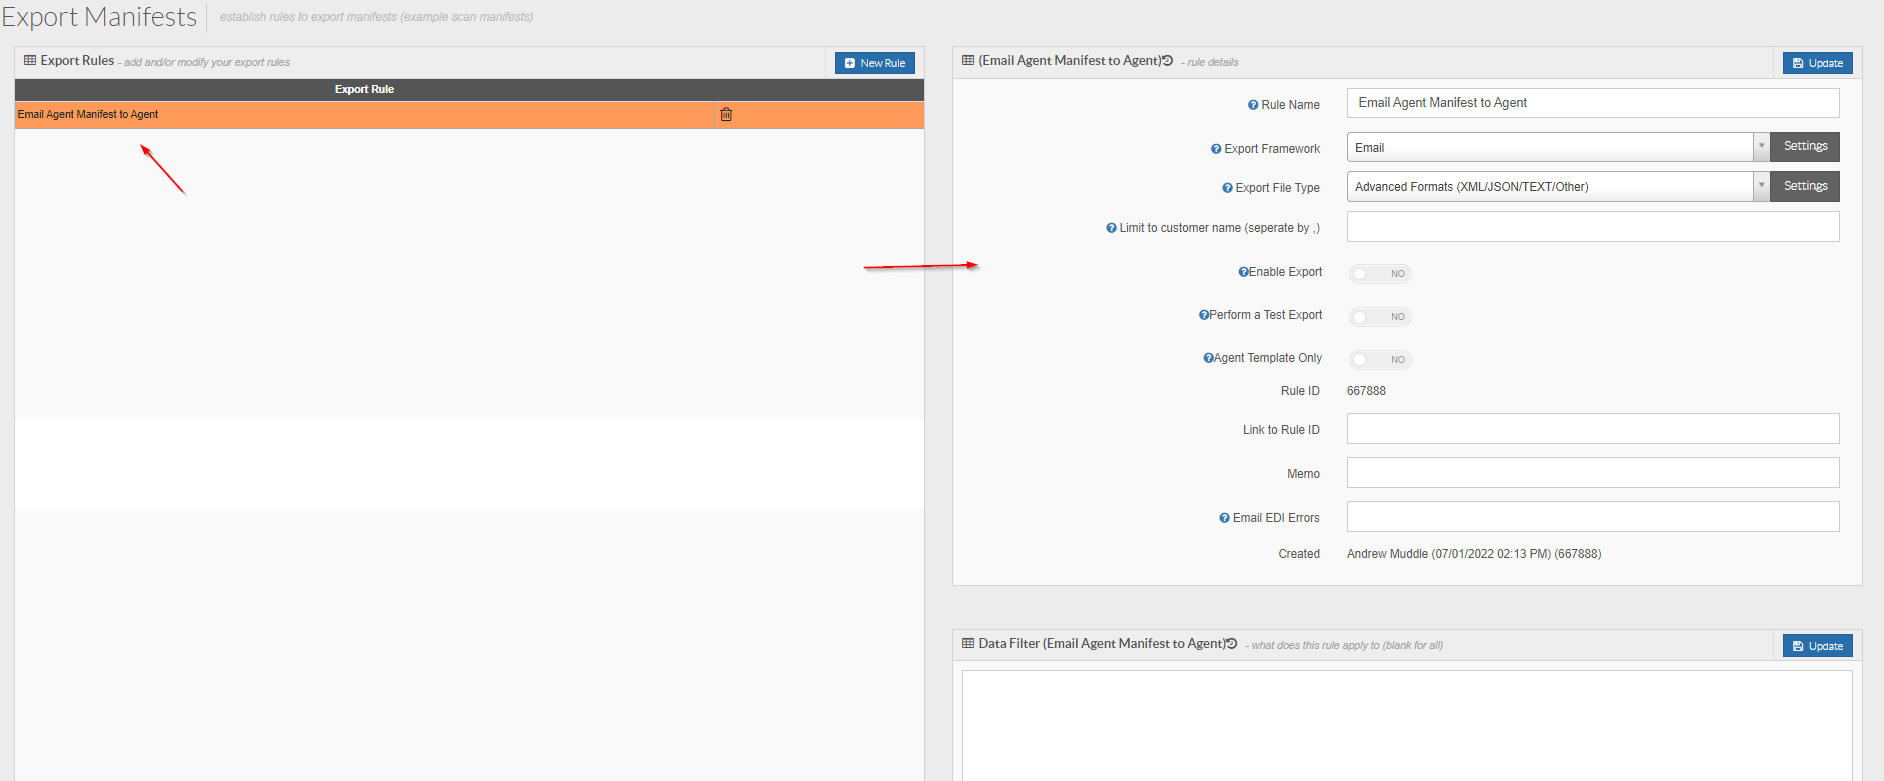
You will then see the rule in your list, in orange, indicating that it is currently inactive.
Click on the rule on the left and the settings for it will appear on the right:
You will then see the rule in your list, in orange, indicating that it is currently inactive.
Click on the rule on the left and the settings for it will appear on the right:
From here, we need to configure the settings.
At the bottom of the page you will see a Data Filter:
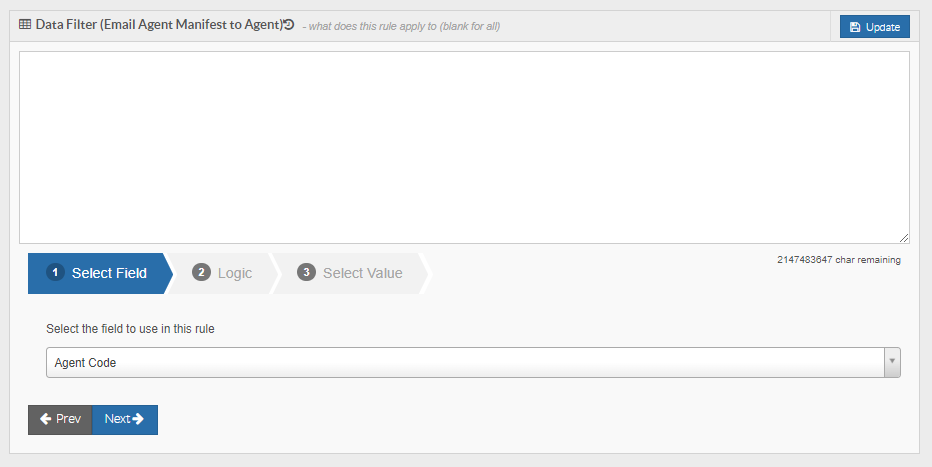
The Data Filter is the driving force behind determining when an EDI rule will and won't apply.
To configure the Data Filter, we need to add logic to it.
To do this, use the Data Filter Builder at the bottom of the page:

In Step 1 of the builder we are going to select Manifest Type, then click Next:
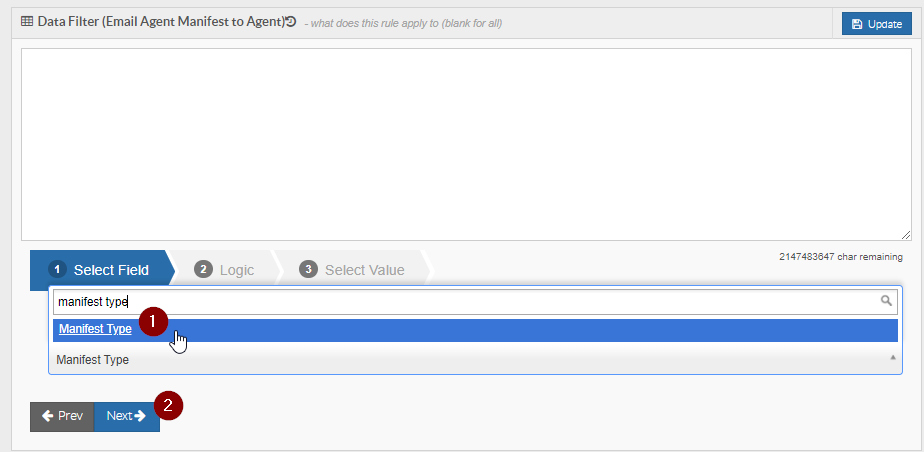
In Step 2, select Equal and then click Next:

In Step 3, select Agent then click Add Rule:

You will then see that there is now text in the Data Filter:
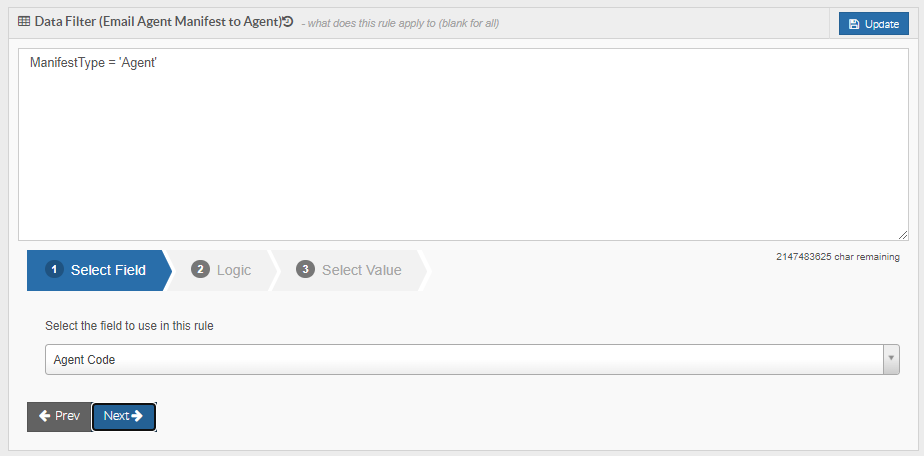
The text here is now logic that tells the system to export any emails using this rule, when there is an Agent type manifest created (a manifest compiled from consignments that have been assigned to the one agent).
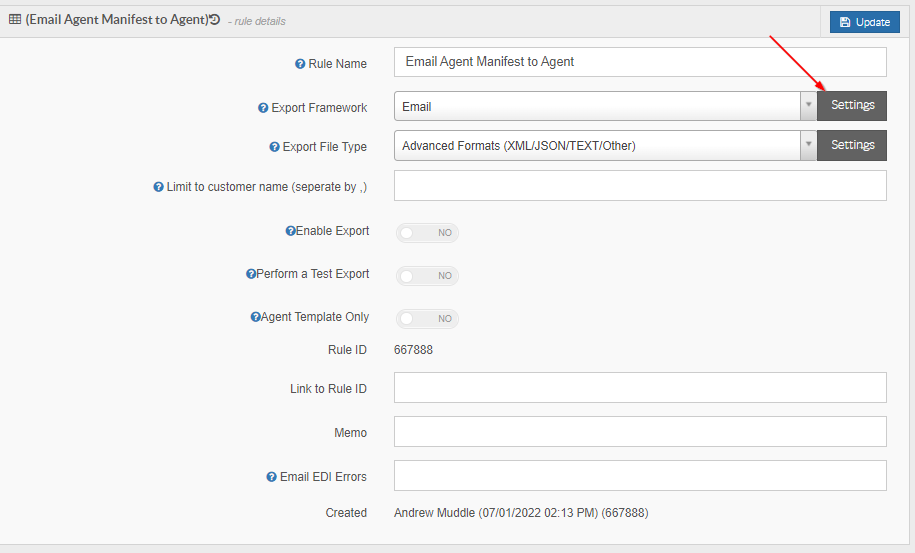
Once the Data Filter has been configured, you will need to modify the rest of the settings located at the top-right.
Rule Name = This should already be populated from when you created the rule. The name can be changed again if needed, but should be reflective of what the rule does.
At the bottom of the page you will see a Data Filter:
The Data Filter is the driving force behind determining when an EDI rule will and won't apply.
To configure the Data Filter, we need to add logic to it.
To do this, use the Data Filter Builder at the bottom of the page:
In Step 1 of the builder we are going to select Manifest Type, then click Next:
In Step 2, select Equal and then click Next:
In Step 3, select Agent then click Add Rule:
You will then see that there is now text in the Data Filter:
The text here is now logic that tells the system to export any emails using this rule, when there is an Agent type manifest created (a manifest compiled from consignments that have been assigned to the one agent).
Once the Data Filter has been configured, you will need to modify the rest of the settings located at the top-right.
Rule Name = This should already be populated from when you created the rule. The name can be changed again if needed, but should be reflective of what the rule does.
Export Framework = Again, this should already be populated with Email from when the rule was created.
However, you can also customize the email that is sent and specify where to send it. Click the Settings button to do this:
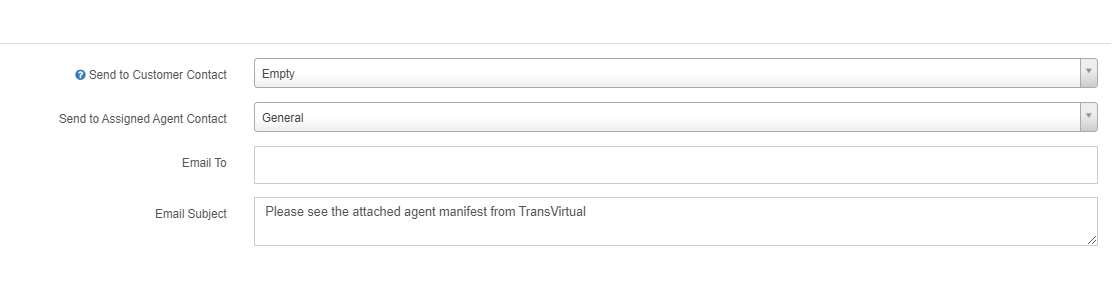
You will then see the below screen appear:

However, you can also customize the email that is sent and specify where to send it. Click the Settings button to do this:
You will then see the below screen appear:
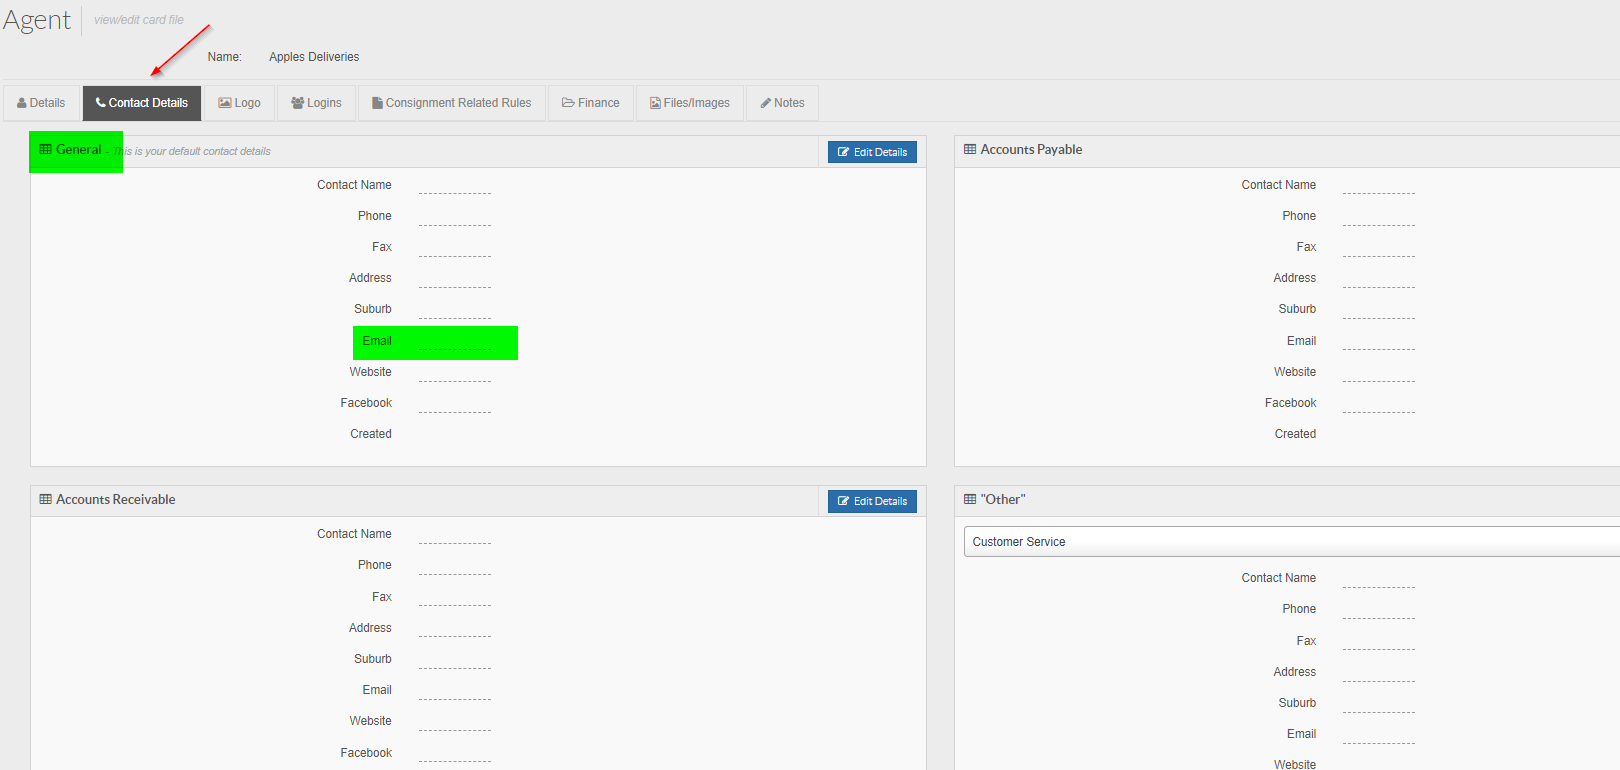
For this rule, we are going to Send to Assigned Agent Contact = General.
The assigned contact listed here will be the email attached to the General contact of the corresponding agent. To find or edit this; Home > Card Files > Agent/Supplier List > Double-click appropriate agent > Contact Detail tab:
We are going to leave the Send to Customer Contact field as Empty because we do not want to send agent manifests to the customers.
For reference, this field works the same as the Send to Assigned Agent Contact but just for customers rather than agents.
Email To = should be used for internal staff where possible as anyone listed here will get all emails generated by this EDI rule. We are going to leave blank for this example.
Email Subject = Used to create a subject for the email. For this example, we are going to use the below:
You can also customize the Email Body. We are going to use the below as our example:

Note: The Validate button at the bottom-left can be used to preview what the email will look like.
Click Update to implement these changes.
Export File Type = This is the file that is sent with the email. For this example we are going to choose Basic CSV/Excel:
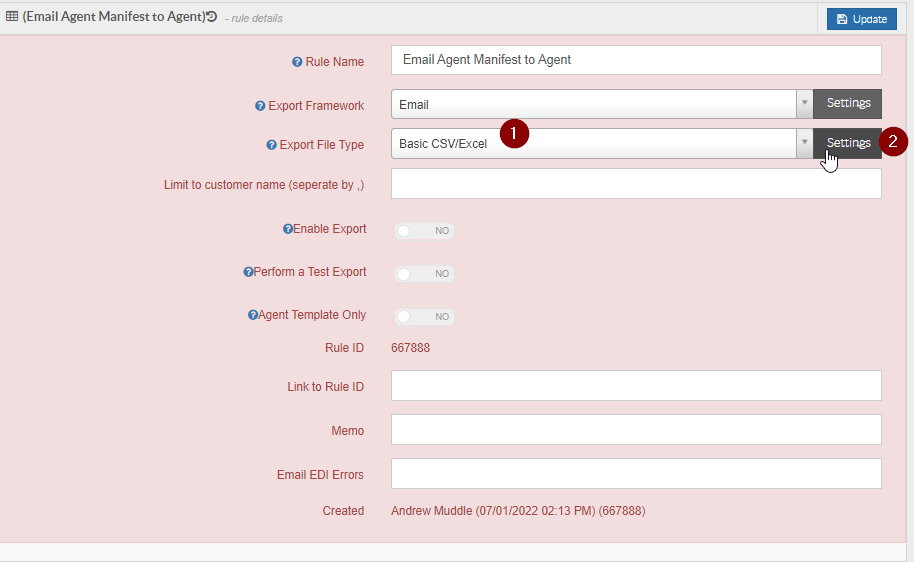
Select the option, then click the Settings button to configure further the export file. You will then see the below:
Select the option, then click the Settings button to configure further the export file. You will then see the below:
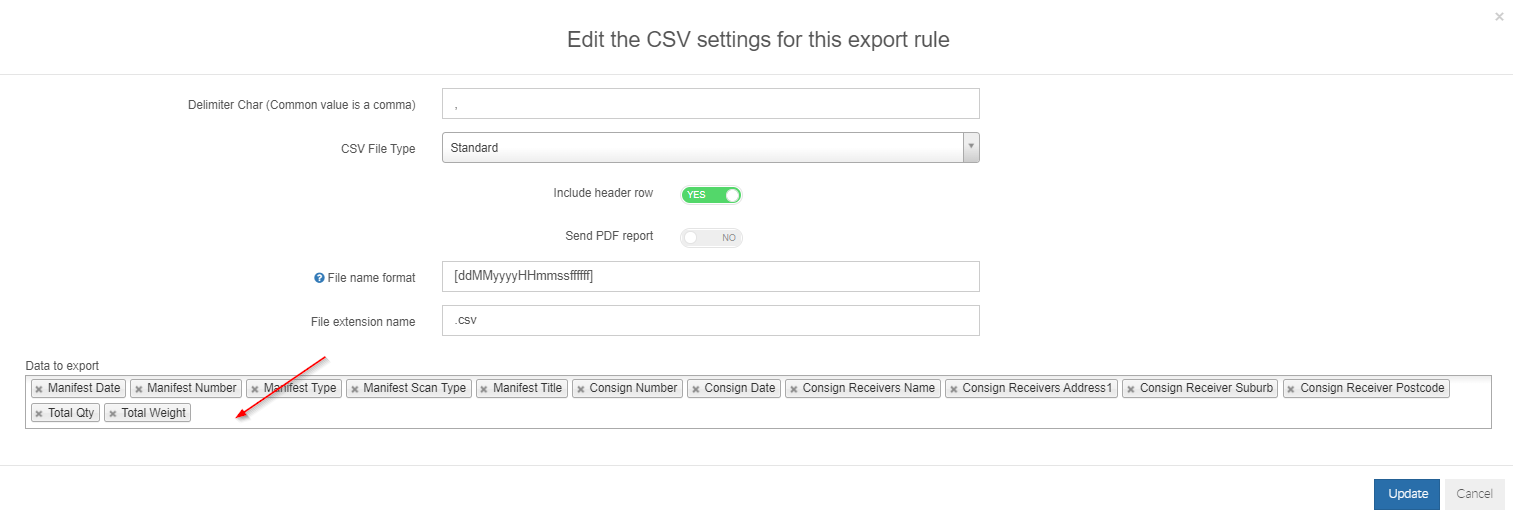
This window will allow you to configure the settings of the excel/csv file.
If needed, you can add in extra columns by selecting the relevant columns from the Data to Export section.
For this example, we are going to leave as is.
Click the Update button at the bottom to apply the changes.
Limit to customer name = This field allows you to list customers you want this EDI rule to apply for. List the customer names and if more than one, separate them by a comma. The customer names MUST be spelt correctly for this to work. We are going to leave blank for this example as it is not required.
The remainder of the settings are not commonly used barring the Enable Rule setting; so we will leave them blank for this example (they are more so used for integration setups when required which is something we at TransVirtual will implement if required).
Enable the rule and click Update to activate the rule:
The rule will now appear in white indicating that it is active.
Note: Manifest rules trigger on manifest close/creation automatically! There is no need to specify a trigger period like with other EDI rules.
Printing Manifests rather than emailing them
The above example covers how to email manifests to an agent.
If needed, you could setup a similar rule that prints off a certain type of manifest (Linehaul for example), rather than having it email to someone.
To do this the setup would be much the same, but you'd need to change the Export Framework to be Printer like so:

If needed, you could setup a similar rule that prints off a certain type of manifest (Linehaul for example), rather than having it email to someone.
To do this the setup would be much the same, but you'd need to change the Export Framework to be Printer like so:
Also select the Printer Name that you want to send the manifest to.
You can also see that the above is set to print Linehaul manifests when one has been created. This may be useful if the Linehaul driver requires a physical copy of the manifested freight they are taking.
When setup correctly, this process happens automatically without any intervention needed to print the manifest PDF.
When setup correctly, this process happens automatically without any intervention needed to print the manifest PDF.

For this to work, you will need to enable a printer in TransVirtual.
Click here for further information on this.
Printers will only be available to select from once you have downloaded the printing app and shared your printer with TransVirtual, as per the help article.
Click here for further information on this.
Printers will only be available to select from once you have downloaded the printing app and shared your printer with TransVirtual, as per the help article.
Note: When selecting Export Framework to be Printer, you will not get an option to choose a file type to print.
A PDF will be printed based on the relevant report template - you can't print an excel file, hence why this choice option does not appear.
A PDF will be printed based on the relevant report template - you can't print an excel file, hence why this choice option does not appear.