Linehaul Routes
Linehaul Routes
In TransVirtual there is the ability to setup Linehaul Routes which are a set of pre-defined routes that any Linehaul freight may take.
Linehaul Routes are typically depot to depot runs and are created using zone list data from the below field:
The zone list being used can be found and changed under Settings > General > Global Setup.

If changing to a new list, do so with caution!
The Linehaul Routes page can be found under Settings > General > Linehaul Routes.
This article will detail how to setup Linehaul Routes.
How to
Arriving at this page in TransVirtual, you will see a Screen similar to the below:
This page is used to create any Linehaul routes you may use.
To create a Linehaul Route click the Add Route button at the top of the page:
The pop-up window that appears will ask you to specify a from and to zone; where is the Linehaul departing from and going to?
The options that appear will be based on the zones you have setup in your Route/Scan/Agent Zone List setup in the global settings.
Select a Zone from and a Zone To and then click the Save button to create this Route:
The Route will then appear in the list:

Note: You can import a Linehaul Route list using the Import Route Table List option seen when creating a new Route. If importing a list, you will need the below columns in your csv file:
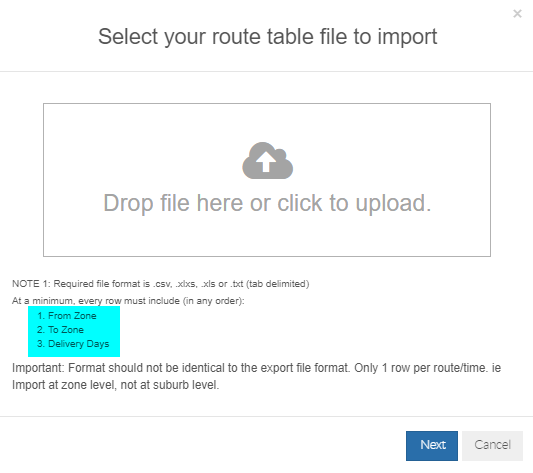
The zones specified in the file should match what are listed in your Route/Scan/Agent Zone List.
The zones specified in the file should match what are listed in your Route/Scan/Agent Zone List.
Once you have created a Linehaul Route, click on it and you will see the settings for it appear on the right-hand side of the page:
Route Detail
This section is used to configure the Route:

Route Name = This is the name applied to the Route. The name should be reflective of the from and to zones for this Route.
Headport From and Headport To = These shouldn't need to be changed as they are populated when you create the Route. However, if required, you can change the values in these fields to be the from and to zones for the Route.
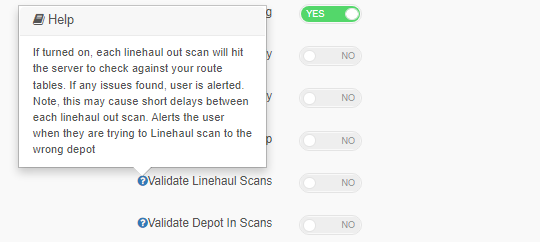
Valid Headport Scan Locations = This section is used to apply a series of Headport scan locations that are valid for this Route. For example, any freight going from Brisbane > Melbourne may stop in at Sydney and get scanned and processed there before heading to Melbourne. Adding Sydney as a valid Headport scan means that when Linehaul freight travelling from Brisbane > Melbourne gets scanned at Sydney, the user scanning at Sydney will not get an error of possible misdirected freight.
This concept will only work if the below setting is enabled in the global setup page:
Settings > General > Global Setup for the above setting.
Provided this setting is on, any mobile users scanning freight at a location other than those listed as valid headport scan locations will receive a message on their device to say the freight may be misdirected. This is handy to ensure freight does not accidentally travel in an incorrect direction.
The Headport locations that display for this field will be derived from the below list:
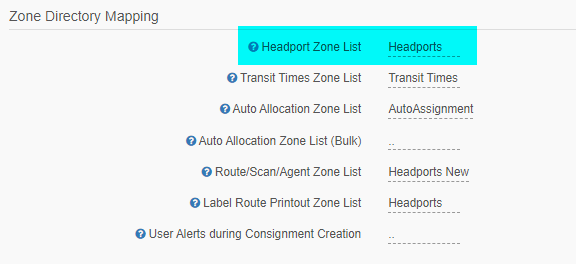
Settings > General > Global Setup for the above listing.
Valid Agent Scan Locations = This setting is used to specify what agent scan locations are valid for this Route. Typically speaking, an agent of yours will only operate out of the one depot/headport. For example:
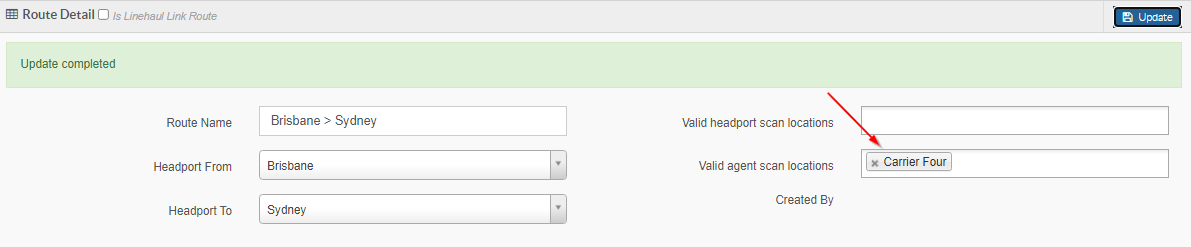
In the above, Carrier 4 operates out of Singleton, NSW. Setting Carrier 4 as a Valid Agent Scan Location means that when a user for this agent scans some Linehaul freight travelling from Brisbane > Sydney, they will not receive a misdirect message on their device. If another agent user from another location was to scan this Linehaul freight, they would receive a misdirect error message. This field is similar to the Valid Headport Scan locations field in that it allows you to specify allowable scan locations for this Linehaul Route - anything scanned outside of the valid scan locations will receive an error message.
The values that appear in this field are the agent names in your account.
This concept will only work if the below setting is enabled in the global setup page:
Settings > General > Global Setup for the above setting.
Provided this setting is on, any mobile users scanning freight at a location other than those listed as valid headport scan locations will receive a message on their device to say the freight may be misdirected. This is handy to ensure freight does not accidentally travel in an incorrect direction.
The Headport locations that display for this field will be derived from the below list:
Settings > General > Global Setup for the above listing.
Valid Agent Scan Locations = This setting is used to specify what agent scan locations are valid for this Route. Typically speaking, an agent of yours will only operate out of the one depot/headport. For example:
In the above, Carrier 4 operates out of Singleton, NSW. Setting Carrier 4 as a Valid Agent Scan Location means that when a user for this agent scans some Linehaul freight travelling from Brisbane > Sydney, they will not receive a misdirect message on their device. If another agent user from another location was to scan this Linehaul freight, they would receive a misdirect error message. This field is similar to the Valid Headport Scan locations field in that it allows you to specify allowable scan locations for this Linehaul Route - anything scanned outside of the valid scan locations will receive an error message.
The values that appear in this field are the agent names in your account.
Setting up a Linked Linehaul Route
The above section so far has detailed how to create a standard Linehaul Route. There is also the ability in this page to create a Linked Linehaul Route which is an 'over-arching' Linehaul leg containing smaller Linehaul legs. For the example, you may have Linehaul leg of Brisbane > Perth. For this leg however, the actual journey that is taken may be Brisbane > Sydney, then Sydney > Melbourne, then Melbourne > Adelaide, then Adelaide to Perth.
Creating a Linked Linehaul Route is way to create one overall Leg that encompasses smaller legs within; doing so means that any included legs are valid scan locations that ensure freight is travelling in the right directions.
To do this the setup is much the same as the above method.
Click the Add Route button and a pop-up screen similar to the below will appear:
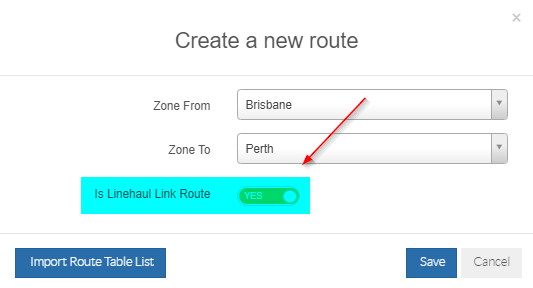
Apply the Zone From and Zone To. Also Toggle the Is Linehaul Link Route to YES. Click the Save button to create the Linked Linehaul Route.
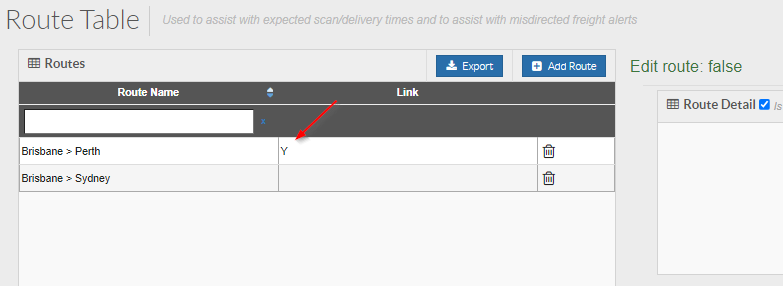
The Route will then create and appear in the list with a Y in the Link section:
Click on the Route and the settings for it will appear on the right:
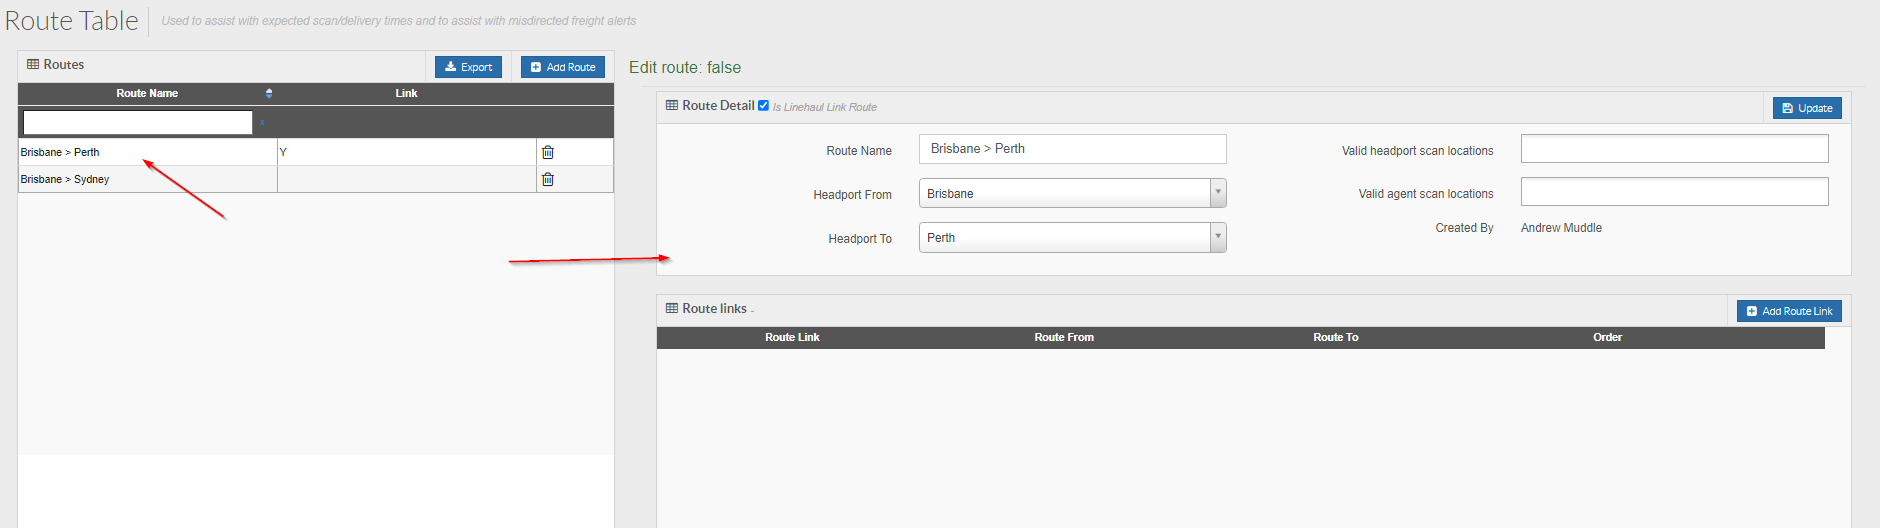
You'll notice that the setup is much the same as with a non-linked Route. However, at the bottom of the page on the right there is the ability to Add Route Link:

Click this button to add a leg to this Linehaul Route. You will then see a pop-up window like the below appear:
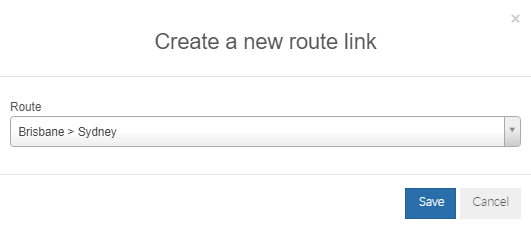
Using the drop-down, select any existing Linehaul Routes that form a leg of this linked Linehaul Route.
Click Save to create and add.
You will then see the added leg appear in the below grid:
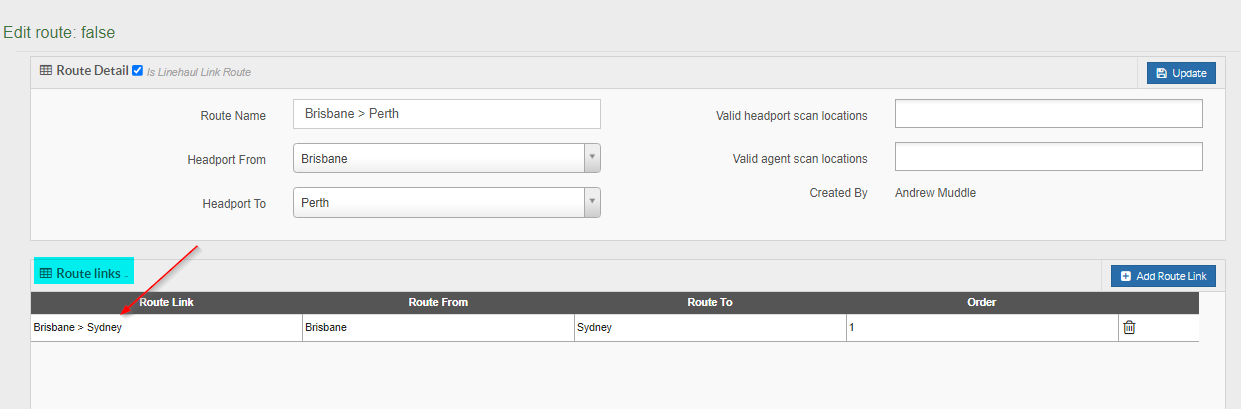
In the above image, Brisbane > Sydney is now a leg or part of Brisbane > Perth.
You could then add in the other legs that form part of the Brisbane to Perth journey.
Creating a Linked Linehaul Route is way to create one overall Leg that encompasses smaller legs within; doing so means that any included legs are valid scan locations that ensure freight is travelling in the right directions.
To do this the setup is much the same as the above method.
Click the Add Route button and a pop-up screen similar to the below will appear:
Apply the Zone From and Zone To. Also Toggle the Is Linehaul Link Route to YES. Click the Save button to create the Linked Linehaul Route.
The Route will then create and appear in the list with a Y in the Link section:
Click on the Route and the settings for it will appear on the right:
You'll notice that the setup is much the same as with a non-linked Route. However, at the bottom of the page on the right there is the ability to Add Route Link:
Click this button to add a leg to this Linehaul Route. You will then see a pop-up window like the below appear:
Using the drop-down, select any existing Linehaul Routes that form a leg of this linked Linehaul Route.
Click Save to create and add.
You will then see the added leg appear in the below grid:
In the above image, Brisbane > Sydney is now a leg or part of Brisbane > Perth.
You could then add in the other legs that form part of the Brisbane to Perth journey.
Transit Times and Transit Time Details:
For information on how to set these sections up please refer here to be directed to the Transit Times article.
Related Articles
Best Process for Scanning Cages and adding freight to a Linehaul manifest/run
Best Process for Scanning Cages and adding freight to a Linehaul manifest/run This article will explain the process involved in using floor scans to create scan manifests, which can then be Linehaul Manifested. This may be handy if you and your team ...Manifests
Manifests In TransVirtual there are many different types of manifests. Manifests are simply a collection of consignments into a group. The below will detail the different types that can be generated in TransVirtual and what they are used for. ...Transit Times
Transit Times In Transvirtual you are able to set up a listing of zones and expected delivery/pickup time-frames. Please refer to the extra information section which explains how to seperate the Linehaul Routes and Transit Times which allows the "Add ...Enterprise TMS Core Feature List
TransVirtual Enterprise Edition provides the full range of TMS features and flexibility. It combines rapid out-of-the-box functionality with the a vast range of enterprise level customizations and configuration. Account Management Customers and ...Process/Workflow Table of Contents
Individual components of TransVirtual can be brought together to create practical processes and workflows. This list introduces you to our default or recommended options. Consignment Lifecycle/Overview Consignment Creation Manually created via Web ...