Consignment Status EDI Export
Consignment Status EDI Export
In TransVirtual there is the ability to create Consignment Status Export EDI (Electronic Data Interchange) rules that send out status update information about a consignment, to a location; via FTP, Email, etc.
This page can be found under EDI > Data Export > Consignment Status Updates.
This article will run through a common setup that most TransVirtual users implement; sending On Delivery notifications to a customer (their freight has been loaded and is on its way).
This page can be found under EDI > Data Export > Consignment Status Updates.
This article will run through a common setup that most TransVirtual users implement; sending On Delivery notifications to a customer (their freight has been loaded and is on its way).
Example Setup
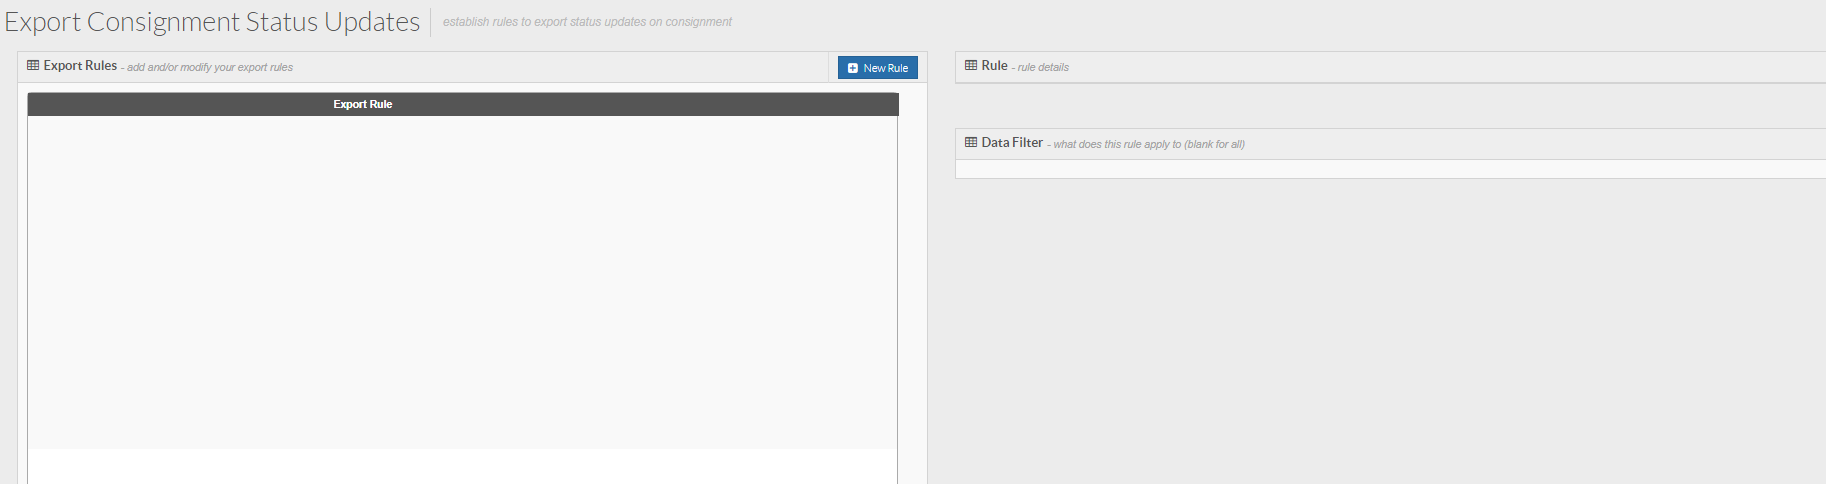
Arriving at this page your screen will look similar to the below:
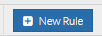
From here we are going to create a rule using the New Rule button at the top of the page:

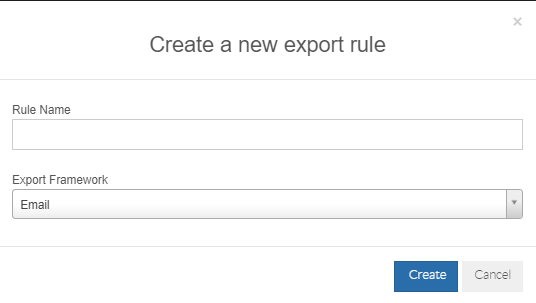
You will then be presented with a pop-up window like the below:
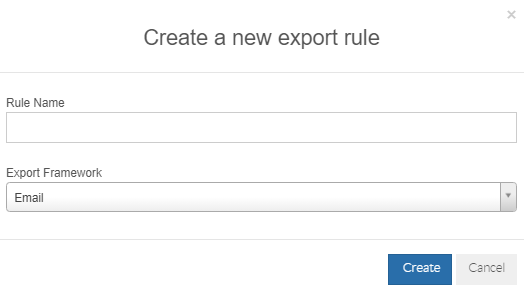
The Rule Name field is where you will enter the name for this rule; call it something that relates to what the rule does. For this example we are going to call the rule "OnDelivery Email Notification to customer".
From here we are going to create a rule using the New Rule button at the top of the page:
You will then be presented with a pop-up window like the below:
The Rule Name field is where you will enter the name for this rule; call it something that relates to what the rule does. For this example we are going to call the rule "OnDelivery Email Notification to customer".
The Export Framework is the method that TransVirtual will use to export this information out from the system. For this example we are going to set as Email.
After you have configured this, click the Create button to create and add this rule to your list.
You will then see the rule appear in the list. It will be highlighted in Orange, indicating it is inactive.
Click on the rule on the left and the settings for it will appear on the right-hand side:
From here we need to configure the settings.
At the bottom of the page you will see the below Data Filter:
Data Filters in TransVirtual are used to determine when an EDI rule will and won't apply to a consignment.
We need to add text (logic) to the Data Filter so that it knows when to apply this EDI rule to a consignment.
To modify the Data Filter, use the Data Filter builder at the bottom of the page:
For this example we are going to create a Data Filter that applies to consignments that currently have an On Delivery status, which is generated when a user/driver load scans a consignment.
To do this, click the builder and select the field that says Status Name:
Click the Next Button.
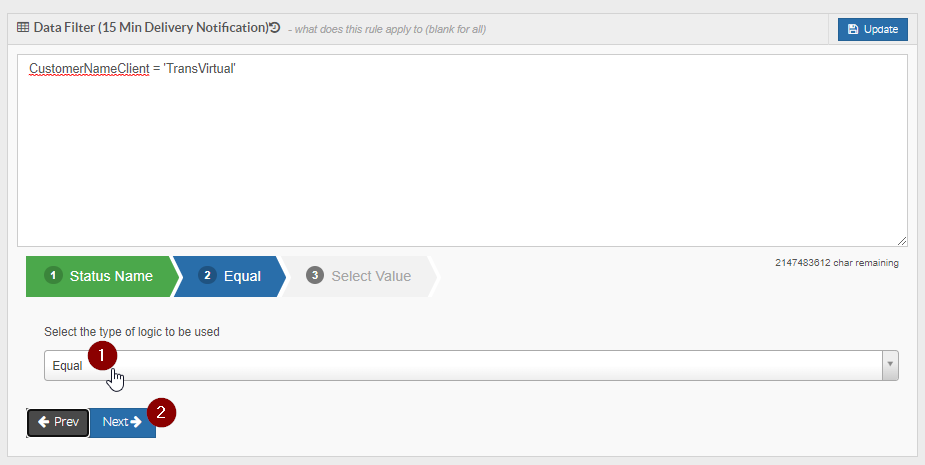
From here we need to apply the logic value for Step 2 of the builder. For this example we are going to say Equal:
Click the Next button to progress to step 3 of the builder.
In step 3 of the builder we are going to specify a Status Name that we want this Data Filter to apply to.
Select On Delivery:
Click Add Rule and you will then see text appear in the Dat Filter as per the below:

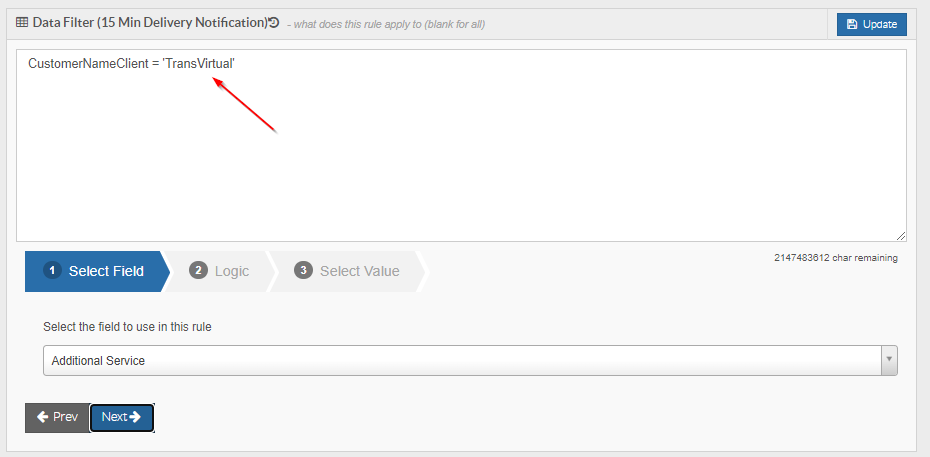
If you only wanted these notification emails to be sent for a specific consignment customer you could add an extra line to the Data Filter that specifies the desired customer.
Step 1 would be Customer Name, Step 2 would be Equal and Step 3 would be what the customer's name in your account is.
For this example, we want these notifications to be sent for all customers so we are going to leave as is with just the first line of logic.
Once the Data Filter has been configured, you then need to configure the settings at the top of the page:
Rule Name = This is simply the name of the EDI rule. We are going to leave as is for this example.
Trigger Period = This is the field where you specify how often the EDI rule will run. For this example we are going to set as Every 2 Mins:
Limit Exports = This setting controls how many times an EDI can be performed for the same event/consignment. For this example we are going to leave as Not Required.
Export Framework = This will determine how the information is sent out of TransVirtual. For this example we are going to set as Email.
To edit what is sent with the email, click the Settings button next to this field:
Once clicked, you will see a screen similar to the below:
The toggles at the top of this window can be used to send these emails to a consignment sender or receiver. You may want to send to the sender or receiver when their freight is On Delivery.
For this example, we are going to select a customer contact to send these notifications to using the below:
These contacts are based on what has been setup in the relevant customer's customer card under the contact details tab:
You can choose any contact section you wish, but must make sure that there is an email listed against that contact.
For this example we are going to set as General.
Email To = This should only be used for internal staff unless you are limiting this export rule to only apply to a specific customer using he Data Filter. Any emails listed here will receive all emails generated by this EDI rule; so generally speaking it is best to only list internal staff here.
For this example we are going to leave blank as we only want to send to the customer.
Email Subject = This can be used to specify an email subject.
For this example we are going to create a subject using the below:

Note: @Model.ConsignmentNumber is a special coding function that will automatically populate the consignment number for each consignment this rule triggers against.
It is very important that this code is typed exactly as per the above for this to work properly.
Once you have configured this page, we are going to amend the Email Body:
In this section you can type a message that will be sent as part of the email body. For this example we are going to use the below:
The @Model.ConsignmentTracking URL is also a special coding function that will send a link that the customer can click on to view the tracking of their consignment. Ensure that this code is spelt exactly as per the above.
Note: The Validate button at the bottom of this window can be used to preview what the email will look like and it also checks to ensure any coding functions are correct and will not cause issues. If needed, use this button to confirm setup is okay.
From here, you can click the Update button at the bottom of the window to implement these changes:
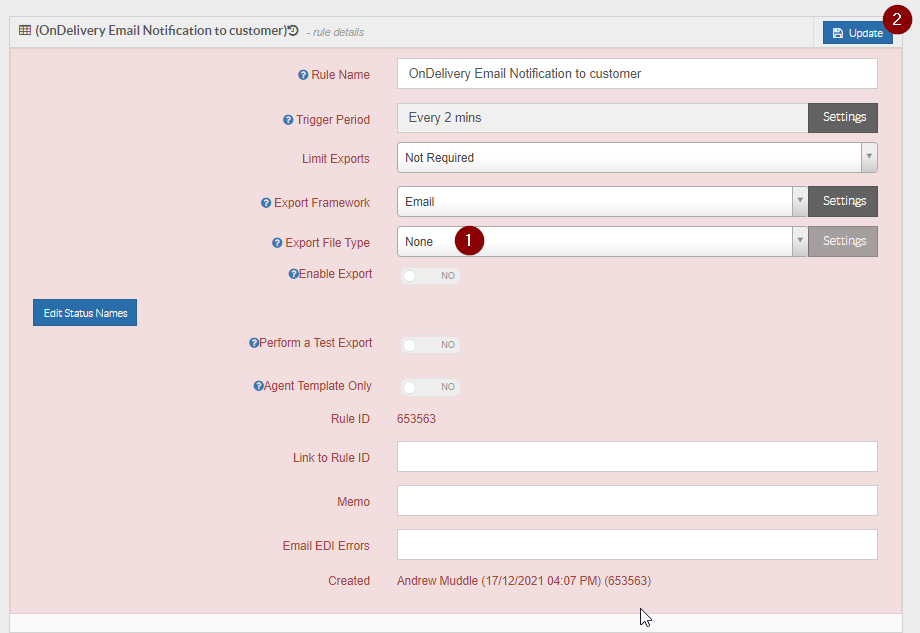
The next thing to configure is the Export File Type Settings = This is what type of file you wish to send with the email (if any).
For this example we are going to set this to None as we don't need to send any labels etc. Change the file type and set as None, then click the Update button at the top:
From here the next thing to do is enable the Export Rule using the Enable Export toggle. Slide to YES and then click Update:
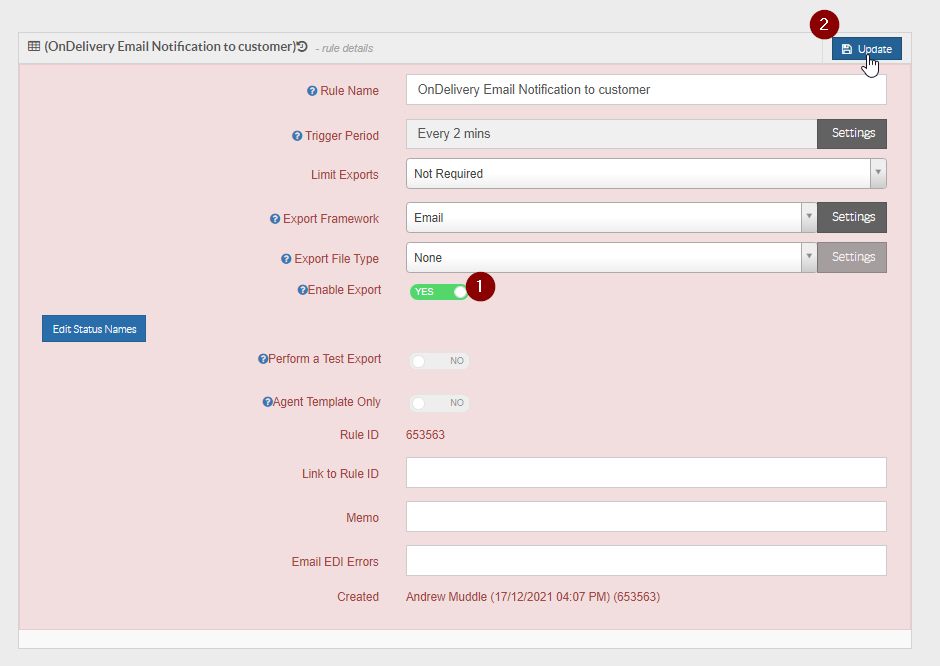
Once you have done this the rule will flag in white, indicating that it is now currently active:
From here the next thing to do is enable the Export Rule using the Enable Export toggle. Slide to YES and then click Update:
Once you have done this the rule will flag in white, indicating that it is now currently active:

Any successful EDI rules that have triggered on a consignment will appear under the communications tab of that consignment:
You can see in the above that this consignment currently has a status of On Delivery; therefore it is eligible for this EDI rule.
Delivery Updates at 30 and 15 minutes from location
In addition to the above, TransVirtual also has the ability to send out notifications to consignment customers, senders and receivers to provide notifications when their consignment is roughly 30 or 15 minutes away from being delivered.
This setup is normally done via SMS and the below example will use that to demonstrate; this will also be setup under the Status Updates page, which can be found under EDI > Data Export > Consignment Status Updates.
Users using the updated 2022 menu should go to Import/Export > Data Export > Status Updates

The Route Optimisatation module MUST be enabled for this process to work!

SMS sending in TransVirtual is a paid function. Each text message sent from your account will incur a charge. Further information for this can be found in the Rates and Modules page of your account:
Settings > TransVirtual Account > Rates and Modules
Or
Settings > TransVirtual Account > Rates and Modules
Or
Configuration > TransVirtual Account > Rates and Modules (Updated 2022 menu users)
Arriving at this page, your screen will look similar to the below:
From here, click the New Rule button:
You will then be presented with a pop-up window similar to the below where you can enter the initial details of your new export rule:
The Rule Name field is where you will enter the name for this rule; call it something that relates to what the rule does. For this example we are going to call the rule "15 Min Delivery Notification".
The Export Framework is the method that TransVirtual will use to export this information out from the system. For this example we are going to set as SMS.
After you have configured this, click the Create button to create and add this rule to your list.
You will then see the rule appear in the list. It will be highlighted in Orange, indicating it is inactive.
Click on the rule on the left and the settings for it will appear on the right-hand side:
From here we need to configure the settings.
At the bottom of the page you will see the below Data Filter:
Data Filters in TransVirtual are used to determine when an EDI rule will and won't apply to a consignment.
We need to add text (logic) to the Data Filter so that it knows when to apply this EDI rule to a consignment.
To modify the Data Filter, use the Data Filter builder at the bottom of the page:
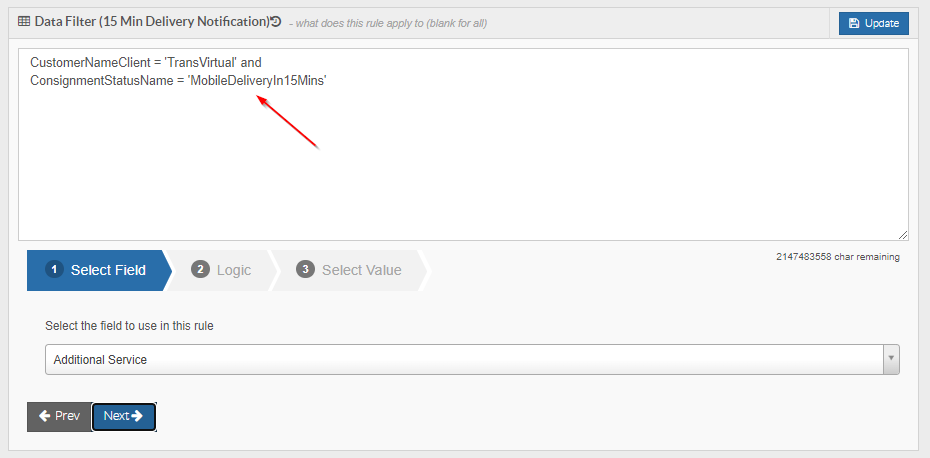
For this example, our Data Filter will apply to consignments for a nominated customer where the consignment status is MobileDeliveryIn15Mins.
To set this up, click on the Data Filter drop-down and select the Customer Name Field. Click Next after selection:
To set this up, click on the Data Filter drop-down and select the Customer Name Field. Click Next after selection:
In Step 2 of the builder, select Equal then click Next to progress:
In Step 3 of the builder select the appropriate customer name and then click Add Rule to implement:
Once you click Add Rule, you'll notice that there is now text (logic) in the Data Filter and it will look similar to the below:
You will now also need to specify the relevant status this applies to.
To add this logic to the Data Filter, click and select Status Name from Step 1 of the builder, then click Next:

Step 2 will be Equal, then click Next:
Step 3 will be Mobile - Delivery ETA 15mins, then click Add Rule:
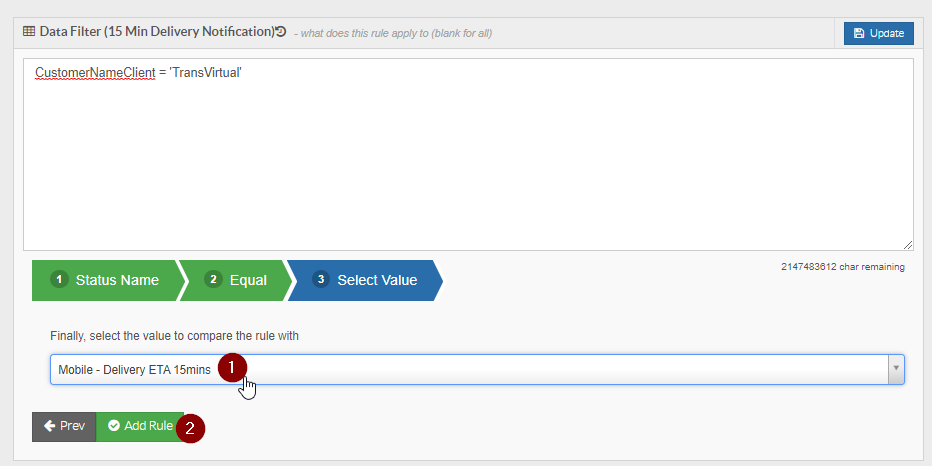
To add this logic to the Data Filter, click and select Status Name from Step 1 of the builder, then click Next:
Step 2 will be Equal, then click Next:
Step 3 will be Mobile - Delivery ETA 15mins, then click Add Rule:
After adding the rule, you'll see this extra text in your Data Filter:
In addition to the above, it may be a good idea to add another condition to the Data Filter like the below IF you have a similar rule setup for 30 min notifications:
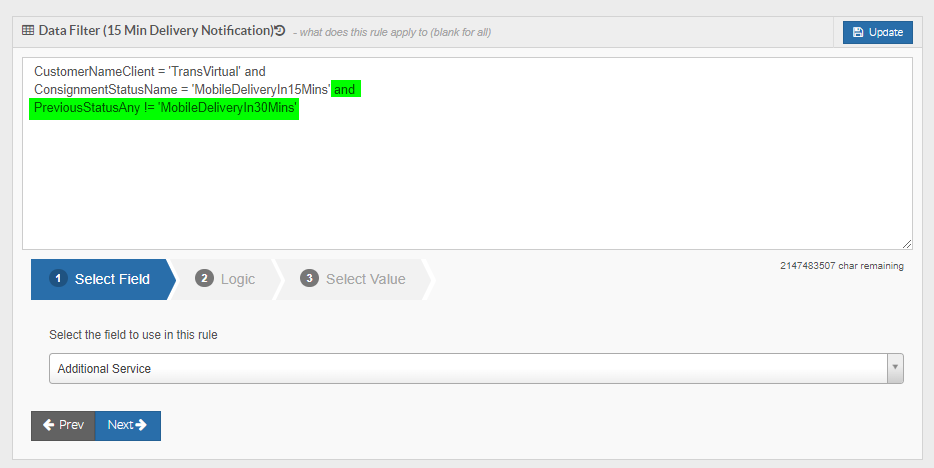
If you wanted to add this, the logic is Previous Status (Any), then Not Equal, then Mobile - Delivery ETA 30mins and Add Rule.
Note: The reason adding this extra condition/line to the Data filter may be a good idea would be if you also have a 30 minute delivery notification version of this rule setup. If that is the case you may not want to send both a notification SMS at 30 and 15 minutes. This extra line means that this 15 minute text notification will only occur if the system has not previously sent a message/SMS out at 30 minutes.
This is may come in handy as it costs money to send texts so you may want to only send either a notification at 30 OR 15 minutes NOT both.
If you only have the one EDI rule then disregard this as it only applies if you have both the 30 and 15 minute rules setup.
Once the Data Filter has been setup, you then need to configure the settings at the top of the page:
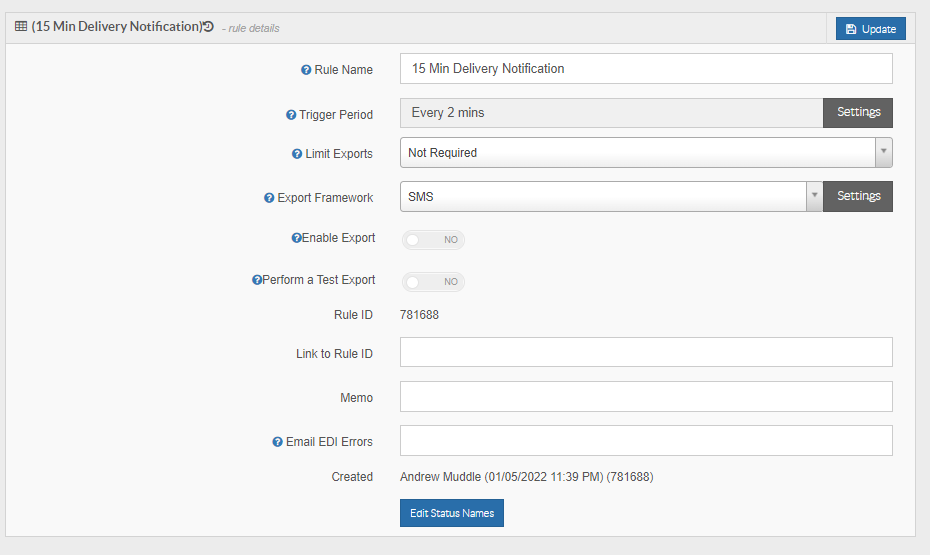
Rule Name = This is the name of the EDI rule and will already be populated with what you entered when creating the rule. You can change again if needed but ensure that the name is reflective of what the rule will be used for.
Trigger Period = This is the field where you specify how often the EDI rule will run. For this example we are going to set as Every 2 Mins:
Limit Exports = This setting controls how many times an EDI can be performed for the same event/consignment. For this example we are going to leave as Not Required.
Export Framework = This will determine how the information is sent out of TransVirtual. For this example we are going to set as SMS.
To edit what is sent with the SMS, click the Settings button next to this field:
You will then see a screen similar to the below appear:
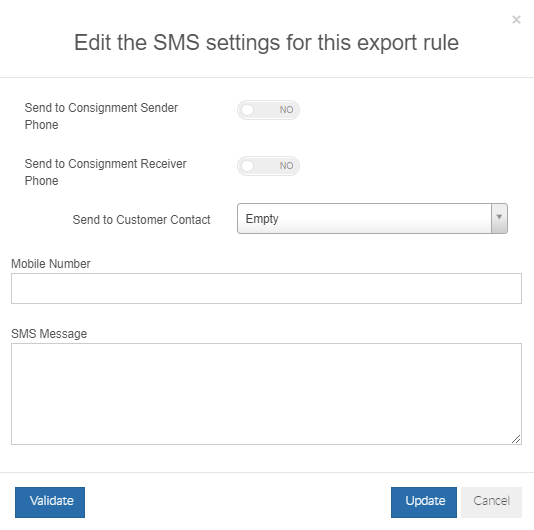
This is where you will need to configure where the SMS/texts are sent and what they say.
Starting from the top, there are toggles for Sending to Consignment Sender or Receiver Phone.
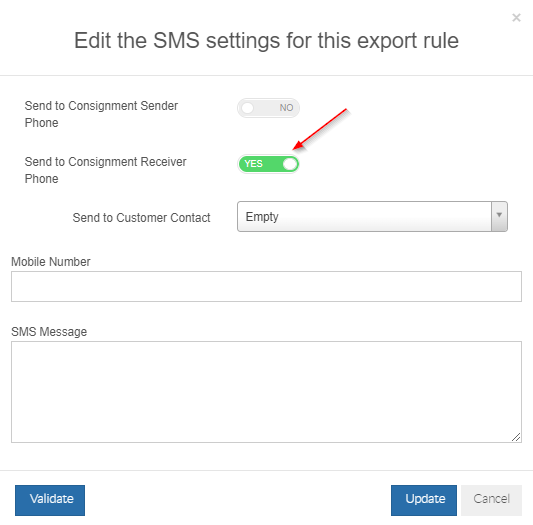
For this example, we are going to toggle Send to Consignment Receiver Phone to YES:
Starting from the top, there are toggles for Sending to Consignment Sender or Receiver Phone.
For this example, we are going to toggle Send to Consignment Receiver Phone to YES:
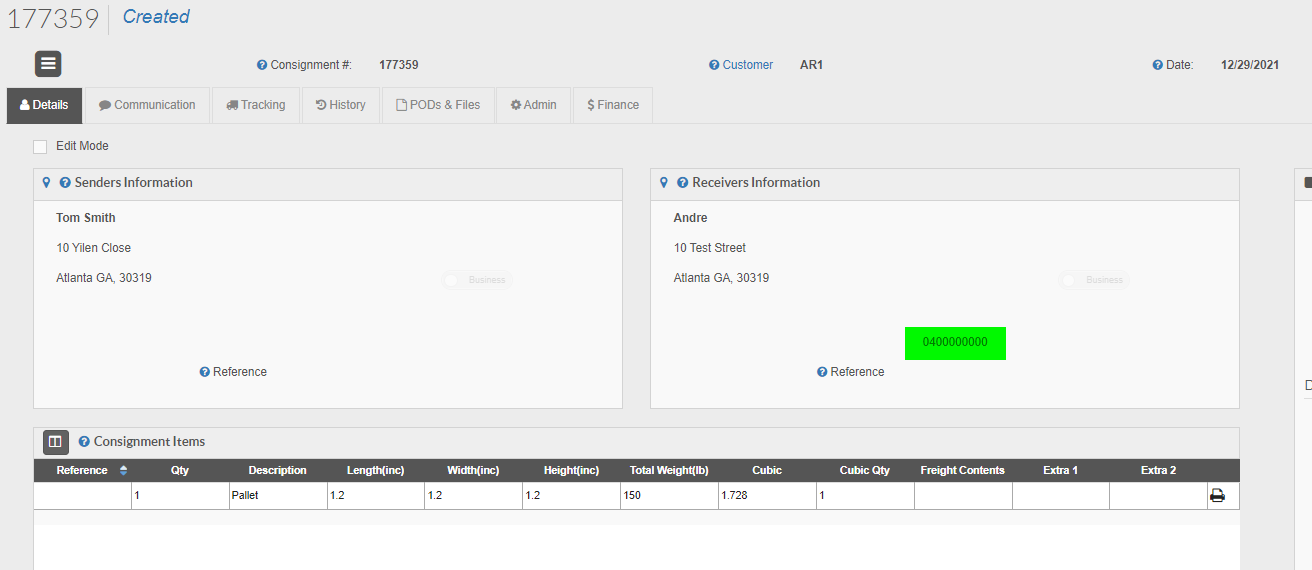
The consignment receiver phone is the number listed in the below:
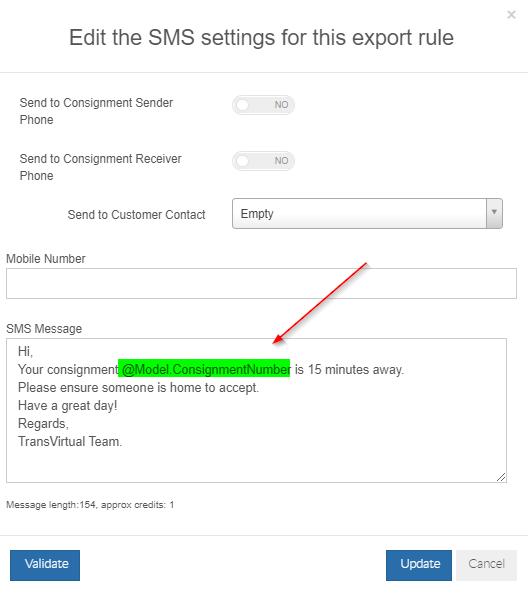
Next, you need to customise the message that will be sent to this phone number.
To, do this, simply type your desired text into the SMS Message field at the bottom:
To, do this, simply type your desired text into the SMS Message field at the bottom:
You'll notice that as you start typing, you will see something similar to the below appear:
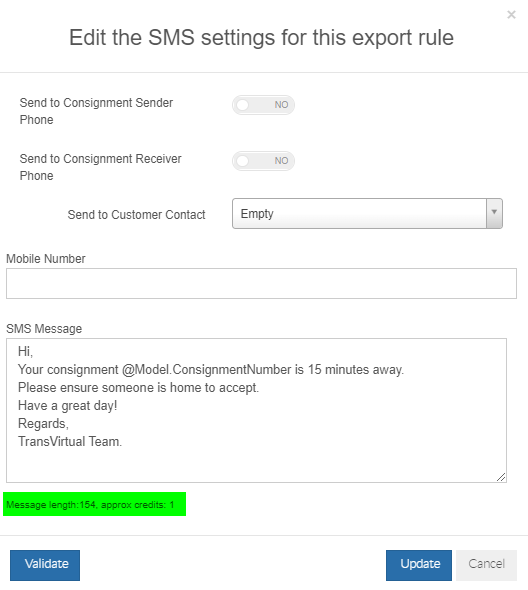
This message gives you an indication of how long your message is and thus how many credits will be used to send each SMS.
The more credits used the more it will cost you; so best to ensure the message is short and sweet to minimise costs (if required).
This message gives you an indication of how long your message is and thus how many credits will be used to send each SMS.
The more credits used the more it will cost you; so best to ensure the message is short and sweet to minimise costs (if required).
Note: @Model.ConsignmentNumber is a special coding function that will automatically populate the consignment number for each consignment this rule triggers against.
It is VERY IMPORTANT that this code is typed exactly as per the above for this to work properly.
Use the Validate button bottom left of this window to ensure the setup is correct - the screen will go white and display an example SMS if all good.
Once configured, click the Update button bottom-right to implement.
The rule is now configured for this example.
Toggle Enable Export to YES and then click Update to enable this EDI rule:
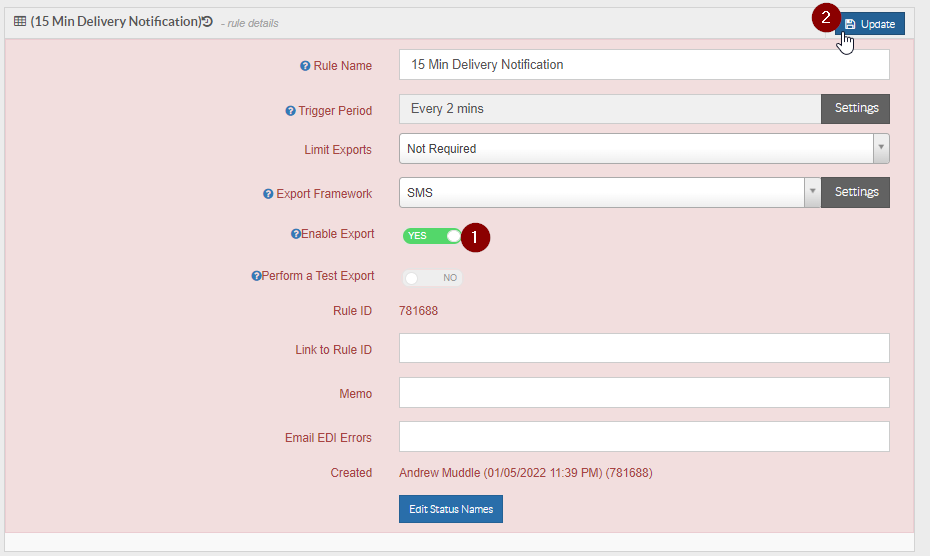
Toggle Enable Export to YES and then click Update to enable this EDI rule:
You will then notice that the rule appears white in colour from the list on the left - indicating it is now active:
How does this actually work?
Once setup, the rule will fire and work automatically to apply to any consignments where TransVirtual is the customer (for this example) and the current status is Mobile - Delivery ETA 15 Mins.
This status is achieved by TransVirtual talking to the driver's mobile device. Each device (as long as it is turned on and GPS is enabled) sends back GPS data periodically to TransVirtual letting the system know its location. When TransVirtual gets this information, it can work out how far away a driver/device is from a location and if 15 mins, the system assigns applicable consignments the status of Mobile - Delivery ETA 15 Mins which is then part of the trigger to send an SMS to the client informing them that their delivery will arrive shortly.
This status is achieved by TransVirtual talking to the driver's mobile device. Each device (as long as it is turned on and GPS is enabled) sends back GPS data periodically to TransVirtual letting the system know its location. When TransVirtual gets this information, it can work out how far away a driver/device is from a location and if 15 mins, the system assigns applicable consignments the status of Mobile - Delivery ETA 15 Mins which is then part of the trigger to send an SMS to the client informing them that their delivery will arrive shortly.
This process requires that the device remain on and that the TransVirtual app has GPS permission along with GPS being enabled from within the device settings.
This process also requires that the driver follow the run order listed on their device!
This process is only as good as the GPS data being received back from the device!
This process also requires that the driver follow the run order listed on their device!
This process is only as good as the GPS data being received back from the device!
Important to note: If for some reason a driver is unable to complete the delivery, they MUST ensure that they 'fail' the delivery so that this export rule does not keep attempting/sending the SMS. For help with this, please click here or here.