Route Optimisation Dashboard
Route Optimisation – Dashboard
Overview
The Route Optimisation Dashboard provides a real-time, visual overview of all delivery runs for a selected day. It allows operations teams to view planned routes, identify unassigned (ad-hoc) jobs, and quickly assign work to drivers directly from the map or job list.
This dashboard is designed to help you:
-
Optimise daily delivery routes
-
Reduce manual planning time
-
Respond quickly to last-minute jobs
-
Improve visibility across all active runs
Where to Find the Dashboard
Navigation path:
Transport → Route Planner → Dashboard
Dashboard Layout Explained
1. Map View (Centre Panel)
What you’ll see:
-
All active delivery runs plotted on the map
-
Colour-coded routes representing different drivers or vehicles
-
Pickup and delivery locations displayed in route order
How to use it:
-
Click on a route to highlight all jobs assigned to that run
-
Zoom in to review delivery sequencing and geographic clustering
-
Select individual jobs directly from the map to view details or assign them
📌 Tip: The map updates dynamically as jobs are assigned or removed.
2. Date Selector (Top Bar)
What it does:
-
Controls which day’s runs and jobs are displayed
How to use it:
-
Click the date picker at the top of the dashboard
-
Select the required date
-
The dashboard refreshes automatically with that day’s data
📌 Best practice: Always confirm the correct date before assigning jobs to avoid misallocations.
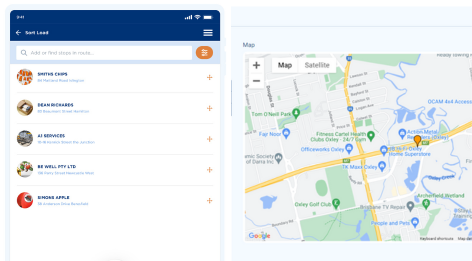
3. Unassigned (Ad-Hoc) Jobs Panel
What you’ll see:
-
Jobs not yet allocated to a run
-
Typically includes late bookings or manually created consignments
How to use it:
-
Review job details (location, time window, service type)
-
Click a job to highlight it on the map
-
Assign it to an existing route or create a new run
📌 Tip: Keep this list clear throughout the day to avoid missed deliveries.
4. Filters Panel
Available filters may include:
-
Route
-
Zone
-
Job type
-
Vehicle or driver
How to use filters:
-
Open the filter panel
-
Select one or more criteria
-
The map and job lists update instantly
📌 Use filters to:
-
Focus on a single driver’s workload
-
Review zone-specific capacity
-
Identify jobs requiring special handling
Assigning Jobs from the Dashboard
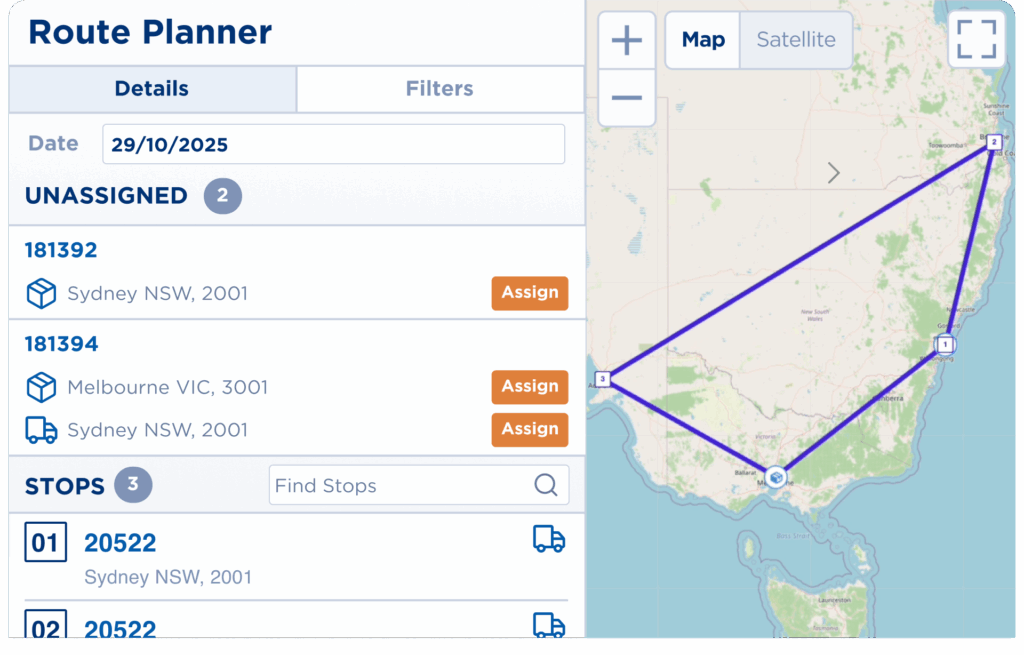
Assign an Unassigned Job to a Run
-
Locate the job in the Unassigned Jobs list or on the map
-
Click the job to open its quick actions
-
Select Assign
-
Choose the target run or driver
-
Confirm the assignment
✅ The job is immediately added to the selected route and the map refreshes.
Assign Jobs Directly from the Map
-
Click the job pin on the map
-
Review job details in the popup
-
Select Assign
-
Choose the appropriate run
-
Confirm
📌 Why this helps: Assigning from the map allows you to visually select the most logical route based on proximity and sequencing.
Common Use Cases
-
Managing same-day or urgent deliveries
-
Rebalancing workloads between drivers
-
Reviewing route efficiency before dispatch
-
Quickly responding to last-minute customer requests
Related Articles
-
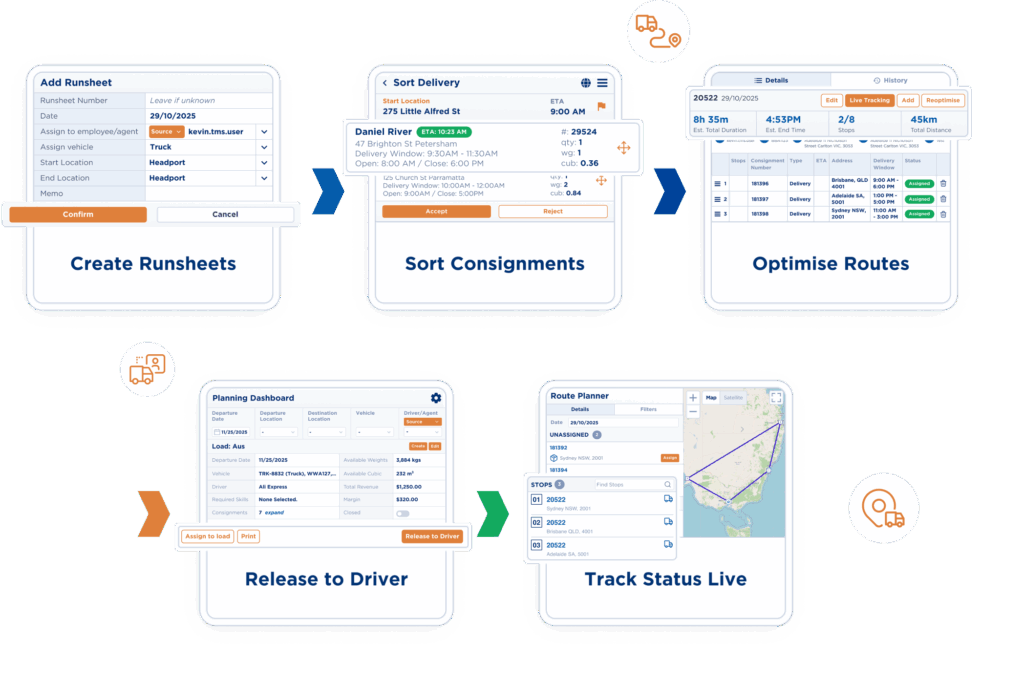
Route Optimisation – Creating Runsheets
-
Route Optimisation – ETA Notifications
-
Route Optimisation – Time & Distance Rates
Need Help?
If you’re unsure how to configure Route Optimisation or don’t see this feature in your account, contact your TransVirtual Support Team via the support portal.