Report Designer Templates
TransVirtual uses a series of report templates that are used to generate the labels, consignment note PDFs, Invoice PDFs, etc. that you see when using TransVirtual.
These report templates can be customized from the default version if required.
A common example of why you may need to customize a report template would be when setting up your invoicing.
The default invoice templates seen in TransVirtual do not include your bank details which are an essential thing that needs to be added so that customers can pay you via EFT.
This article will run through how to make changes to an Invoice report template.
The Report Designer Templates can be found via going to Reports > Reports Template > Report Designer Templates.
Example
Arriving at this page you will see a screen similar to the below:
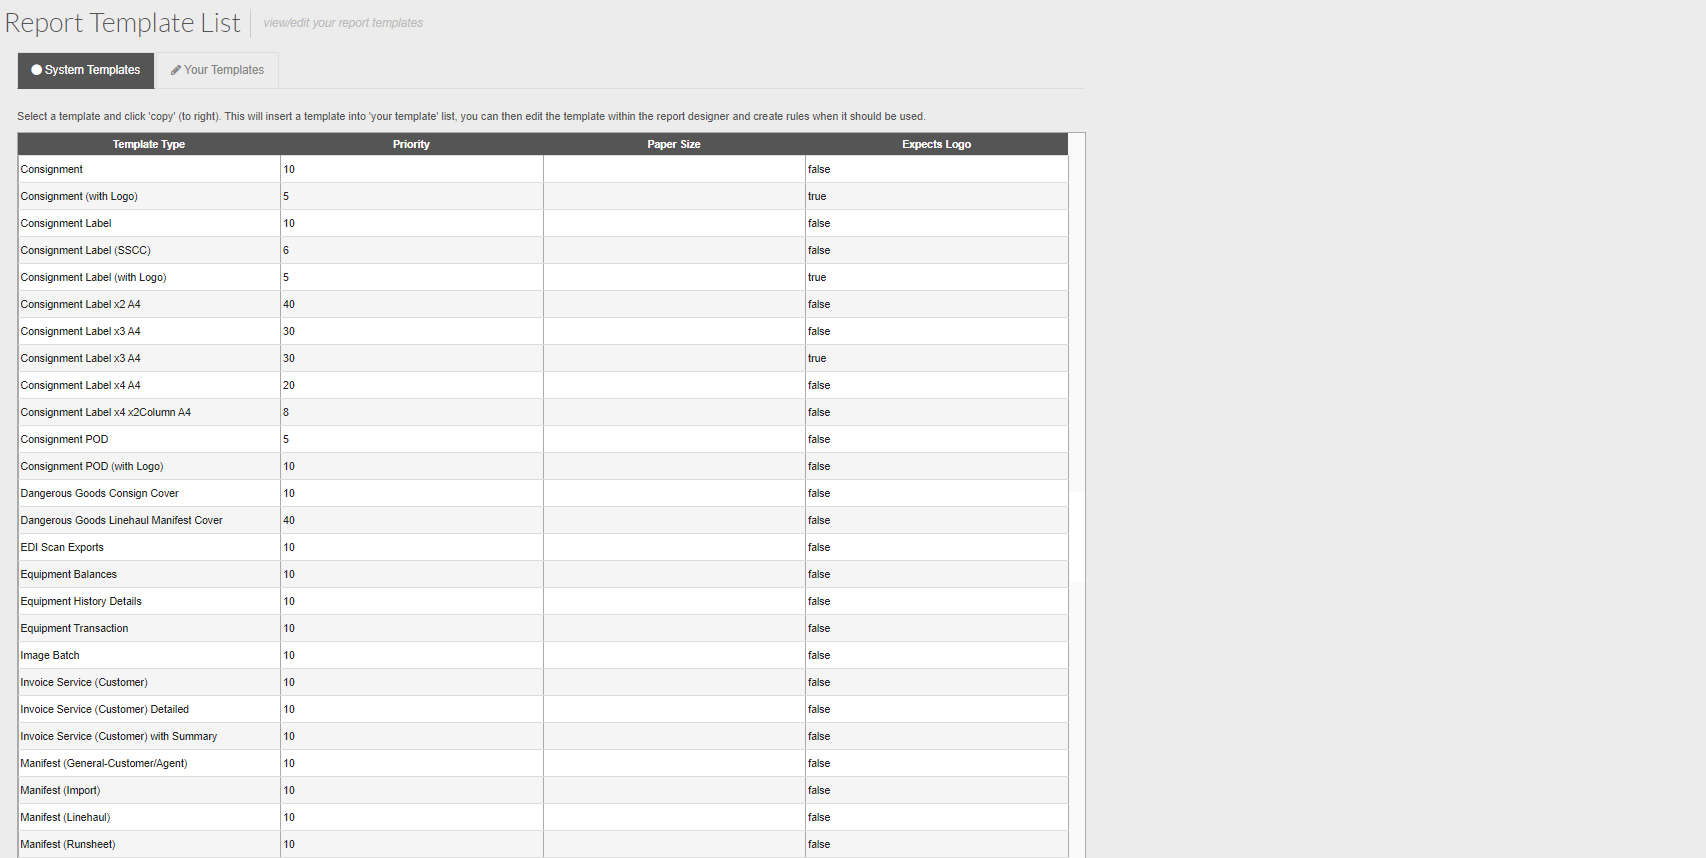
You will land on the System Templates tab by default - this is a list of all of the available system report templates.
The Template Type gives you an indication of what each report is used for.
You will land on the System Templates tab by default - this is a list of all of the available system report templates.
The Template Type gives you an indication of what each report is used for.
For this example, we are going to modify an Invoice type report to include your bank details.
To do this, we need to select a report template from the list that we are going to modify.
To do this, we need to select a report template from the list that we are going to modify.
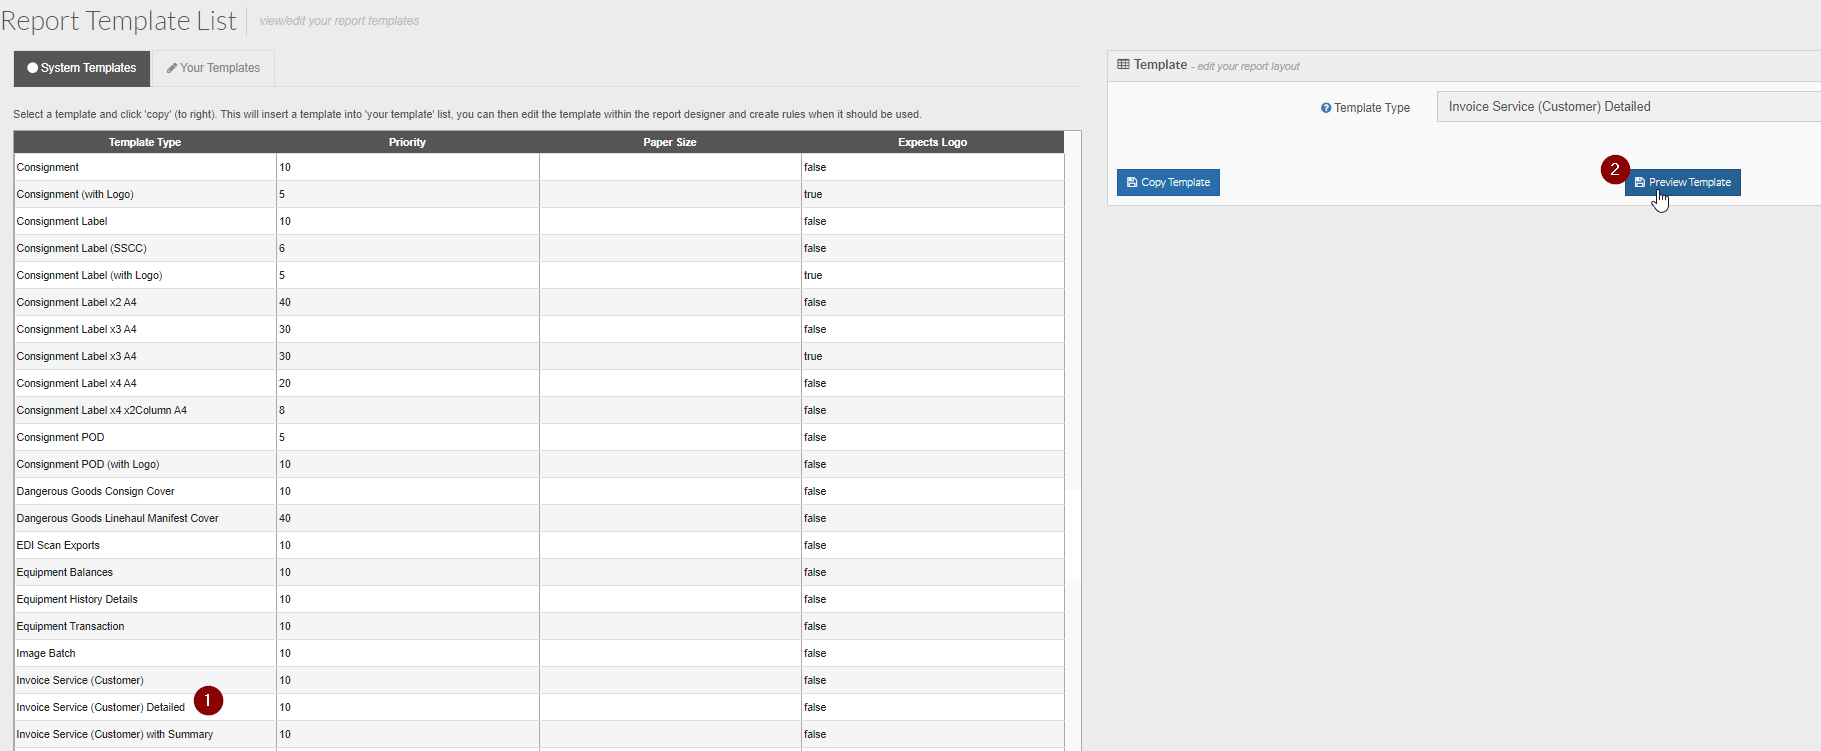
From the list, you can preview a report by clicking on it on the left and then clicking the preview button on the right:
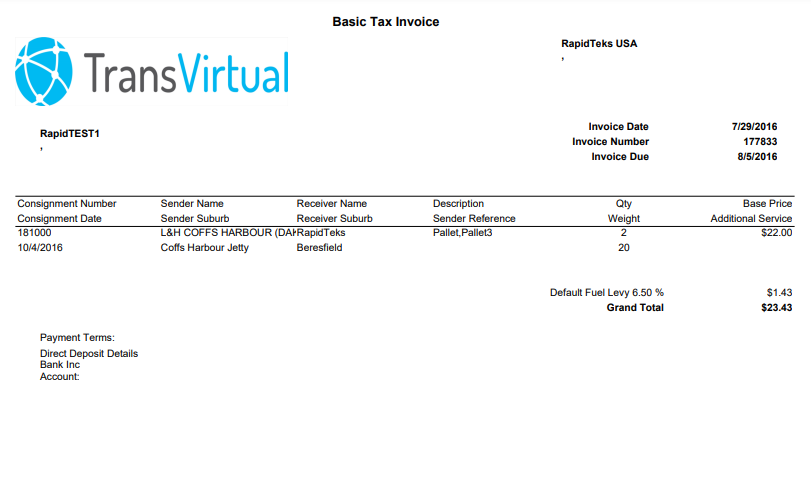
The preview will give you an idea of what an invoice would look like using this template:
For this example, we are going to use Invoice Service (Customer) Detailed as the report we will modify.
To be able to modify this report, you will need to copy it from the System Templates across to the Your Templates tab.
To do this, click the relevant template, then click the Copy Template button:

You will then see the below pop-up window appear:
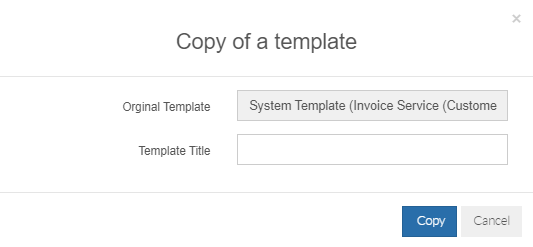
Give this template copy a Template Title. This is simply the name of the new report template you are creating. Name it something that is refelctive of what it does or who it applies to (it may only apply to a specific customer etc).
Click the Copy button to copy it across.
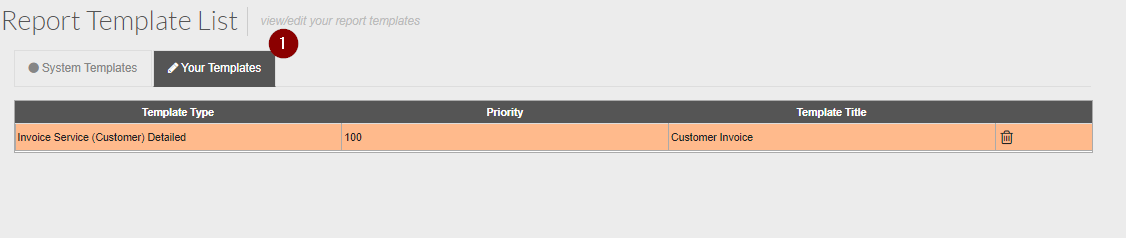
Click on the Your Templates tab at the top of the page and you will now see your template copy in the list, in orange - indicating that it is not yet active:
For this example, we are going to use Invoice Service (Customer) Detailed as the report we will modify.
To be able to modify this report, you will need to copy it from the System Templates across to the Your Templates tab.
To do this, click the relevant template, then click the Copy Template button:
You will then see the below pop-up window appear:
Give this template copy a Template Title. This is simply the name of the new report template you are creating. Name it something that is refelctive of what it does or who it applies to (it may only apply to a specific customer etc).
Click the Copy button to copy it across.
Click on the Your Templates tab at the top of the page and you will now see your template copy in the list, in orange - indicating that it is not yet active:
Click on the report on the left and the setting for it will appear on the right:
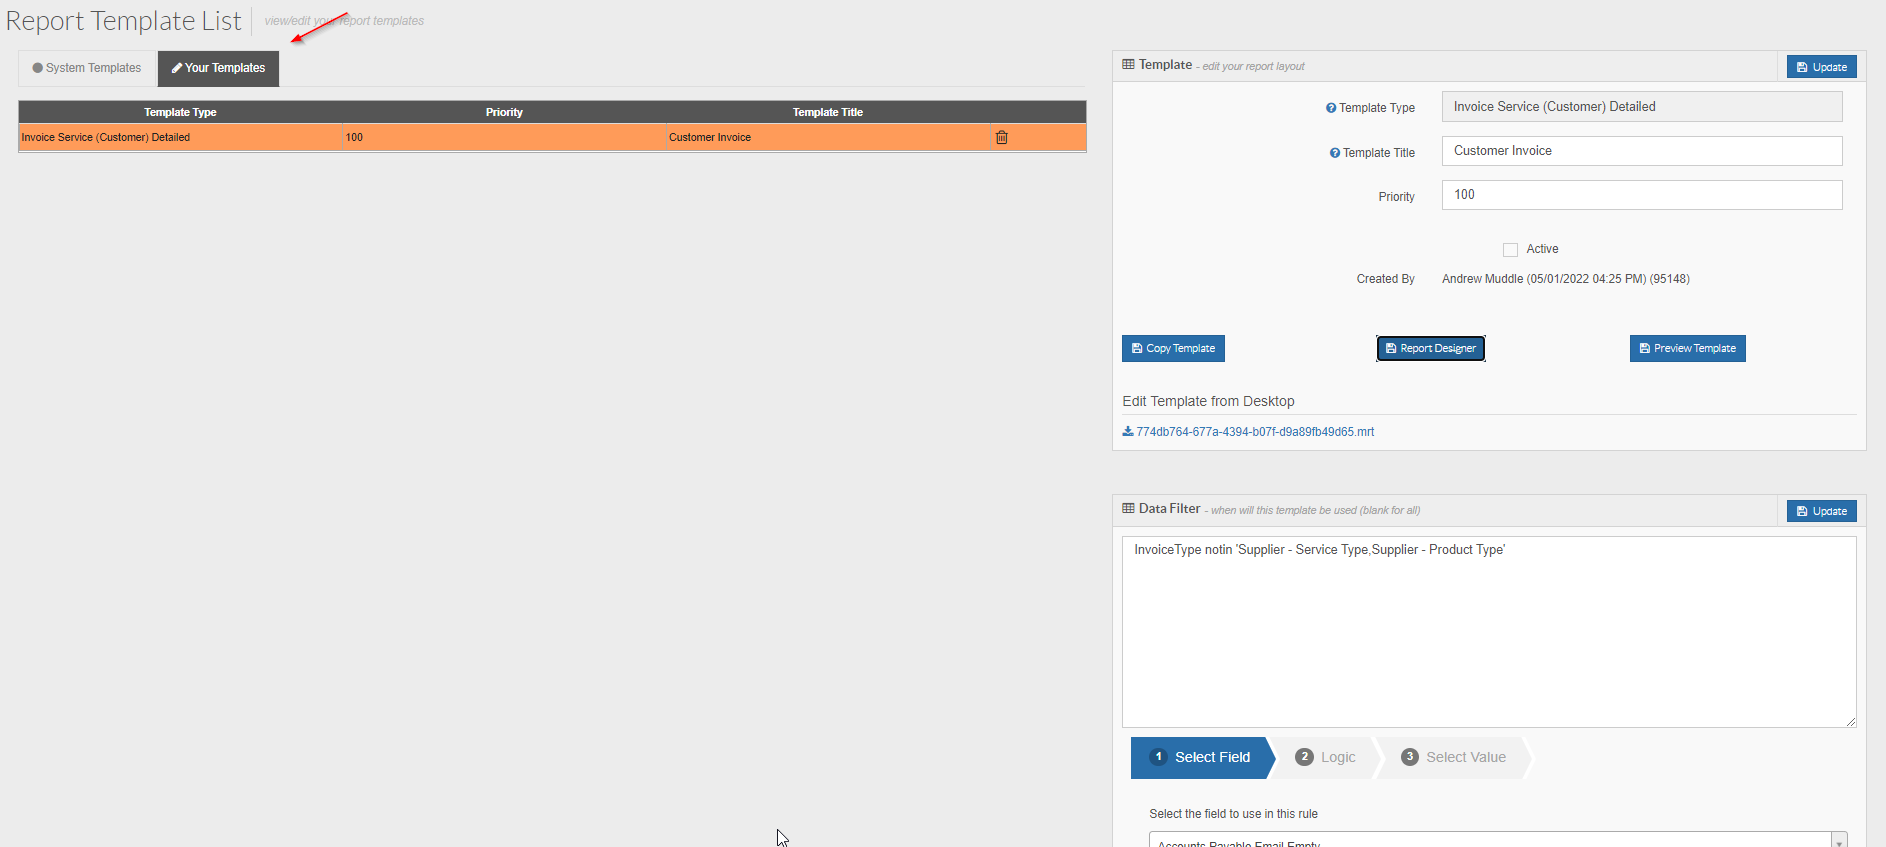
At the bottom of the page there is a Data Filter.
The Data Filter is the driving force behind determining when this report template will be used.
For this example, we only want this report template to be used when the invoice is a customer type invoice; this should not apply to an agent type invoice as payment details would not apply to them because they are not paying you.
To correctly modify the Data Filter to only apply to customer type invoices, you will need to add logic to the Data Filter using the Data Filter builder at the bottom of the page:
From the drop-down list in Step 1, select Invoice Type and then click Next:
In Step 2 of the builder, select Not In List and then click Next:
In Step 3 of the builder, select Supplier - Service Type and Supplier - Product Type, then click Add Rule:
You will then see that there is now text in the Data Filter like the below:
This logic now says to only use this report template when the Invoice is NOT one of the two listed Supplier type invoices (an agent invoice).
Once the Data Filter has been configured, the next step is to modify the report template.
To do this, click the Report Designer button to enter the report template:
Doing this takes you into the report template where you can modify it. It will look something like the below:
As you can see, this is a little bit like Word.
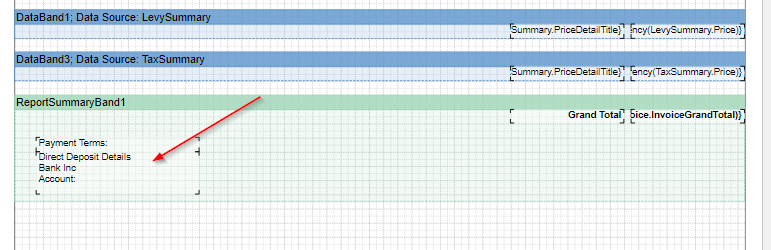
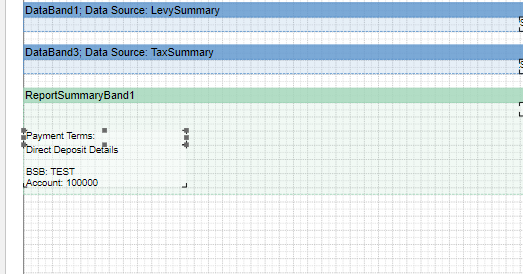
For this example, we are going to add in some bank details so that when the invoice PDF is sent to a customer, they know where to send the money to pay you for the invoiced amount.
To add in bank details, we are going to amend the text box at the bottom of the page:
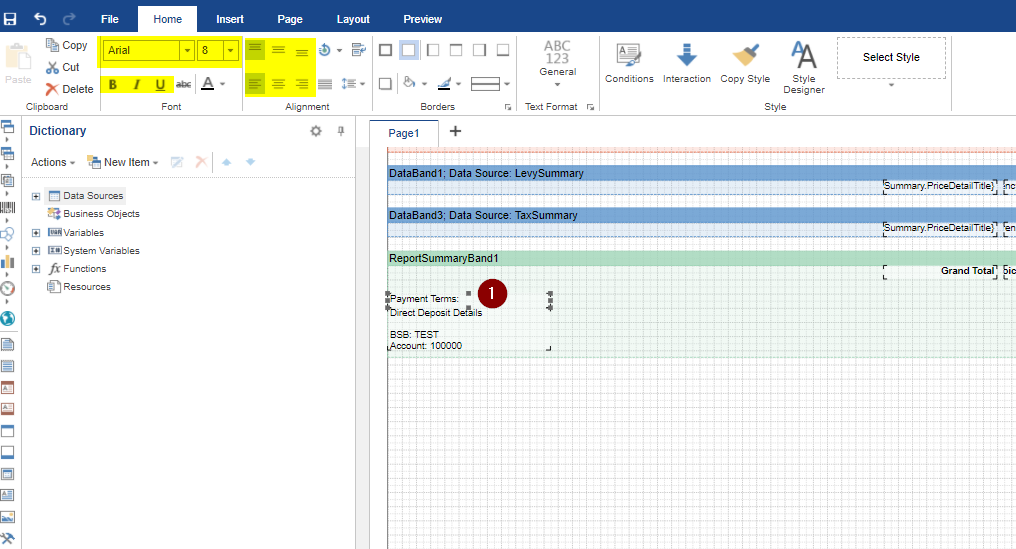
Double-click the text box and you will then be able to edit the text within the field. Modify as you need and then press OK to update this field:
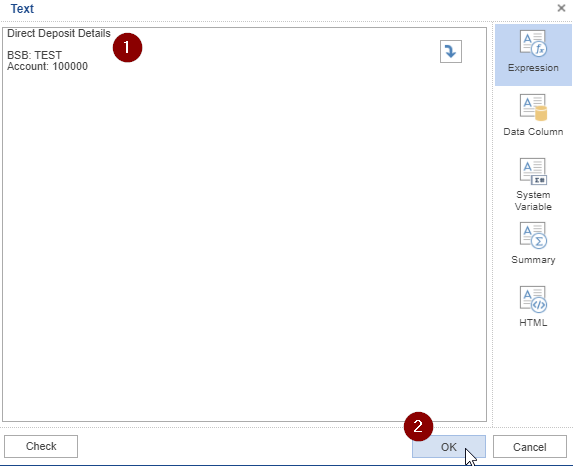
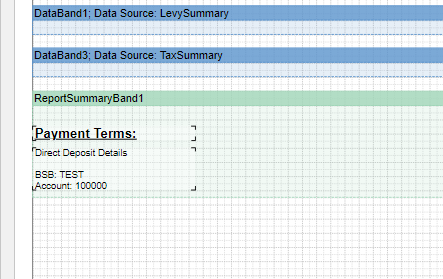
You will then see that the text field appears as per what you have changed it to:
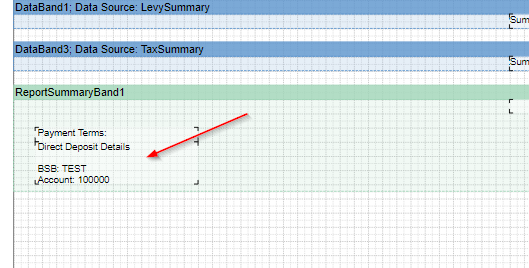
If needed, you can click and hold the text box to move it to the left or right to better position the text:
You can also make the text in a text box bigger or smaller, as well as making it bold or centering/moving to the left or right; this is very similar to Word.
To do this, click the text box you wish to modify. At the top of the page you will see options to change the text or bold etc:
Apply the changes and the text will update accordingly:
To add in bank details, we are going to amend the text box at the bottom of the page:
Double-click the text box and you will then be able to edit the text within the field. Modify as you need and then press OK to update this field:
You will then see that the text field appears as per what you have changed it to:
If needed, you can click and hold the text box to move it to the left or right to better position the text:
You can also make the text in a text box bigger or smaller, as well as making it bold or centering/moving to the left or right; this is very similar to Word.
To do this, click the text box you wish to modify. At the top of the page you will see options to change the text or bold etc:
Apply the changes and the text will update accordingly:

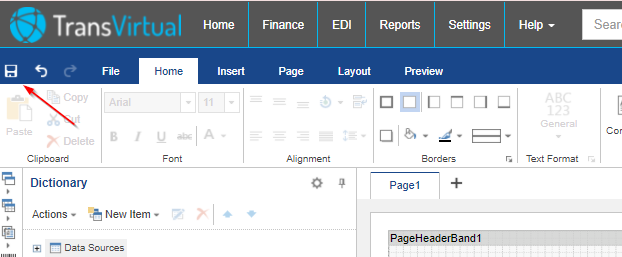
Once you have made some changes it is always a good idea to save the report as you go using the save icon at the top-left:
For this example, we are also going to amend the Title of the report at the top of the page as well as move the logo and make it bigger.
Go to the top of the page and you will see this:
Double-click the Title and change as needed. We are going to update to be Tax Invoice:
To make the logo (green box top-left) bigger, simply click on the box and expand it out to the top of the page; much like you would do with an image in Word:
We are also going to move the boxes at the top of the page closer to the edges so they are spaced out more:
To do this, simply click and hold, then drag the fields to where you want them.
In the above we also increased the Title size and made it Bold.
Don't forget to save any changes that have been made!
If you would like to preview the changes made so far, you can click the Preview button at the top of the page. This will show you what an invoice using this template would look like:
In addition to making size changes to text or appling bold functions, you can also add functions such as Word Wrap or font shrinking.
If you have limited space on a template and text keeps getting cut off, applying a Word Wrap function to the text box may resolve the issue.
To add this, click the text box required, then click Properties from the bottom-left of the page, then click Text Additional:
When you click Text Additional you will see a list of options appear, like so:
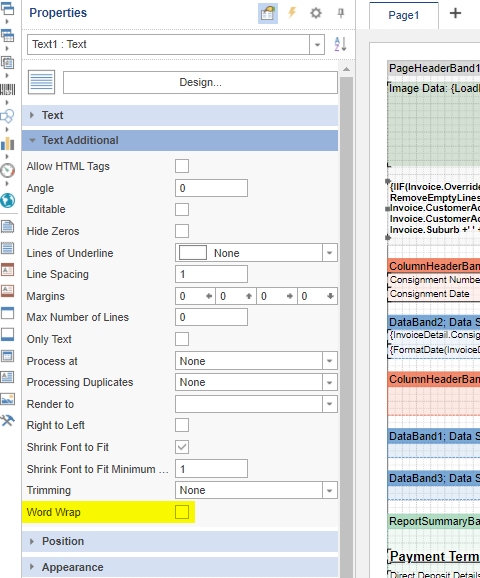
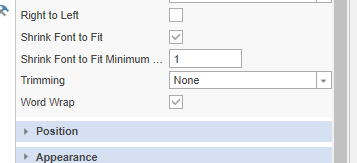
Check the option for Word Wrap:
Once you do this, save the template and preview the template if needed.
Word Wrap simply means the text won't cut off if it spans too far across the line. Word wrapping will move any cutoff text to the next line within the text box.
Check the option for Word Wrap:
Once you do this, save the template and preview the template if needed.
Word Wrap simply means the text won't cut off if it spans too far across the line. Word wrapping will move any cutoff text to the next line within the text box.
There are other options you can add to a text box if required. Again to do this, click the relevant text box, then click the Properties tab at the bottom, then enable the relevant setting you wish to apply to the text box.
Additional Functions
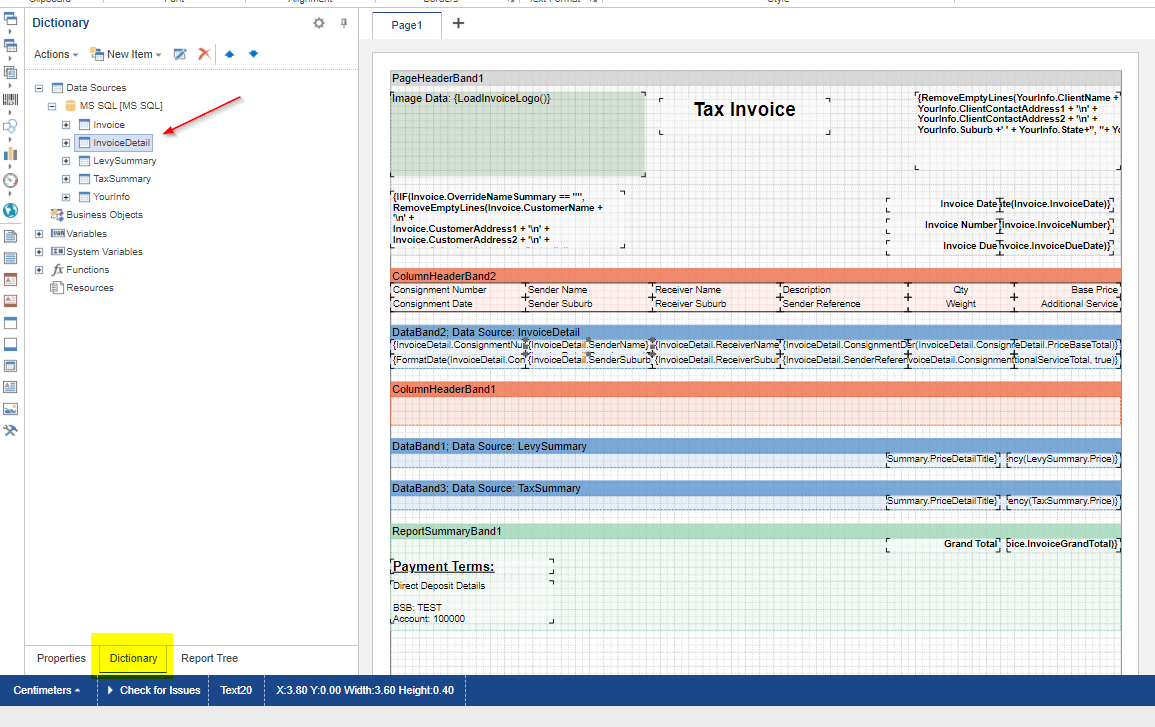
As per the attached video, you will notice that most of the fields in this report template have 'code' in them; strings of text that tell the system what data to automatically populate.
You can change the code in a text field if you wish, using the available fields, however, if you do this you MUST be very careful in what is selected.
To add in 'code' use the available fields from the Dictionary:
You can change the code in a text field if you wish, using the available fields, however, if you do this you MUST be very careful in what is selected.
To add in 'code' use the available fields from the Dictionary:
If adding in any of these coding fields, you need to ensure that the Data Source you are seelcting the field from, matches the Data Source assigned to the blue Data Band:
In the above you will notice that all of the text boxes in the Data Band for Invoice Detail all start with InvoiceDetail.
The fields being used are drawing information from the assigned data source which is a table in the database.
If the Data source assigned to the data band and the field being used are not from the same data source, this will cause issues with the report and will cause it to stop functioning.

If you need assistance with modifying this part of a report template, please contact TransVirtual to ensure the setup will work as expected!
Adding in text boxes or data bands (amongst other things) can be done by using the buttons on the left:
Similar to Word, click what you want to add, then click where you want to add it in.
Once the template has been configured
Once the template has been modified as needed, you will need to enable it.
Save the report template and then exit out of it by closing the window.
You will then need to go back to the Your Templates list:
On the right, you will need to check the box that says Active and then click the Update button at the top:
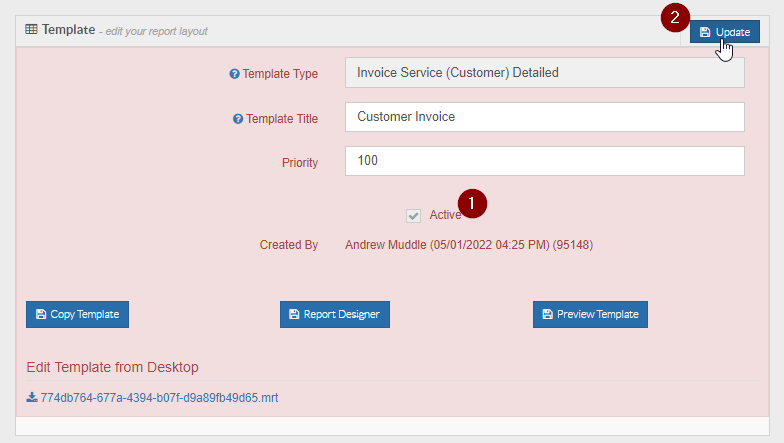
You will then see that the template is coloured white in the list as it is now active:

In addition to enabling the template, you can modify the priority number of the template if needed:
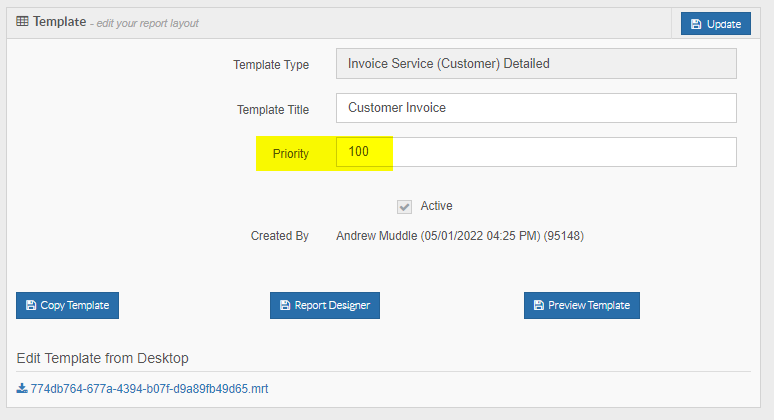
Click in the box and change the number, then click Update at the top to implement.
The priority number is only useful when you have multiple report templates that could apply to the same invoice/label/connote,etc - in this case, the system would use the template with the highest priority number to generate the report.
Higher numbers are looked at first by the system, so if you have a report template you want to be the 'default', you would set the priority of that template to be the highest number.
For this example, we are going to leave as 100 because we only have one template that will apply.
Save the report template and then exit out of it by closing the window.
You will then need to go back to the Your Templates list:
On the right, you will need to check the box that says Active and then click the Update button at the top:
You will then see that the template is coloured white in the list as it is now active:
In addition to enabling the template, you can modify the priority number of the template if needed:
Click in the box and change the number, then click Update at the top to implement.
The priority number is only useful when you have multiple report templates that could apply to the same invoice/label/connote,etc - in this case, the system would use the template with the highest priority number to generate the report.
Higher numbers are looked at first by the system, so if you have a report template you want to be the 'default', you would set the priority of that template to be the highest number.
For this example, we are going to leave as 100 because we only have one template that will apply.