Manifests
Manifests are simply a collection of consignments into a group. In Transvirtual there are many different types of manifests, the below will detail the different types that can be generated in Transvirtual and what they are used for.
Carrier (onforwarder) Manifest
A carrier manifest is simply a collection of consignments that have been assigned to a carrier.
1. To view your customer manifests, on web application go to Operations > Consignment Data > Manifests, then click on Carrier (onforwarder) Manifest tab, the Carrier Manifest Filter page will be display as shown below. 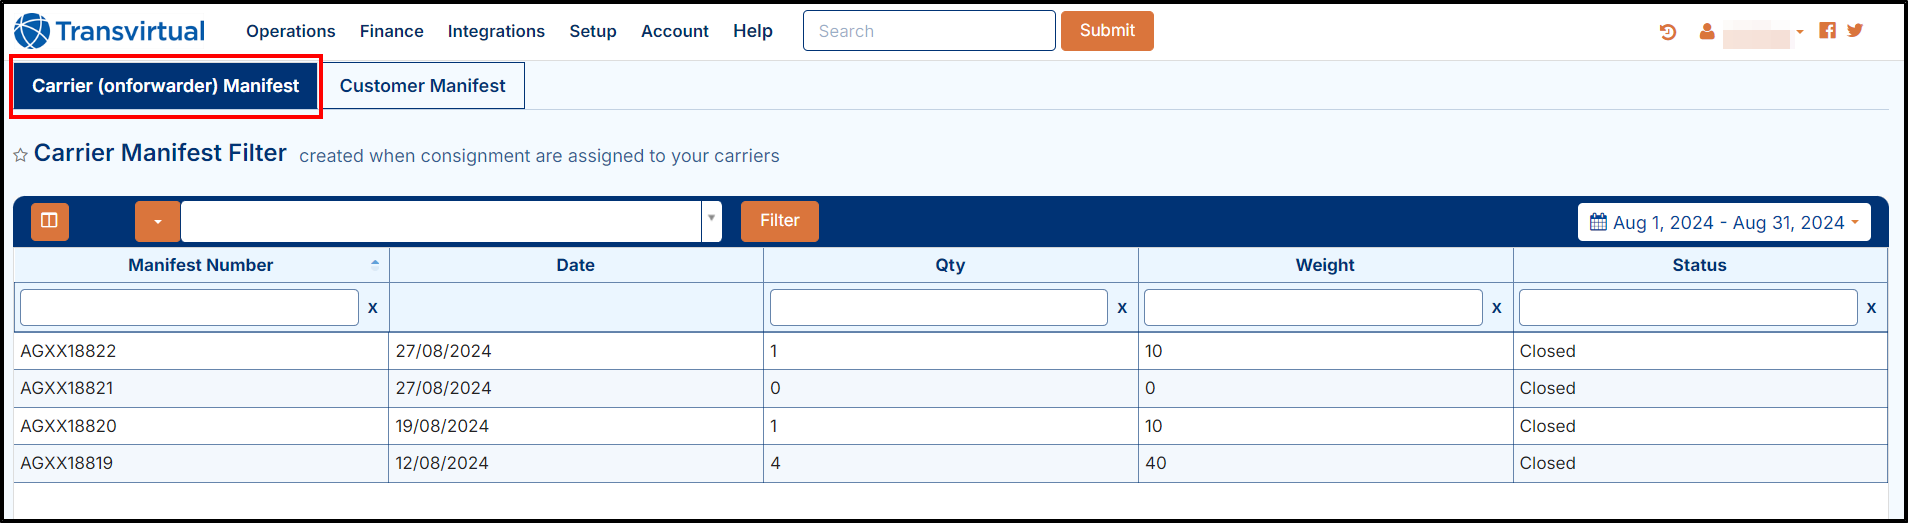
2. You can either assign a connote to a carrier by manually doing so in the history tab of a connote itself or by setting up Auto-Assignment rules. Click here for instructions on how to set auto-assignment up.
3. To assign a connote to a carrier manually. go to consignment history tab,
then to the Assignments section, and finally click on the Manual Assignment button, as
shown below.
4. After step 3, Manually Assign to Carrier (or employee) Pop up will come, here select the Source (Employee or Carrier) with the help of drop-down button and then choose the applicable from the list with the help of drop-down button, once done, click on the Save as shown below.
5. On the Carrier (Onforwarder) Manifest page, you can change the date
range to view the older manifests and add or remove columns using the column
selector as shown below.
6. If you want to see the Carrier Manifest detail then, double click on the applicable manifest number which you want to open, the detail of selected manifest will display as shown below.
7. On Carrier Manifest detail page, you can print the detail by clicking on Print button and can select the column by click on column selector icon as shown above.
8. You can Export the manifest by clicking on Export button located at bottom of the page and select the excel or csv file with the help of Drop and Down button as shown below.
9. Carrier manifests are typically setup to display at a daily level - meaning that a new carrier manifest will be created each day. However, it is possible to define how carrier manifests are created if required.
10. To do this, go to the carrier card you wish to modify. To modify carrier card details, navigate to Setup > Card Files > Carriers, the carriers page will display, now select the applicable carrier from the carriers list, the carrier detail will display. Click on Consignment Related Rules tab and then go to Manifest section as shown below.
11. On manifest section, you have the ability to have daily carrier manifests and auto close a carrier manifest at a certain time each day by click on the toggle button as shown above.
12. You can group carrier manifests by sender or service level (If required) to know how many consignments for a particular carrier have been assigned.

The customization is up to you, but typically the standard is daily manifests with an auto-close time each day so that a new carrier manifest is created daily.

Clicking the blue/white Question Marker icon helpers will provide an explanation of what each setting will do:
Customer Manifests
Customer manifests are simply a collation of jobs for a particular customer. They are created automatically as each customer creates consignments in your account.
1. To view your customer manifests, on web application go to Operations > Consignment Data > Manifests, the Carrier Manifest page will open, now click on Customer Manifest tab, the Customer Manifest page will display as shown below.
1. To view your customer manifests, on web application go to Operations > Consignment Data > Manifests, the Carrier Manifest page will open, now click on Customer Manifest tab, the Customer Manifest page will display as shown below.
2. On Customer Manifest Filter page, you can see the Manifest number, Date, Quantity, Weight and Status.
3. If required, you can modify the date range at the top-right of this filter by clicking on it and then select the appropriate date range, once select it then click on Apply to view older manifests.
You can add or remove the columns using the column selector at the top left.
4. If you want to see the customer manifest detail then, double click on the applicable manifest number which you want to open, the detail of selected manifest will display as shown below.
a. On Customer Manifest detail page, you can see the Manifest info, Additional info, Consignment Detail and Additional Detail.
b. On Manifest Info section, you can see the following details:
1. Customer Name
2. Manifest Number
3. Manifest Title
4. Manifest Date
5. Date of Creation
6. Original Closed
7. Customer Name.
c. On Additional Info section, you can see the following details:
1. Details and Manifest Reference
2. Consignment Count and Memo
3. Unique Locations and Total Items
4. Total Weight and Total Cubic
5. Pickup Ready Time and Pickup Close Time
d. On Detail tab, you can see the consignment details as below:
1. Consign Number
2. Date
3. Sender Name
4. Receiver Name
5. Receiver Suburb
6. Status
7. Quantity
8. Weight
9. Manifest Comment
10. General note
11. Cubic
12. Scanned Quantity
13. Scanned Weight
14. Scanned Cubic
5. On Detail tab, you can add or remove from the available columns by clicking on the column selector, can request a Pickup and Print the data by clicking on appropriate button as shown.
6. To request a Pickup, click on Request Pickup, Confirm your pickup request pop-up will come, here select the Pickup Ready Date and Time and Close Time and then click on Submit button as shown below.
When you request a pickup, you will see the summary of the consignment as shown above.

You can request pickup if the Manifest is Open, if it is closed then you cannot see the Request Pickup button, and to check whether the Selected Manifest.
7. If needed you can print the Manifest in PDF by click on Print, Export data Popup will come on screen, now choose Select Data Type and Select Action with the help of Drop and Down button and then click on Export button as shown below.
If required then, you can change the Selection Action either Email PDF, Show PDF or Download PDF, and then click on the Export button.
8. If you need an excel/csv file, you can use the export function to download the Customer Manifest by clicking on Export button located at bottom of the page and select the excel or csv file with the help of Drop and Down button as shown below.
9. Customer manifests are typically setup to display at a daily level - meaning that a new customer manifest will be created each day. However, it is possible to define how customer manifests are created if required.
a. To do this, go to the customer's card you wish to modify and navigate to Setup > Card Files > Carriers, the carriers page will display, now click on Customer Manifest and select the applicable customer manifest from the customer list, the customer detail will display. Click on Consignment Related Rules tab and then go to Manifest section as shown below.
b. On manifest section, you have the ability to have daily customer manifests and auto close a customer manifest at a certain time each day by click on the toggle button as shown above.
c. You can group customer manifests by sender or service level should (If required) to know how many consignments for a particular customer have been assigned.
The customization is up to you, but typically the standard is daily manifests with an auto-close time each day so that a new customer manifest is created daily.
d. One Important thing to note here is this setting:
The purpose of this setting is to allow you to automatically create a pickup consignment linked to a manifest. This linked consignment is essentially a 'summary' consignment for the manifest it has been linked to.
For Example: If you had a customer manifest with 10 consignments on it, this setting would create a pickup consignment that would have all of the consignment items from those 10 consignments on it.
Keep in mind that if you have this setting enabled, and the original consignments on a manifest have been created as pickups, the pickup flags will be disabled (turned off) and the original consignment will no longer be a pickup. The reason this happens is because it does not make sense to have two pickups for the same connote.
Creating a linked pickup connote means you are creating pickup requests for all of the consignments on a manifest, which then means the pickup required flag on the original consignment is now redundant.
Related Articles
Card Files (Customer)
1. In Transvirtual web portal menu, go to Setup > Card files > Customers, the Customers page will display as shown below. 2. On Customers card files, you can Add/Edit the Customer, Import/Export the customers. Add a New Customer 1. To add a new ...PDF/Excel Reports
Overview Transvirtual offers a series of default reports that can be used to extract valuable information from your account. These reports offer information on things like costs, profit/loss, driver job activity, amongst other things. To see the ...