Dangerous Goods List
Dangerous Goods List
Overview
Transvirtual includes a predefined list of dangerous goods. You can:
- View existing dangerous goods
- Add new dangerous goods
- Update dangerous goods details
- Limit specific dangerous goods to specific customers
- Upload or change dangerous goods images
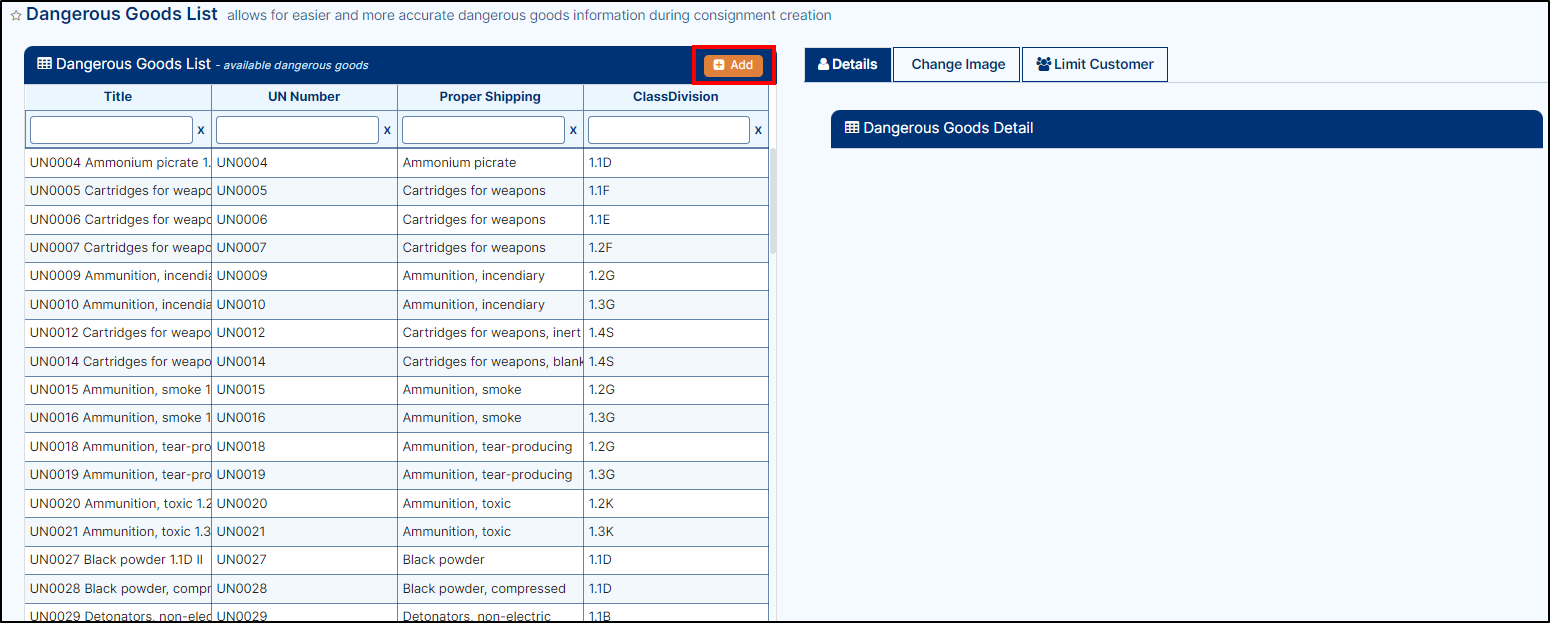
To see the dangerous goods page, go to Configuration > Lists and Zones > Dangerous Goods. The Dangerous Goods List page displays as shown below.
Add New Dangerous Goods
- On the Dangerous Goods List page, click Add.
- The Create a new dangerous goods entry pop-up displays.
- Enter the required details:
- UN Number
- Proper Shipping Name
- Class/Division
- Subsidiary Risk
- Packing Group
- Description
- Display Value
- Use the Active toggle to enable the dangerous goods entry.
- Click Create.
Update the Dangerous Goods List
- Click the dangerous goods entry you want to update.
- The details display on the right side of the screen.
- Update any of the following fields:
- UN Number
- Proper Shipping Name
- Class/Division
- Subsidiary Risk
- Packing Group
- Description
- Display Value
- Active status (toggle)
- Click Update to save changes.
Limiting to a Customer
- In the dangerous goods detail section, click Limit Customer.
- The Limit Customer tab opens with the customer list.
- Click the customer name.
- Checkboxes appear next to each dangerous goods entry.
- Select the checkbox for the dangerous goods you want to limit to that customer.
- The dangerous goods are automatically limited to the selected customer.
Change Dangerous Goods Image
- In the dangerous goods detail section, click Change Image.
- The Change Image tab opens. Either drag and drop an image into the field, or select an image from your files.
- The image saves automatically.
Delete Dangerous Goods Image
- Click the delete icon next to the image.
- A confirmation pop-up displays.
- Click Yes, I want to.
- The file is deleted.
Notes
- UN Number is mandatory when creating new dangerous goods.
- You must activate the toggle button to enable newly added dangerous goods.
- Images are saved automatically when uploaded.
- Customer limitations apply per dangerous goods entry.