Customer Invoicing
Identifying Rating/Pricing Issues
When using TransVirtual pricing etc from time to time you may experience an unexpected price or no pricing against a consignment.
These will be flagged upon invoicing and highlighted in the invoice window and will also be listed by going to the following (Finance > Tools > Consignment Price Reviews)
The first step will be to open the Finance Tab with the consignment and view the Rating Notes as below
In this box It list the various steps used to generate a price. On the top line you will see the name of the rate card being used 'Standard Rates' and the Service Level applicable 'Express 1 day'.
The next line of this Box indicates the route and based on the zones in this example it is travelling from NSW to NSW
The following lines indicate it is charging for a 'Pallet'
1 Pallet @ $100.00 = $100.00
Then also a 'Carton'
1 Carton @ $6.00 = $6.00
In the below example, this indicates it has been unable to match the suburbs to zones, you should then check to ensure each the from and to suburbs on the consignment are assigned to a zone within the applicable zone listing for this customers rate card
In the below example, this has found a zone for its Suburbs however no rate based on the Item Descriptions within the consignment, you should check to ensure the Freight Items in step 2 match to items on this consignment or that a Default freight item has been set for when no match is found
In the below example we have found a rate for one of the items but not all, as above you would need to identify a match for the other descriptions within the consignment either via setting freight item descriptions or adding a default freight item
Approving an Invoice
Approving an invoice should only be done once the invoice has been manually checked to ensure that the pricing is as expected.
To approve an invoice, open up the relevant invoice ( Finance > Invoices > Customer Invoice Search OR Agent (RCTI) Invoice Search > Double-click the invoice to open).
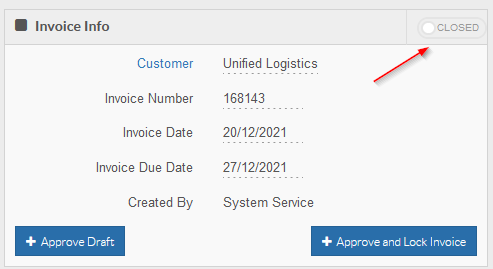
Once in the invoice you will see the Invoice Info at the top-left of the page, and it will look something like the below:
Go through the invoice and check for any pricing issues.
If the invoice is as expected, click the Approve and Lock Invoice button at the top to approve the invoice:
You will then see a screen similar to the below appear:
This is a warning message asking you if you are sure you want to approve and lock the invoice - the reason this appears is because approving and locking an invoice acts as the trigger for Invoice EDI rules to send emails to customers or send invoice data across to your accounts package (Myob or Xero). Be sure all prices are correct before approving.
If all okay, click Yes, I want to to confirm.

Note: The Approve and Lock button will only appear once an invoice has been closed - you can close an invoice manually using the toggle located in the Invoice Info section:
Editing an Approved Invoice
It is possible to make changes to an invoice after it has been approved and locked. Ideally consignment prices should be checked prior to an invoice being Approved and Locked, however, if needed, there is the ability to Un-approve an invoice.
Invoicing and related features require the Finance Module

Invoices Changed after being approved and locked will not be sent to customers or your accounts package again this will need to be done manually
1. Start by navigating to the invoice that needs changing; you can search for this number directly using the search bar at the top:
Or by going to Finance > Invoices > Customer Invoice Search OR Agent (RCTI) Invoice Search; depending on what type of invoice this is for-customer or agent.
From here you can search for the invoice number using the Invoice Number field and then pressing enter:
If you do not know the invoice number you can search using the other search fields-such as customer name; or you can change the date range and scroll through to find the correct one
2. Once you arrive at the invoice screen, you will see something similar to this
Here you can see there is an Un-Approve button. This is the button you will need to use to edit this invoice.
Also take note of the Additional tab. This tab gives you information such as what EDI rules have been triggered for this invoice. Chances are that if you have an Approved and Locked invoice there will be an EDI rule that sends off an email (or similar) to the corresponding customer etc. This is important to take note of as if there have been EDI rules triggered this means the customer or agent will have already received a copy of this invoice. You will need to let them know that you are amending their invoice and are going to re-send it; just to avoid any potential confusion or issues etc.
3. Once you click on the Un-Approve button you will see this
Make sure you read this warning message carefully before Un-approving an invoice! Always check Invoice prices are correct in your Accounts package.
4. Once you Un-approve you will see the invoice screen refresh to look something like this
5. You will notice that the Un-approve button has now changed back to the Approve and Lock Invoice button. You can now make changes to any affected consignments on that invoice.
You will now also see that where it previously said 'Price invoiced and locked' on the related consignments for that invoice-these no longer have that message, indicating they can now be changed
6. Make any changes you need to, ensuring that the prices are definitely correct before the corresponding invoice is Approved and Locked.
Note: Use the red Delete button in the above picture to delete any prices off a consignment that you do not require.
If you accidentally delete a price from a consignment you can re-enable it as per below
Click Show deleted. You will then see any deleted prices. Click on the deleted price and click activate to re-enable that price/charge for this consignment
The price will then re-appear in orange indicating it is pending/pending invoice
Once the consignment has been invoiced it will appear in white indicating the price is set/complete
Warning: When you delete a price and then re-activate, this price may not get added to the invoice that it was previously on. Make sure if it is not on the same invoice, that you add/move it to the correct invoice.
Use the Invoice Actions button to change what invoice this consignment is put on. When you click this button you will see a list of all current invoices, or you can create a fresh invoice if you wish
The consignment has now changed to the selected Invoice
7. Once all necessary changes have been made, you will need to Approve and Lock the Invoice
Only Approve and Lock once the Invoice is correct.
8. As this Invoice has previously been Approved and Locked, any EDI rules that have been triggered against it will not re-send. This means that after you edit an Invoice, the customer will not automatically receive the updated version. To re-send any EDI rules that have previously been sent all you have to do is click on the Additional tab of the invoice, and then double-click on the EDI rule to re-send that information
Resending EDI rules to your accounts package will not update the accounts package, this will need to be done manually
Invoice Statuses and Invoice Colour Legend - What they mean
Invoices in TransVirtual can have a variety of different statuses or states. Consignments on an Invoice can flag in various colours. Below is an overview of what each Invoice status and colour means and is used for:
Invoicing requires that the Finance module is enabled.
Invoice Statuses
OPEN: When an Invoice is open more consignments can be added to it. An Invoice will remain open until a user closes it or the system closes it - the system will only close an invoice if it has been setup to do so:
CLOSED: An invoice can either be closed manually by a user or automatically by the system:
Finance > Invoices > Customer Invoice Search > Select Applicable Invoice where you will see something similar to the above image.
Closed Invoices do not allow for new consignments to be automatically added to them. This is handy so that a user can go in and review the prices on an Invoice before finalizing it.
APPROVED DRAFT: This function allows users the ability to create a draft copy of an Invoice; which can be used in EDI rules to send to Customers/Agents:
APPROVED AND LOCKED: This is the final stage in the Invoice process. Approving and Locking an invoice should only be done after a user has manually reviewed the prices on an Invoice to ensure that they are as per expected. This status is typically used in EDI Invoice exports, which are setup to send the Invoices via PDF/Excel files to a customer or agent email address etc:
Invoice Colour Legend
Consignments on an Invoice can flag in various colours.
WHITE: The consignment has no pricing issues and has priced correctly as per what the system was expecting.
RED: When a Consignment is flagged in red, it means there is a pricing problem with the consignment or there are Additional Services that are pending approval. Red can also be when a consignment has been imported and has a price difference between the imported price and the system price. Essentially, this consignment has an incomplete price requiring review:
YELLOW: This applies to when a price has been imported onto an Invoice. When a consignment is imported and the imported price is different to the price the system has calculated, the consignment will flag in yellow-which is essentially telling the user that there is a price difference between the imported price and the system calculated price:
ORANGE: A consignment will flag orange when there has been other import issues (this could be that the import has fewer details than the consignment in the system)/also when a consignment has been moved from an existing invoice to the current invoice.
In the above situations where you have a consignment flagging with a price or import issue, a user can manually check each consignment and rectify any potential issues.
An Invoice can still be Approved and Locked with pricing issues, however it is advised that each invoice is checked and reviewed prior to Approval.
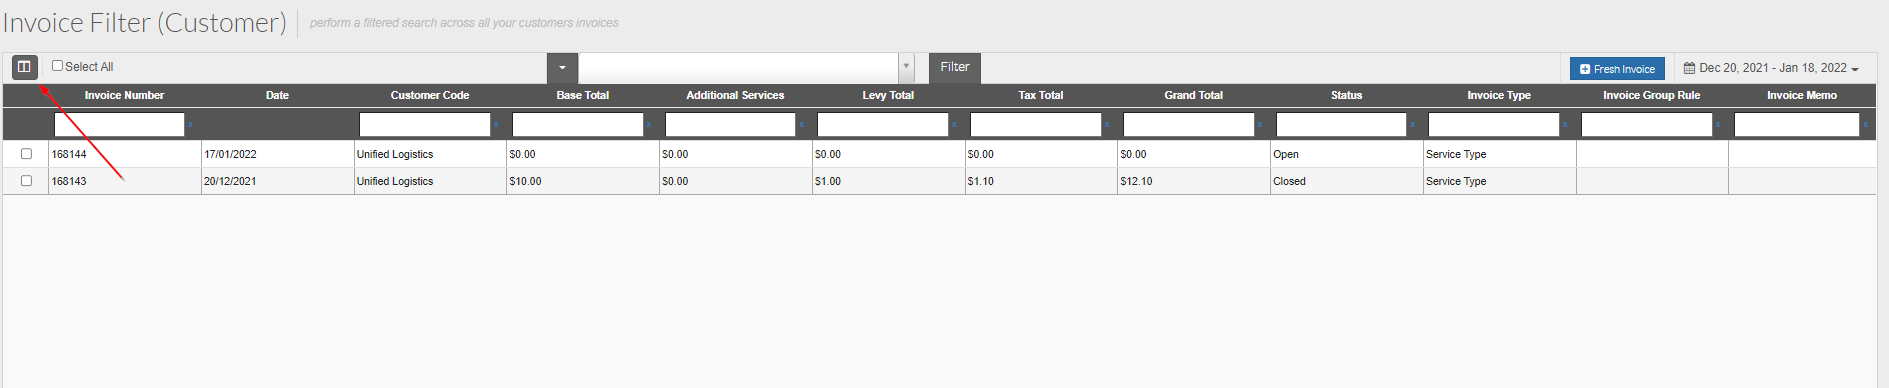
Invoice Filter (Customer) + Agent (RCTI) Invoice Filter
These pages work in a similar method to the consignment search page, allowing you to view any invoice results that are returned for your selected date range.
Depending on which of these two pages you are viewing (Finance > Invoices > Customer Invoice Search OR Finance > Invoices > Agent (RCTI) Invoice Search), you will see either customer or agent invoices.
These pages are handy to see what invoices may require action - you can use the status column to see whether an invoice is open, closed or if it has been approved and locked.
Note: Both of these pages operate in the same manner but this article will use the Customer Invoice Search Filter to illustrate the functions of the page.
At the top-right of the page, you can change the selected date range, if required:
The results that are returned in the grid will be invoices that have an invoice date within the selected date range.
You can also edit the columns you see in the grid, using the column selector button top-left of the page:
Select the appropriate columns from the ColumnsSelected field.
Click Update at the bottom of this window to implement any changes you have made.
The page will then refresh with the updated column selection.
Click Update at the bottom of this window to implement any changes you have made.
The page will then refresh with the updated column selection.
You can export the grid results using the export button at the bottom-left of the page if required:
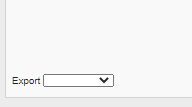
This button will provide you with an excel or csv file containing the information/columns shown in the results grid.
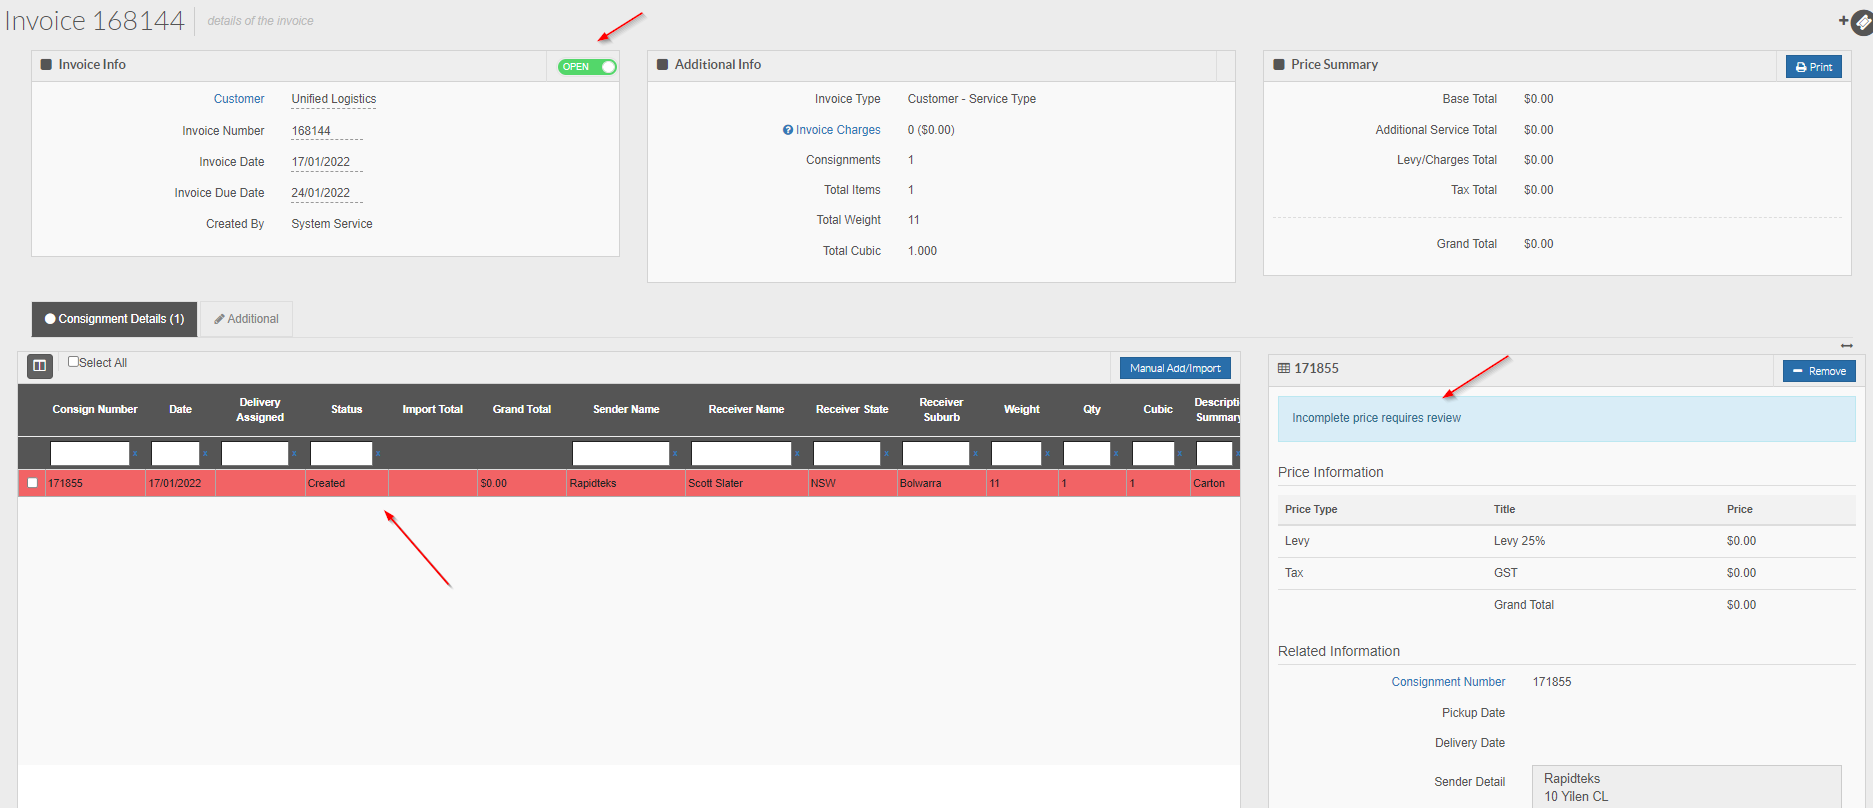
To view an invoice in greater detail, double-click and open it.
You will then see a screen similar to the below:
This button will provide you with an excel or csv file containing the information/columns shown in the results grid.
To view an invoice in greater detail, double-click and open it.
You will then see a screen similar to the below:
As seen in the above, you can see the state of the invoice as well as consignments that are on the invoice and then any relevant pricing information on the right of the page.
The Additional tab in the middle of this page can be used to see any EDI rules that may have triggered against the invoice.
The Additional tab in the middle of this page can be used to see any EDI rules that may have triggered against the invoice.
Related Articles
Finance/Invoice Setup Process
TransVirtual has an optional add-on Finance module that allows you to add pricing to consignments and invoice out consignments to customers; as well as send these invoices across to your accounting software (Myob or Xero) so that you can keep track ...Invoice Mass Actions
Invoice Mass Actions In this article we will be providing a general overview of the Invoice Mass Actions tool. You can locate this by going to Finance > Invoices > Customer or Agent (RTCI) Invoice Mass Actions. Both of these pages operate in the same ...Invoice EDI Export
Invoice Export Setup In TransVirtual you can setup an EDI (Electronic Data Interchange) that automatically sends PDF, Excel, CSV (etc.) Invoice files to a Customer or Agent, based on specific situations. So, when an Invoice is Approved and Locked you ...Invoice Group Rules
Invoice Group - Customer and Agent Rule Setup Invoice Group rules in TransVirtual are used when you need to create multiple invoices for the same customer/agent within the same invoice period. The two pages that can be used to carry out this setup ...Customer Levies/Surcharges
Customer Levies/Surcharges This section of TransVirtual allows users to have the ability to setup levies or surcharges such as Fuel levies etc. Found in Finance > Levies and Surcharges > Customer Levies/Surcharges. This requires that the Finance ...