Consignment EDI Import
Consignment EDI Import
In TransVirtual there is the ability to create EDI (Electronic Data Interchange) Import rules that allow you to create consignments without the need to use the consignment creation page in the TransVirtual Web Portal.
This is especially handy for when you/customers need to create a large number of consignments in one go.
The page used to create a consignment EDI Import rule can be found under EDI > Data Import > Consignments.
This article will detail how to create an example standard consignment Import rule that can be used to create consignments in bulk. This example will also be limited to creating consignments for one customer because typically, your customers would be responsible for creating their own consignments.
Example Setup
Arriving at this page, you will see a screen similar to the below:
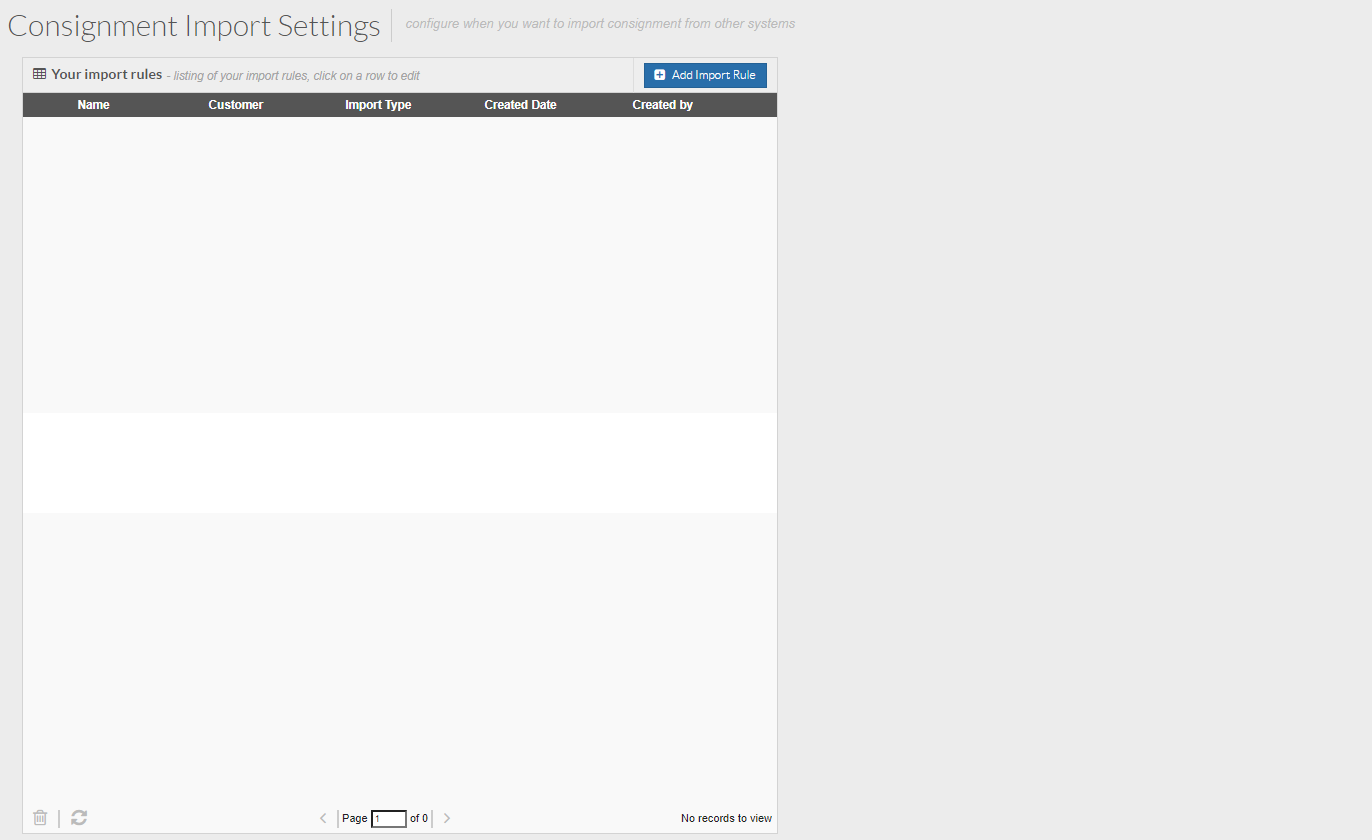
To create a new rule, click the
Add Import Rule button at the top of the page. You will then see a pop-up window like the below appear:
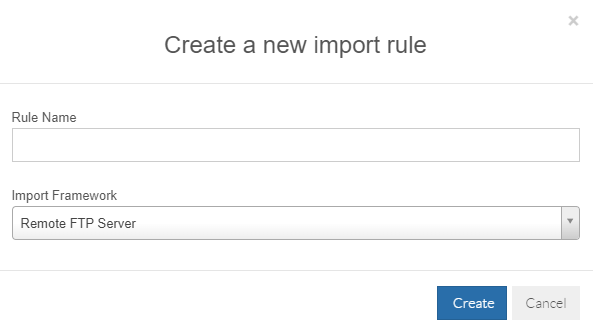
Rule Name = This is the name of the EDI Import rule. The name should be refelctive of what the rule does. For this example, we are going to name the rule "Consignment Creation Import via Email".
Rule Name = This is the name of the EDI Import rule. The name should be refelctive of what the rule does. For this example, we are going to name the rule "Consignment Creation Import via Email".
Import Framework = This is the method which this EDI rule will utilize to create the consignments. For this example we are going to set this as Email.
Click the
Create button and you will now see your EDI rule appear in Orange in the list, indicating that it is not yet active. Click on the rule and the settings for it will appear on the right-hand side of the page:
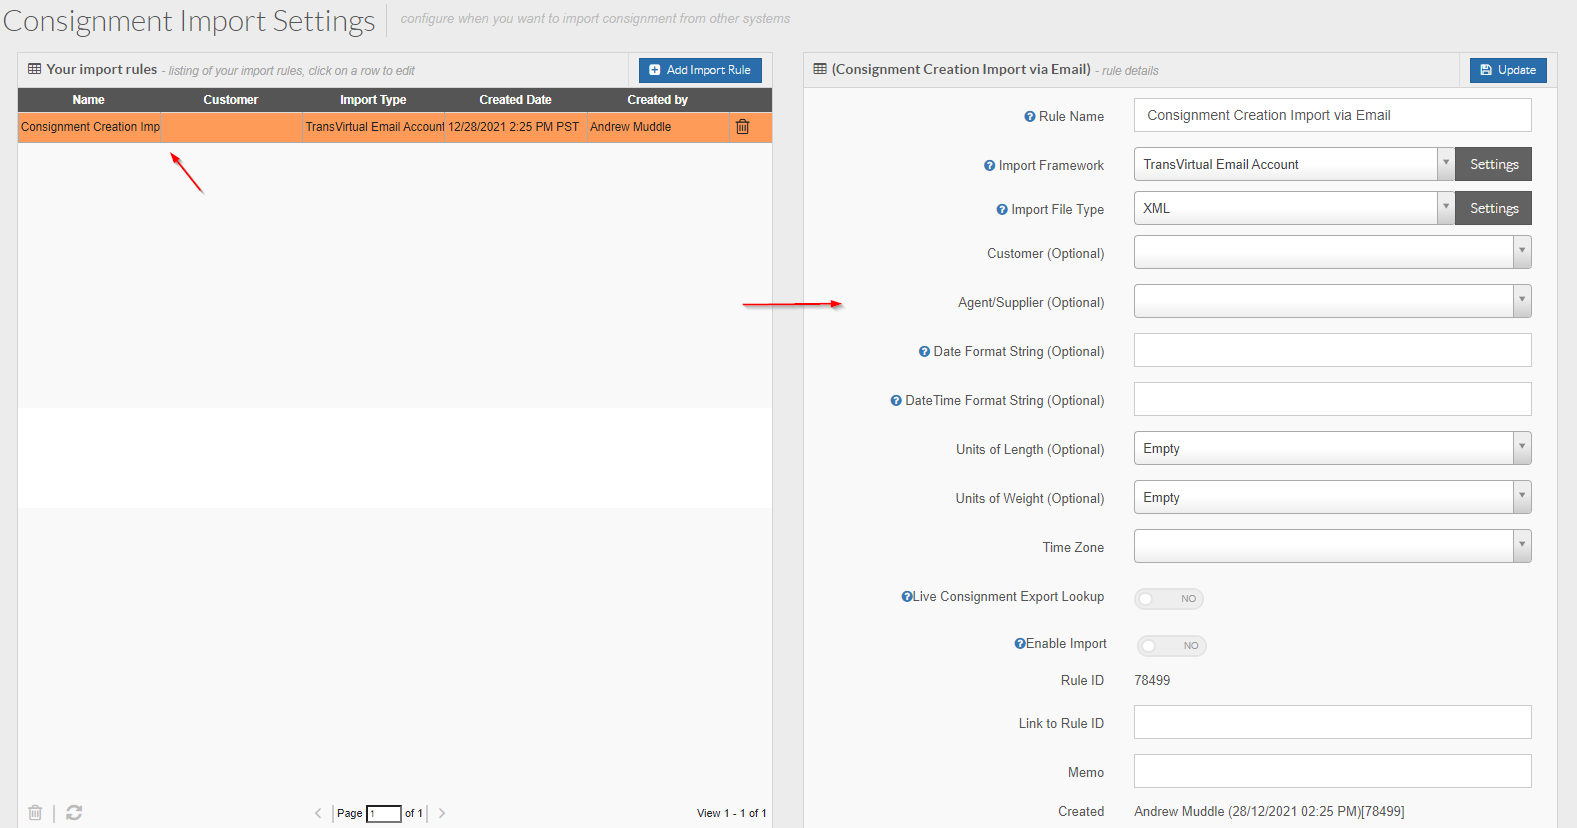
From here, we need to configure the settings for our EDI rule.
Rule Name = This is simply the name of the EDI Import rule. You should already have this field populated with the name used to create the rule. This can be changed if needed, but the name should be reflective of what this EDI Import rule does/is used for.
Rule Name = This is simply the name of the EDI Import rule. You should already have this field populated with the name used to create the rule. This can be changed if needed, but the name should be reflective of what this EDI Import rule does/is used for.
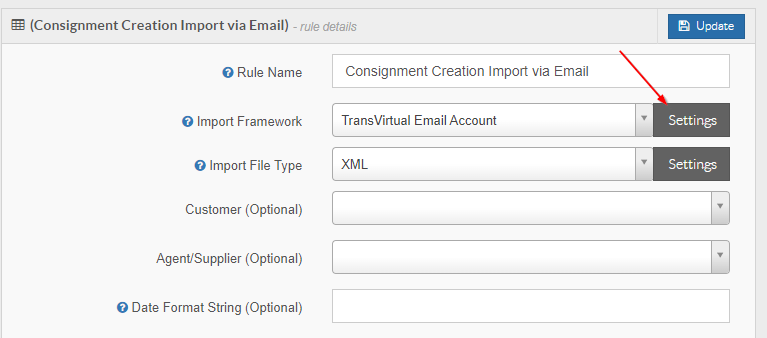
Import Framework = This is how the consignments will be created. For this example we are using email, which means that a file in the format of the
Import File Type, will need to be sent as an attachment to the email address listed for this rule. The email listed needs to be a TransVirtual email. To generate/identify what email should be used for this process, click the
Settings button next to this field:
You will then see a screen similar to the below:
Click
Generate Address and then Click the
Update button to link the generated TransVirtual email to this EDI Import rule.
This is the email address that will need to be used in this process; email recipient should be this email address.
If you re-click the Settings button again, you will see the email you have generated and can copy and paste it to provide to staff or customers hoping to create consignments via this method:
Import File Type = This is the file format that will be used to create the consignments for this EDI rule. For this example we are going to use the below:
CSV is a comma separated file that is the most commonly used file type in TransVirtual. Setting the Import File Type as CSV means that for this EDI Import to work as expected, the file that is sent with the email
MUST be a CSV type file.
In addition to setting the Import File Type as CSV, we also need to map the columns that will be in the file (CSV files look very similar to an excel worksheet/file). Without any column mapping, TransVirtual is unable to determine what information belongs where and any imports would be unsuccessful.
To add column mapping, click the
Settings button to the right of this field:
You will then see a screen similar to the below appear:
This pop-up window is used to configure the CSV file that will be used in this Import process.
Delimiter Char = This is the character that will be used to separate the columns in the CSV. Typically commas " , " are used in CSV files; other characters can be used if required. An example could be a pipe " | ". For this example, we are going to leave as a comma.
The set of toggles in the middle of this window can be used if required; each does as the name suggests. The top one will ignore the first row of a CSV file. The reason you would toggle this would be because you may have a row of column headings in your file. For this example, we are going to set this toggle to YES.
The other commonly used toggle here is the
Skip if Job Already Exists toggle. Enabling this toggle simply means that once a consignment has been created, no future EDI imports can be used to update the information on it. This can be toggled if required, but for this example, we are going to set as NO.
Column Mapping = This will list the columns that should appear in your CSV file, from left to right.
To add mapping to this rule, click and select the relevant fields from the column selector field:
Search for and select the fields that will be used in this import.
For this example, we are going to use the below in our file:

Note: The column mapping is up to you/your customer. The mapping that is listed in this EDI Import rule
MUST match the columns from left to right in your CSV file; otherwise this process will not work as expected.
Transformation Code = This is a numeric value that can be used to map complex CSV files. This is not typically required, but if it is needed, you will need to talk to the staff at TransVirtual to implement. For this example, we are going to leave this field blank.
Once your mapping has been setup, click the
Update button to implement.
Customer (Optional) = This field is used to map the customer that any consignments created via this EDI rule will belong to. For this example, this EDI rule will be limited to just one customer which will be AR1:
Select the customer you want to force for consignments generated via this EDI rule, then click
Update at the top to implement.
The reason this is used is so that you don't need to specify a Customer Name in the CSV file. This field is also a 'back-up' Customer Name in the event that you typically specify a Customer Name in the CSV file, but may have forgotten to do so. If this happens, setting this field with a value, means that any rows in the file without a Customer Name will pickup what has been listed here; this will then be attached to the consignment as the Customer Name.
We are going to set AR1 as our Customer for this example, because all consignments generated via this EDI rule will belong to that Customer.
Agent/Supplier (Optional) = This field can be used to specify an Agent/Supplier that will be listed against consignments created via this EDI rule.
This may be handy for situations where the same Agent/Supplier
ALWAYS does the delivery or pickup for these jobs.
For this example, we are going to leave blank.
The remainder of the settings here will be left blank for this example. They serve as a way to specify a Date/Time Format, UOM Format or Weight Format
IF any values pertaining to these are different to the defaults setup in your account. Typically, there would not be a need to modify these, but these fields exist as a way to do so, when required.
An example of where this may be required could be is if a customer sends dimension values in millimetres rather than the standard meters. If this where to happen, you would need to modify the UOM for this Import rule to be mm, which means the system would then correctly convert what is being sent in the customer import file, into meters in your TransVirtual account when the consignments are created.
Note: The Timezone should also be set accordingly.
Once the settings for this rule have been configured, you can now enable the rule using the Enable Import toggle and the by clicking
Update
This Import rule is now active and will appear in white in your list confirming this:
Extra Information - What Next?
From here, the next step is to provide the email address linked to this rule (found by clicking the Settings button next to
Import Framework) to the Customer that will be using this rule to create consignments in your account.
Once they have been provided the correct email, the file they send with the email MUST be in the format specified in the settings of this rule. For this example, the file type is listed as a CSV, meaning that the attached file they send to the TransVirtual email MUST be a CSV; otherwise the import will not work and the consignments will not be created.
The columns listed in the file MUST be the exact same as those listed in the Import File Column Mapping.
An example of what the file could look like for this setup would be the below:

Ensure the columns listed match what is in the Import Mapping.
Save the file as a .csv file type.
Attach this to an email and send the email to the email listed for this import rule:
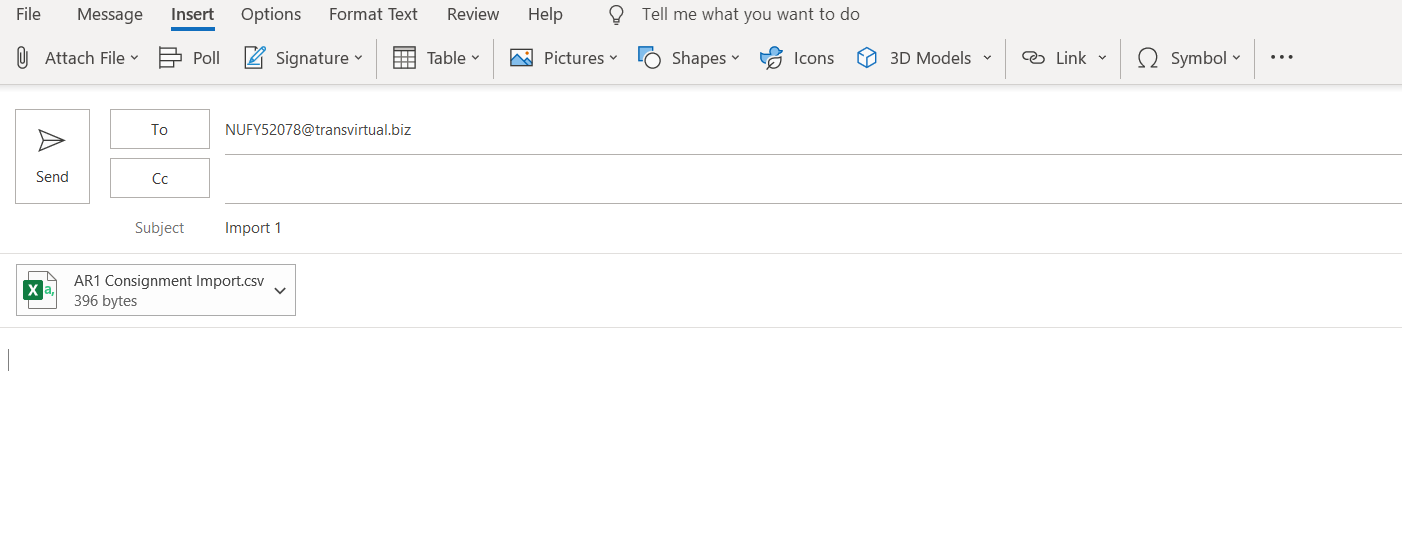
Send the email.
A few minutes later, the consignments will be created in your account, provided there are no errors with the file type or column mapping.
Once they have been provided the correct email, the file they send with the email MUST be in the format specified in the settings of this rule. For this example, the file type is listed as a CSV, meaning that the attached file they send to the TransVirtual email MUST be a CSV; otherwise the import will not work and the consignments will not be created.
The columns listed in the file MUST be the exact same as those listed in the Import File Column Mapping.
An example of what the file could look like for this setup would be the below:
Ensure the columns listed match what is in the Import Mapping.
Save the file as a .csv file type.
Attach this to an email and send the email to the email listed for this import rule:
Send the email.
A few minutes later, the consignments will be created in your account, provided there are no errors with the file type or column mapping.
You can check for newly created consignments via the Consignment Search page (
Home > Consignment Actions > Search Consignments) or by using the Import History page (
EDI > Other EDI Tools > Import History > Search for Rule Name and double-click appropriate rows to see what consignment numbers may have been created via this rule). The Import History page will display whether an Import has been successful or not.

Note: If you are creating an import rule and the Import Framework is Remote FTP, if the rule has not downloaded any files in 3 months or longer, the rule will get automatically disabled. If this occurs, you will not be able to use the rule anymore and will need to re-create the rule (creating a new rule with the same settings).